Category: maya

Blocking Plus Workflow Demo – Part 2 (Arcs)


So you’ve blocked in your poses for your animation – now what? You could hit spline, but you can already imagine the cringey, floaty movement that will come out of it. How about taking another pass at your blocking and getting it to blocking plus?


If you’re not sure where to start, take a look at instructor Jean-Luc Delhougne’s blocking plus workflow in Maya (from our Body Mechanics animation course). He takes a blocking pass of a jump from basic poses to a well-timed blocking plus pass with arcs and natural movement. In Part 2, he uses arc and angle tracking in different parts of the body to improve parts of his blocking that feel a little off at first glance.


If you missed Part 1 (Timing), take a look here: 
http://www.animschoolblog.com/2019/05/so-youve-blocked-in-your-poses-for-your.html


These are the kind of skills you can learn in our online animation classes and animation workshops. If you’re interested in 3D animation programs, check us out at our website link below!


Looking for the best 3D Animation schools? For more information about AnimSchool and our online animation programs, visit us at www.animschool.com

Quick and Easy Camera Shake


Camera shakes are a nice way to add weight to certain actions within a shot, such as a heavy character hitting the ground or a large object passing by. There are several ways to achieve a camera shake in Maya, but here is Body Mechanics instructor Benn Garnish’s take on it. He shows us his super quick and easy method using an Animation Layer and the Graph Editor to produce a realistic camera shake in just a few clicks of the mouse:  


    Not sure how to use Animation Layers or just need a refresher? Check out our Introduction to Animation Layers post.


Looking for the best 3D Animation schools? For more information about AnimSchool and our online animation programs, visit us at www.animschool.com

Using Blendshapes – Rigging 101


One of the most essential tools in a rigger’s toolkit is blendshapes. Blendshapes are deformers that allow an object to change its shape based on the shape of a duplicate. Simply put, it’s a way to get your object to change its form at will to look like something else. Some basic examples of where you could use a blendshape are blink attributes for eyelids (the original mesh would have the eyes open, and the duplicated mesh would have the eyes closed), or even the squash for a ball (the original would be the ball object, and the duplicated mesh would be the same ball in a squashed shape).


The workflow for creating blendshapes is quite simple: 

  1. Duplicate the original object you want to alter.
  2. Edit the duplicated object to get the shape/look that you want.
  3. Connect it back to the original object
    • Select the changed object
    • Shift + select the original object
    • Go to the Rigging menu dropdown > Deform > Blendshape > Option box > Create Blendshape

By connecting the duplicate back to the original, you create a blendshape node on the original object that takes values as input (default 0) which let you determine how much you want your object to look like your blendshape. It’s a sliding scale from 0 to 1, with 1 showing the full influence of the blendshape on the object. To see and edit your blendshape(s), go to Windows > Animation Editors > Shape Editor. From here you can make quick edits and reapply them, and key them in your animations as well.


Blendshapes can be used for a variety of cases in which you need specific control over certain parts of your object, such as facial rigging, corrective deformations, and muscle/skin controls. For more information on the characteristics of blendshapes, how they work, and how to apply them, check out this video clip on the basics of blendshapes by our Intro to Rigging instructor, Eriks Vitolins.


Looking for the best 3D Animation schools? For more information about AnimSchool and our online animation programs, visit us at www.animschool.com

Parenting? Constraints? Choose Wisely.

    If you’ve ever animated a shot with props in it, chances are you’ve had some difficult encounters with constraints. Just creating a parent constraint often doesn’t meet the needs of a shot, and it can be confusing to try to figure out how to animate the prop correctly. Parenting is another way of creating a relationship between two objects, and can be quite effective if done properly. So, should you use parenting? Constraints? One of the best ways to deal with props is actually to use both.  


Parenting: Parenting refers to putting an object (the “child”) directly under the hierarchy of another object (the “parent”). The child follows the parent, but can also be moved independently of the parent. This hierarchy cannot be toggled on and off.


Parent Constraint : A relationship between a parent object and child object. The parent object dictates the movement of the child object, and the child object cannot be moved independently of the parent. The relationship can be toggled on and off.


   By parenting a child object to a locator, then parent constraining that locator to the parent object, you can create a degree of separation between the parent object and the child object. This way, you have a parent constraint which you can toggle on and off as needed, and the child object can still be moved and animated independently of the parent object.


    If you’re new to parenting and constraints or just need a refresher, check out this clip from our Body Mechanics class, where instructor Charles Larrieu covers parenting, parent constraints, and using locators to gain more control over the constrained object.


Looking for the best 3D Animation schools? For more information about AnimSchool and our online animation programs, visit us at www.animschool.com 

VFX Splocking Workflow, Bonus Features: Camera Shake, Q&A


    In this last installment of instructor Tony Mecca’s 3D Animation VFX workshop, Tony goes over the basics of camera shake in Maya and answers some questions from students about VFX workflow and industry.


To view the blocking and posing parts of the demo, follow these links:


Looking for the best 3D Animation schools? For more information about AnimSchool and our online animation programs, visit us at www.animschool.com

Stepped or Spline?


Stepped and spline refer to the way your keyframes are interpolated in an animation. Stepped means that there is no change in values between two keys.  With spline, the computer automatically adds in-betweens values between two keyframes.

Most 3D animation is splined in the end, making smooth motion, but there are two main ways of starting out when animating. So stepped and spline also refer to two different workflows.

With Stepped, you focus on key poses and only work on those keys. When you hit play, the software plays it like a series of drawings.


Pros
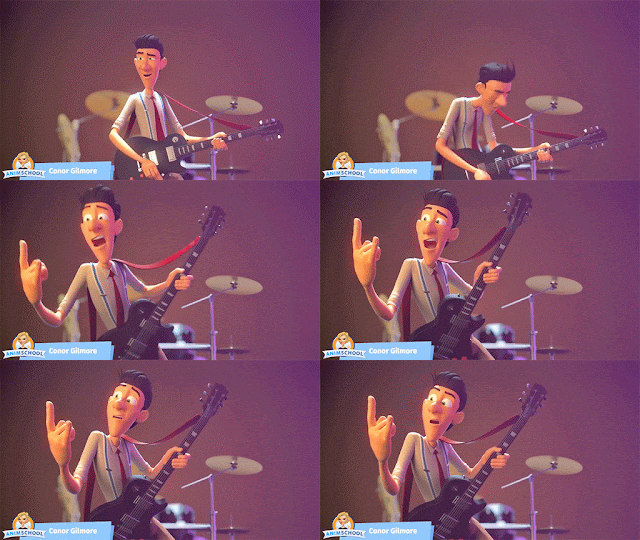
The biggest benefits of working in stepped mode is that you can really focus on the key poses for your shot. Since the software doesn’t interpolate between any of the keyframes, stepped mode allows you to keep your shot very clean in a way that you can tell the story of your animation with a small amount of keyframes. 
In other words, stepped mode helps you establish the important beats of your animation and allows you to get a basic idea of the timing while focusing on the key ideas of the shot.
Your graph editor is more manageable, and big changes are easier.

Cons

The biggest drawback of stepped mode is that it can be hard to envision how your timing is going to turn out. Animators fill in more and more poses as they go, but there is a point when you have to leave the stepped world behind and convert the curves from stepped to spline. That’s a simple click, but seeing your hard animation work that way is nearly always a disappointment.
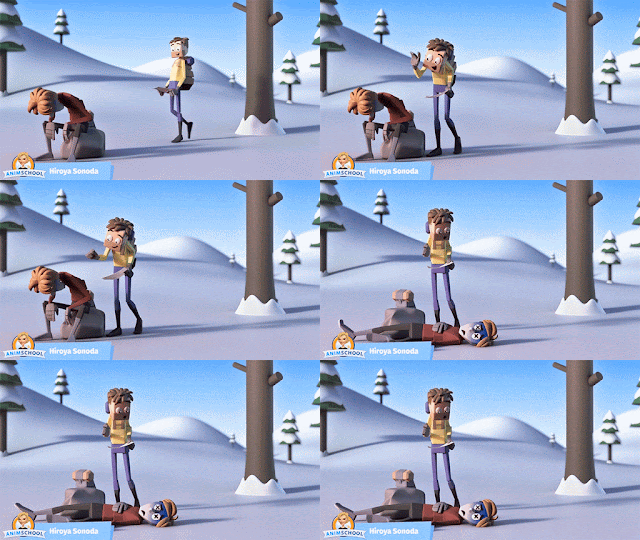

If you are an animator, you’ve probably seen how an animation loses its snappiness when going from stepped to spline. This is because your brain had been filling in the gaps but now the computer interpolates between each keyframe. The simple version you were used to looking at wasn’t a very complete representation of the movement. It’s the time when you get a big surprise seeing it with fluid motion – and it’s never a pleasant one!


Spline:
Another method of starting out is skipping the stepped keyframes
entirely and having smooth movement from the very beginning, where you
focus on the overall movement of the body and don’t worry about the
poses yet.

You start by moving the rig’s root control or COG (center of gravity) to find the movement of the scene in a fluid way. Then you layer in the spine and head’s motion, and the limbs.

Pros

Spline gives you the possibility to work more straight ahead and feel how your animation is going to look already in the early stages of blocking. You skip the painful process of getting used to looking at simplified stepped movement, only to hit the hard reality of the ugly “first spline” phase later.
If the movement doesn’t feel right, it is easy to shift individual keyframes around until you get what you are looking for.

Cons

It’s easy to get distracted by the interpolation of the keyframes and not focus on posing when using splined curves to block out a shot. It may also be hard to work in a clean way – the keyframes aren’t neatly organized on individual frames – they are scattered all over.

Since you’re not spending time on making beautiful poses up front, the posing can suffer and feel like an afterthought.

Students can have a difficult time learning with a spline method, since they get used to seeing bad motion and aren’t able to see how to improve it, and instructors aren’t able to see which timing decisions were made consciously and which are just the raw computer interpolation. At least with stepped blocking, an instructor knows exactly what the student’s posing and timing decisions are and can give specific ways to fix it.

Spline workflow is often associated with faster productions since the motion is worked out earlier, and it avoids that two-step process. But it is also associated with lower production values because of that.

However experienced animators can achieve excellent results with a spline workflow as well since they know how to overcome these issues. Now spline workflow is used at all ranges of quality, from the cheapest animation to the very best animation.

Although one method might be better than the other depending on the shot being animated, choosing stepped or spline comes down to personal preference. It is important to try both of them out and determine what’s better for your type of workflow.


Happy animating!