Category: Animation school Page 1 of 4

New AnimSchool Character: Marshall

For Immediate Release

Orem, UT  United States – September 11, 2014 — AnimSchool is proud to present our newest character, Marshall, exclusively for AnimSchool students!

AnimSchool is the leader in appealing, flexible characters. Our students animate with the most refined, advanced characters, using the popular AnimSchool Picker.

Marshall has clothing options: shirt, jacket, pants, shoes, poseable toes, as well as fat controls and UV’s for textured rendering.

AnimSchool rigs are built with each part and control being tested to extreme levels, making the strongest poses possible.

You can see the range of motion and poseability students can achieve with Marshall.

AnimSchool students are using him to great effect, like this shot below from graduate Ricardo Puertas!

To use Marshall, apply to an AnimSchool program or individual class.

AnimSchool characters and the AnimSchool Picker are used by more
than 20,000 users worldwide, and have been used to win numerous
animation contests and for commercial needs. AnimSchool is known as the
most trusted name for appealing 3D characters.

With over 200 students, AnimSchool
was founded in 2010 to bring character-focused 3D animation instruction
to students all around the world, through live online sessions with the best film professionals.

Contact:
Isaac Nordlund
AnimSchool
admissions@animschool.com
560 South State Street, Suite F3
Orem, UT 84058

801 765-7677

###

How Do I Choose the Right 3D Animation School?

What Should I Look for in an Animation School?

In order to shoot for the top in your profession, you need
to learn from the best. Look for instructors who are
currently working at some of the most popular studios in the
industry. From Dreamworks and Disney to Pixar and Blue Sky,
make sure the level of instructors prepares you for the 3D
workforce. Students should have full-time pros available
that provide continuous interaction and help with
problem-solving.
Are the sessions with the instructors live–not stale,
out-dated recordings of past lectures?

Any fair comparison will show: from animation, modeling and
rigging to drawing and art classes and additional open
review sessions, AnimSchool offers many more hours of live

teaching than any competing school, dollar for
dollar.

What Aspects of Learning 3D Animation are Important?

There a number of animation courses out there, so look
closely at what they offer. Your school should provide
students with the highest quality character rigs,
the best instructors in live classrooms, then the
access to watch recordings of all of those classes,
the chance to get multiple review sessions each week,
extra classes to develop your art and drawing skills, a
place to collaborate with other students, see each
others’ assignments and leave comments.

A 2009 study, “The Development of Professional Expertise” showed the best way to learn at the highest
level is to get expert coaching. Have the student’s
performance evaluated so the student begins to notice
the differences — the gap between their performance and
expert-level performance.
The process is repeated so
the student’s perception matures along with their ability to
follow any set of steps. To use this approach it isn’t
enough to just watch lectures on your own, so look for a
school that can provide this steady feedback loop.

Look for an actual registered school, so they have
a long-term commitment to your education, helping
advise you through the program and advocate for you after
graduation. A school can provide that continued support and
relationship of trust, more than any loose set of workshops
or standalone classes. Learning animation isn’t a quick fix
— it’s a long process, so you want a school that is there
to assist you along the way.

Look for a dedicated support staff. People ready to
answer the phone whenever you call
with a problem.

The school’s curriculum should give students a broad
overview of the animation field, while focusing on specific
skills that will qualify the students in a competitive
field. You may not want a school that teaches too broad a
curriculum: by the time you’re done, you may be a
jack-of-all-trades and master of none– and unable to
find a job.

A school that is too focused one one job only may leave you
with limited options to branch out to neighboring skills.
A school teaching more than one narrow job title may be a
big benefit if you ever want to try a different job in 3D
animation.
Or if you may want to make your own 3D animated short
someday.


AnimSchool offers the best environment for aspiring
students of animation– we offer our students all of the
benefits listed above. But remember that while your school
provides you with opportunities and tools for
success, it is up to the student to apply the teaching with
many hours of focused effort, daily.

Are Drawing Skills Important for Learning 3D Animation?

Can you learn 3D animation skills even if you can’t draw
well? Even if you are not skilled at drawing now, look for a
school that is committed to teaching the art as much as the
technical skills involved in learning 3D animation.

You can apply to animation schools with limited drawing
ability, but you should plan on becoming a better artist
through your schooling — and beyond! The animation world
needs artists with a confident vision of what they want to
create, more than technicians looking to others for artistic
vision.

You could get by without drawing, since it’s true that some
animators, modelers, and riggers don’t draw well. But
developing drawing will develop your artistic ability, which
increases your skill and makes you more attractive to
employers.

As Pixar and Disney president Ed Catmull says, learning
how to DRAW is really about learning how to SEE.

AnimSchool offers our students a free live drawing or
art class
most terms, and free access to all previous
drawing and art class recordings — hundreds of hours of
learning.

Is Location Essential to Learning Animation?

You may look for animation colleges close to your home, or
one close to the places you’d like to work someday. But did
you know you can also learn right from home on the web?
Some students supplement their studies at a brick-and-mortar
college at an online school like AnimSchool. They may attend
at the same time as they’re attending college, in between
terms, or after they’ve graduated.

Since 3D animation is a competitive field, many find they graduate

traditional college only to discover it’s very hard to
land that first job without the close mentorship of top
animation pros.

Some students choose not to go college and go straight for
the highly successful learning model available at an online
animation school. Far from being disadvantaged, many of
those students find they qualify for top animation jobs —
over their brick-and-mortar peers.

AnimSchool is all online–on your computer, over high-speed
internet. Using the latest in web conferencing technology,
students can learn the craft of 3D computer animation right
from home.

Will I be Certified?

Look for a school that offers certification for
their instruction. That means they have complied with all
state regulations and tax laws for operating a school,
follow licensing laws designed to protect students from
fly-by-night classes that may be here today and gone
tomorrow, and have the proper infrastructure for
administering student needs. But remember, the most important qualification is not a piece of paper, but the skills you present in your portfolio!

AnimSchool provides students with a 21-month certificate
program
, and employers are recognizing the quality of
our graduates who’ve earned those certificates.

Whatever choice you make, AnimSchool is here to help if you
want to learn 3D animation at the highest levels.
Click here to apply to one of our programs (or take a single class).

AnimSchool Student Spotlight: Daniel Kraft

Hi Daniel! Can you start by telling us a bit about yourself, like your background, where you’re from and experience before AnimSchool?

I’m from California, The Sacramento area. I originally went to Expression College and studied animation and visual effects. I didn’t focus on animation initially but more of a generalist role learning a little of everything. Only near the end of my time there did I focus on animation. Later I worked over at Adhesive Games as an animator and wanted to polish my animation skills more and do some shot animation. I looked for a good school and that’s when I found Animschool.


Who are the animators that inspire you?

It’s hard to choose, I get inspired by all the animation I see. One animation that sticks out for me is Ryan Woodward’s “Thought of You”:

I love the movement and expression that he conveys with simple gestures. I also view Wayne Unten’s blog and love his simple quick animations. Its creative animations that make me just want to buckle down and get my own done.

Can you share your process from start to finish on your shots for the body mechanics class?


This was a really fun assignment. I started with a brainstorming session. I knew I wanted to get the most out of this animation that I could. I took some time to come up with a clever and fun way to tell a story. I made a web with all my ideas and how they could be done differently. I went through quite a few ideas before settling on this one. The next step for me was to plan out my shot, I didn’t want to build any props if the idea was going to fall flat. A few thumbnails later and I was confident enough to get into Maya a build my scene.

Thumbnail drawings for Daniel’s body mechanics assignment

I built the tree house trying to keep it simple as I could so it would match the character. I left out the rope till later and just imagined it as I animated.

Then I filmed reference. I didn’t have access to a rope swing so I found some reference online for that. I did have my brother and a friend drag me around the floor to get reference for the end:

After some notes on my idea in class I began to block out my scene. I did the main story telling possess at first and from there broke down the physicality of the movements. Then it was on to more blocking! I got it down to 3’s for most of it, I think, before I moved into spline.

Of course I had lots of notes from my teacher to improve my work. In the polish stage I would do a pass then play blast and write down everything that I could see and then do another pass. Then repeated that step a few times more. After I was happy with it I modeled and rigged the rope and put it in.

Continuing on that, your facial expression shot is very emotional, and the character really shows that. How was the process to convey such subtle internal feelings on the character, from start to finish?


My facial performance shot was a challenge. I had several different ideas and quite a few sound clips. I really tried to get into the head of the character. I explored how she would act, not just what she was saying. I wanted her body and face to tell what she was thinking as she said the line. Again, I shot a lot of reference. When I got into Maya and started posing I really took the time to sculpt each pose.

But after a round of crits I had to rethink my acting choices. I redid most of my shot and tried to catch up to the class. I was a bit nervous at this point because I had a long shot and had already been set back but I knew the changes really helped. In spline I actually did some exploration of subtle acting choices to find the ones I thought worked best. I was still behind schedule so I pushed through polish in a weekend!

What was the most valuable pointers that your instructors at AnimSchool gave on your assignments, in your opinion?
Planning pays off! If you don’t spend the time up front it doesn’t matter how well you polish a shot it won’t be as good. You need to lay the foundation of a shot and how its framed and how it plays out before you get started. Then you need to look at the foundation you just made and pick it apart and try it differently. Then you know you’ve got something good. Another great bit of advice is that if it feels wrong it is wrong. It might be animated perfectly but if it doesn’t feel right then it’s not. On the flip side if it breaks the rig but feels great use it.
Any advice for your fellow students?
Don’t be afraid to start an animation over. When you do it the second time it will be faster and better!!

We thank Daniel for this interview and be sure to check out his LinkedIn profile and Facebook.

AnimSchool Classtime: Keith Osborn

In AnimSchool’s Animating Characters class, instructor Keith Osborn shows how to convey line of action and weight on a character’s walk.

Come join all the students learning online at AnimSchool.

AnimSchool Student Spotlight: Diego Collell

Today we’re interviewing AnimSchool Student Diego Collell.
Hi Diego! Tell us about yourself: where are you from, and how did you became interested in character animation?

First of all, I’d like to say thanks to David Gallagher, Animschool and all its teachers. In special, Juan Pablo Sans (former AnimSchool instructor) and Garrett Shikuma.

Hello! I’m Diego Collell, 35 years old and I live in Buenos Aires, Argentina, with my two kids Tiziana and Benicio, and my wife Cecilia.

Since I was a little kid, animated cartoons fascinate me (Chuck Jones and Tex Avery). When I started growing up, my willing to learn about these drawings and to really dive into animation.

By always watching cartoons, my love for animation grew everyday, a true hobby for me.

The first thing I did was to buy a bunch of animation related books and kept hours reading them.

In my free time I practice sports; I really like playing soccer and watch movies. Some of my favorite actors are Jerry Lewis, Rowan Atkinson (the guy that plays “Mr. Bean”), Steve Carell, etc. But one that amazes me is Jim Carrey. I really have fun with his performances. For that reason I chose to do a shot with his audio!

Did you have any experience as character animator before joining AnimSchool?

Yes! Here in Buenos Aires I’ve been working a lot in production companies for advertising, series and movies.

Tell us about your shot of your assignment for the Character Performance class. The character
has some really cool and exaggerated poses! What was the process from start to finish?


Since the beginning I told my instructor, Garrett Shikuma, that I wanted to make a shot in the style of “Horton Hears a Who!”, and with the help of my instructors, I was able to improve it every time.

Research:
I’ve searched for an interesting audio for the animation so it would have texture.

Listening:


Soon after I start listening it several times in loop so I can understand every beat and clue. After that, I analyse the beats carefully, keeping into account every high and low, so I can apply the emotions and intentions according to the tone of the voices.


References:

Once I got a clear idea of what I want, I go to the mirror and practice.

Recording:


When I have more precise acting choices, I record myself doing it several times.

Editing the reference:
Somtimes I do, sometimes I don’t. When I do, I use After Effects.

Blocking:
I use my reference to nail all the main story poses, not worrying with any extra detail.

Blocking Plus:
I take the key poses to the extreme so they can clearly convey the character’s feeling in that shot. I also refine some facial expressions.

Spline:
I clean all my curves. Approximately, I spline my blocking every 50 frames.

Polish:
I made sure of polishing everything possible, frame by frame, checking everything!

I’m very happy with the final result of the shot. All of my instructors were essential for this.

The rendering and lighting was done by a friend, David Alexander Ary Aguero.

How do you think your instructors helped most in achieving the quality of animation you
wanted?

In general, my instructors are all very kind and solicit. The General Review classes have been a huge help. The instructors there care for your shot and your progress just like your main instructor.

Truth be told, all of Animschool teachers are AMAZING!

Are you working as a character animator at the moment?

Yes! At that moment I’m working as a character animator.

Any tips for your fellow students?
Work hard! The more you animate, the more you lern.

We thank Diego for his time, be sure to check his reel, LinkedIn and Facebook profile!

AnimSchool Interview: Xin Zhao and Florent Rubio, makers of “The Answer” short

Today we are interviewing not one, but two people! Xin and Florent are the makers of “The Answer”, a short animation film using Animschool’s Malcolm Rig. 


The short is now featuring in Vimeo’s “Staff Pick”collection. Check it out:


Both of them are now applied to our 3D Animation Program. Lets begin the interview!

Hi guys! Can you start by telling us where you’re from, your experience with character animation and background?
Xin: Hi, I’m Xin. I’m from Beijing. I always wanted to be a animator since I was a kid and they told me knowing how to draw is going to be benifical even if I want to be a 3D animator in the future. So I started my professional Fine Art training since I was in primary school. Since then I learn Fine Art for nearly 10 years before I went to Teesside University to get a Bachlor of Art Degree in Character Animation in the UK, where I gained a lot of 3D Generalist skills as well as animation skills.

Florent: I am from Toulouse, in France. I have always been a big fan of animation and video games but for some reason I thought about it as a possible career pretty late and I studied different subjects (including food processing…) in the end, after graduating in computing science in France I decided to move to England and learn animation.
We both studied at Teesside University, in England, where we graduated from Bachelor of Art in character computer animation. After our studies, we both got hired as animation interns by Ubisoft in Newcastle-Upon-Tyne. We are now still working at Ubisoft and we decided to study at Animschool on our free time to learn more about animation as our University course was very oriented on CG generalist skills.

How did the idea for the script came up? Who was in charge of what in the short?
Xin: Of course, it is slightly based on real events. My partner Florent was shaving in the bathroom with his electric razor, and some minutes later, he came back in the room with a half shaved beard and his razor which was out of power and the cable was nowhere to be found. With this idea in mind, we also wanted to find an idea about how he could finish up shaving in a funny way. I remembered reading a famous self-helping book based on “The law of attraction” and which marketing is based on a “secret” linked to many historical figures and conspiracy. And so we decided to make a parody of it.

Florent: We shared the different tasks according to our skills and what we wanted to do.
Both our dreams were to become character animators after university so we evenly shared the animation.
For the pre-production, after defining our story and getting some rough shot ideas, Xin draw an amazing storyboard (see panel). Xin’s storyboard was so clear we even used it as the main reference for the environment design.

A panel from the storyboard

We both modelled and textured environment and assets.
Xin took care of Malcolm rig modifications, the 2D/motion graphics and compositing Florent did the shading, the lighting and the rendering.
And just a word about the book narration voice actor: Fernando Zamora. Who worked with us remotely and did an amazing job. Thank you again 🙂

Can you tell how much time did you guys spent per day on it and how long did it took from start to completion?
We started over the summer to be ready to animate at the start of the academic year so it took a part of the summer and half of the academic year (because we had another project), so around 5 months spread on a year.
The days were busy, we did everything from home and it was an average of 9-10 hours/day. A lot of hard work but it was worth it in the end 🙂

What did you guys think of the Animschool Malcolm rig? Did it meet your expectations on the production of the short?
From the start, this project goal was to produce the best character animation we could make to showcase our animation skills. To get the best results, we had to give up the idea of using our own character.

Quickly, we decided to use a Free Rig which allow us to have maximum performance of the character animation. We choose Animschool’s Malcolm Rig due to its flexibility after we saw many great animations including a short animation called Mistakes on the 11 Second Club website. The runner-up of March 2012 gave us a great idea of how flexible and controllable the Malcolm Rig’s hands are.

The Malcolm Rig has an amazing facial rig. The eyebrows and mouth in particular allowed us to have greater facial animation without being limited by the rig itself. Of course, the body rig of Malcolm is fantastic too. The controllers on his limbs enable us to have great line of actions during the animation.

Malcolm flexibility and deformations 

Can you share the main process for the character animation and model modification?
This is the animation workflow we used for this project:

  • Video Reference Recording – Record video references of ourselves for the animation.
  • Character Animation Thumbnail – Decide the character’s actions by drawing out the storytelling poses.
    Example of thumbnail drawing for animation
  • Blocking Animation – Blocking of the storytelling poses of the animation and establish the rough timing of each movements.
  • Spline Animation – Change stepped animation curves to spline curves.
  • Polish Animation – Add textures to the spline animation and clean the curves in Graph Editor.


Model Modification

Geometry Modification
To fit our purpose, we wanted to personalized Malcolm geometry and textures. Considering the complicity of the rig, Xin didn’t dare to make too much changes on the geometry, otherwise it might result some problem on the rig. The main modifications are the general face shape was sculpted to be rounder and the hairs were removed to leave space for a Maya hair system

Malcom face modification
We also gave him a shirt collar to add some detail. The collar is animated by 6 blendshapes to reduce shoulders intersection once animated.
Blend Shapes for Malcom’s collar

Our issue was that only Malcolm’s face was UV mapped. We did not know at that time that uv mapping a rigged character would not end well 🙂

When we though skinned character’s UV were still movable

After doing some research, Xin found an article from a blog called Anim Bizz, talking about how to transfer UVs after rigging. A “Shape Orig” node includes the information of the character before rigging. Therefore, a UV transfer can be applied to this and it allowed us to UV map Malcolm’s body.

Hair System
For the hair, we wanted the non-dynamic hair system since dynamic hair is not necessary and it requires more work to do with the simulation which is way too complicated for us. Xin followed a course talking about hair system on DigitalTutors.com and had a basic idea how to build up the hair system with curves.
The idea was to create curves where we wanted the hairs to be and apply hair systems on them. Three layers of curves were created to had more realism and volume to the hair.

Layers of curves for more realism

These little guys were quite an inspiration 😉


For the Beard and Eyebrows, we used the Maya Fur system.
So after all these modifications, the character looks like this:

Malcom after a complete makeover

Detail of Malcom’s new textures

The “new” Malcom

What were the main challenges for this short?
Hahaha… Everything. We basically had no experience using Maya for more than animating a basic walk cycle and lip sync exercise for University. Every aspect was new and we were constantly doing research and learning: how to rig, how to shade, light and render, how to use hair and fur .. and well .. how to animate. Thanks to a lot of great ressources online (including AnimSchool Youtube channel, Digital Tutors, countless blogs, univeristy feedback) we managed to get to the result we wanted.
Hair and fur were particularly difficult because there is less content about it ( how to create, how to render)
Oh! and having a big mirror in the first shots didn’t make things easy ^^ (Camera angles, lighting, rendering and compositing)

What was the technology involved in the creation of the short (render, software, hair system, etc)?
The render was done using Mental Ray in Maya. It was done in parrallel with the lighting and shading. It took a lot of time and a lot of experiment. Here is an example of the process to find the lighting:

Several attempts in finding the correct lighting

And so on until we could get it right:

The final lighting set that made into the final version of the short

Most of the shiny/reflective materials are Mental Ray’s “mia_material_x”, the rest are Lambert materials:

Mental Ray’s architectural materials are good for cool a realistic look. 

Another example of Mental Ray Area light and shadow transparency node use.

The other software we used were:

  • Maya 2013 for all the 3D (including non-dynamic hair system and fur)
  • Adobe After Effects for compositing, 2D and motion graphics
  • Nuke for some of the compositing (motion vectors)

Any advice for animators that want to start production of their own short?

The only advices we can give to people who want to produce a short film are the ones we wish we had heard/followed before we get started most of them are probably obvious and specially relevant if you are still studying:

  • Keep it simple: Especially if you are alone, it is hard to find the line between challenging yourself and putting the bar too high.
  • If the goal of your short is to demonstrate your animation skills, We advise you not to try making your own character/rig. (Unless you have time and you are an amazing character TD/ rigger 🙂 ). There are a lot of rigs available out there, and as far as we know, Malcolm is by far the best. (No, Animschool don’t pay us to say that !) 🙂
  • Find a subject/story that get you really engaged. So you don’t throw everything by the window some months down the production.

If you have any questions, feel free to contact us through Vimeo or our websites:

http://www.florentrubio.com/

http://www.xinzhao.co.uk/

We thank Florent and Xin for this interview and hope to see more works from them in the future! If you want to learn real character animation taugh by professionals in the industry, come apply now!

AnimSchool Student Spotlight: Andrew Stovesand

Today our interviewee is AnimSchool Student Andrew Stovesand. Andrew is now working as a character animator at Moonbot Studios.


Hi Andrew! Can you share a bit about yourself and experience with animation prior to AnimSchool?

Hi there, yeah for sure! Prior to Animschool most of my animation experience came from working as a Maya generalist. I did a lot of camera animation at a prior studio and that really helped me become aware of the graph editor and how it works. I had a few 11 Second Club attempts, most of which I am not super proud of (haha). Also I made a short animation while I was in school.

Do you have any favorite artists that inspire you?

I love watching those old Disney animators, Frank Thomas and Ollie Johnston and how they did it. I mean, they were just going with what felt right and they did amazing work! Nowadays there are so many ideas and theories on what to do and what not to do. Of course Glen Keane is very inspiring as well…

A clip I recently saw that inspired me:

I also like to paint and am very inspired by painting. Somehow I think they all link together, I feel like the more I grow as an animator the more I grow as a painter/artist in general and vice-versa.

Your facial performance shot is very appealing – mind to share your process with us?

Cool, thanks! Yes, that shot was fun. I knew right away when I heard the sound clip that it was the one I wanted to use. I mean, if you get a good sound clip where you can see the character easily in your head, then things fall together much more smoothly. I sketched a bunch for the shot and I believe it was Stewart who taught that class, he had us spell out the subtext for the shot which helped me get into her mindset. I also shot a bunch of reference of me and my wife acting, I got a lot of good ideas from that. I knew right away how I wanted her to start off in the shot but transitioning her to the end when she blows up was really the challenge.


Andrew’s sketches and notes for his facial performance assignment (click to enlarge).

Your character performance assignment features two animated characters and a complete modeled set. How many hours per day did you work on this shot to get it done in time?


Ha, yes that had some love put into it. My generalist background helped me there. I can model basic stuff pretty quick, so once I knew what I wanted I modeled it in there fast and kept updating as I would go along. Once I see something working in a shot and it inspires me, I feel like nothing will stop me from getting it done. I did spend a lot of time on that shot, and this is where getting laid off had its benefits. Haha!

Back to the question, I think I worked a couple hours a day give or take on that one.


Andrew’s sketches and notes for his character performance shot (click to enlarge).


How do you think your skills as an animator evolved since you joined AnimSchool?

Wow, great question. The biggest change for me, even after working in the industry for a few years, was getting it through my head that it really does take a lot of work and time to make quality animation. Honestly, it was a relief once I could do this. It kept me from being way to hard on myself. I mean really, anyone who has no experience would not think it takes so many hours to make something move in a pleasing way. We take it all for granted, don’t we (I mean isn’t this what the whole industry is trying to get the public eye to see?!)?
So really the biggest change was learning how to respect each step of the animation process (planning, reference, blocking, splining, polish) and the amount of time needed to do each one well.

Lastly, do you have any pointers or tips for your fellow animation students that are struggling to get their shots the way they want it?

Ok, yeah… Well, one really simple saying that Thom Roberts said in my very first Animschool class was “kill your babies!”, meaning, be willing to start fresh and delete something that just isn’t working. For example, the way the character is turning his/her head bugs you and you can’t figure out why? Kill your babies. I find this also applies a lot to simplifying keys. So many times I realize I just needed to get rid of a few keys and it cleans up a movement. I still am amazed when this happens. Killing your babies is not easy and still difficult to do, but usually I find it always helps (that sounds terrible)!

Thanks Animschool for all your help and for having me!

We thank Andrew for this interview. Check out his reel below:

AnimSchool Classtime: Developing a character with Bill Robinson

In today’s clip instructor Bill Robinson gives us tips on how to develop a character based on references. He also tackles on how to build basic perspective for your characters. Enjoy!

AnimSchool offers extra classes each term for it’s students. This is a clip from the Character Design and Drawing class with artist Bill Robinson. Go check our full list of courses and apply now!

AnimSchool Student Spotlight: Jilmar Altamirano

Today we are interviewing AnimSchool student Jilmar Altamirano. Jilmar is taking the 3D Animation Program at AnimSchool and is showing some real talent in his animations!


Hi Jilmar! Can you share a bit about yourself, where you’re from, experience with animation prior to AnimSchool, and background?
I’m 20 years old and I currently live in Gainesville, FL. I was born in Ecuador and when I was 12 years old I moved to the US. When I was little, like most kids, I loved watching cartoons and playing video games. In particular, a video game called “Skullmonkeys” which I really enjoyed. At that moment I did not know anything about animation, or that people actually could make a living off of it. A few years ago I remembered about “Skullmonkeys” and decided to get it again. I still loved it. That’s when I started to do some research about animation and began to practice stop motion animation. After months of doing stop motion, I switched to computer animation.

Skullmonkeys in-game animation


The first year of my learning experience I watched tons of tutorials learning as much I can about modeling, rigging, lighting, rendering, etc. I really enjoyed all of those, but animation was still my priority. Learning animation with tutorials or on your own is very limited. So I decided to take my education further. I did not choose a college because of the poor reviews a lot of them got and how expensive they were. I looked into online animation schools. Luckily I found Animschool. I was really impressed with the student showcase, and the characters were very appealing. So I applied and here I am blessed to be doing this interview, and to have a very supportive family, friends and instructors.


Who are your favorite animators and artists?
I really don’t have a favorite animator or artist in particular; but if I had to pick I would say the whole team responsible for creating The Neverhood / Skullmonkeys because without them I probably would have never found my passion for animation. I also look up to my Animschool instructors. They are all great animators who are very supportive which inspires me to keep pushing myself.
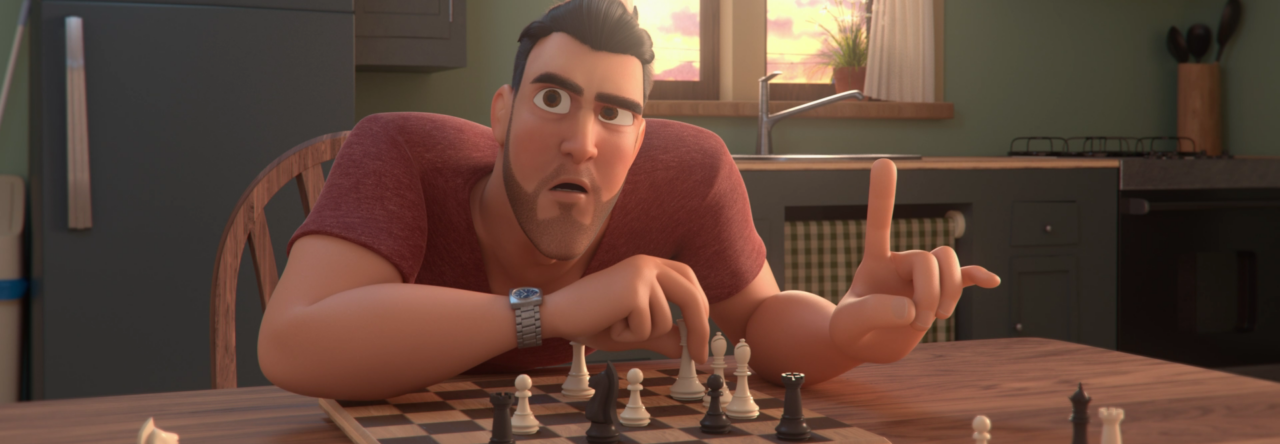
We can see a very good foundation on your shot for your Body Acting class assignment. Can you describe how the idea came up and what was your process?


The idea of having a Halloween theme on my animation just popped in my head for some reason. It could have been because Halloween was coming up and also because I wanted to use the awesome “BoneApart” rig.
I won’t take all the credit for the idea, my story was improved by my awesome instructor at the time, Trevor Young, and at a general reviews class with another great instructor, Tony Bonilla.
I did not know I was going to do a cartoony piece until the middle of my first blocking, but I just felt like it needed to be snappy and it would just add to the comedy of the shot.


For the blocking I always try to block on 3’s or 4’s, but since this was a very snappy animation I found myself having to block on 1’s in those transitions.

For splining, I find it easy because of how much time I spend blocking. I just have to go through all my curves, cleaning them up, making sure the mechanics are there and the arcs are clean.


For polishing, I would say I focused 75% of the time I had on the kid and 25% on the skeleton. Since the kid was the focus of the shot I tried to polish him as much as I could, going frame by frame checking that every arc was clean.


You also have a great shot for the Character Performance class. Can you share your process from start to finish?

Picking audio clip: When I picked this audio clip I was telling myself: “what have I done? This is going to be way too hard for me.” I had no experience with dialogue shots, so I knew it was going to be very challenging for me from the beginning.

I listened to the audio like a hundred times. The character sounded very crazy and manipulative. I pictured the character in my head but when I would try to act it out it just wouldn’t be the same.


Reference: My instructor, Marcelo Sakai, recommended me to study Mother Gothel from Tangled, so I did. I watched all her clips from the movie a bunch of times. I shot a lot of reference; I mean a lot, maybe like one hour of footage in total. I also had a lot of help from my wife who acted it out. She helped me see a more girly performance and she made some acting choices I would have never thought of.


Blocking: Finally got my reference and after the fourth or fifth week of class I had my first blocking pass. It had a few story telling poses maybe 4 or 5 with basic facial expressions.


Blocking Plus: I added a lot of breakdowns, blocked on 3’s and 4’s. I refined some facial expressions and blocked all basic mouth shapes.


Spline: I splined the body first, cleaned all my curves. At this point I found myself getting more into the character, and finding facial expressions that fit the dialogue better. After spline on the body was done, I splined everything on the face except the mouth. I cleaned those curves, and then moved into the mouth, pushing the shapes. I had a lot of fun with those mouth shapes.


Polish: At this point I focused mostly on the face and hands, going frame by frame checking every arc, even the arc of the corner of the mouth. Also pushed mouth shapes even more. Added more fleshiness on the face and I worked on the hair.


I am really happy with how it turned out at the end. All my instructors were very helpful and supportive throughout the whole term.


How did your instructors help you achieve the desired quality in your animations?
My instructors are very supportive. When you tell them your goals for the term on your first day of class, they won’t stop pushing you until you reach that goal. They are all very talented artists and that is why my animation has improved so much over the past year. I tried to attend to as many extra classes offered in Animschool as possible.
The General Review classes have been very helpful. The instructors there care about your progress as much as your main instructor.
I can’t thank all of them enough, and I can’t thank Animschool enough for having all these amazing instructors!

Any advice for your fellow students?

Always try to challenge yourself on your assignments, try different things you haven’t tried on your previous work, like different styles (cartoony or realistic), different workflows, if you have only animated guys, then try animating girls, animals, robots, etc. Experiment a lot.

Don’t give up! If your assignment isn’t coming out like how you hoped, don’t get frustrated just keep working on it, it will look great in the end. Don’t be afraid to ask for feedback.
If you send your reel to studios and don’t hear back from them, it doesn’t matter: just keep improving your reel, and keep sending it to more studios.
Work hard!


We thank Jilmar for his time, and be sure to check out his siteVimeo and LinkeIn pages!

AnimSchool Classtime: Character Posing with Jean Dominique

Great tips on posing your characters by AnimSchool instructor and Head of Animation at MPC Los Angeles Jean Dominique Fievet.

This is an excerpt from Jean Dominique’s class on Animating Characters Term from the AnimSchool 3D Animation Program. To learn more about our courses, go to our website.

Page 1 of 4