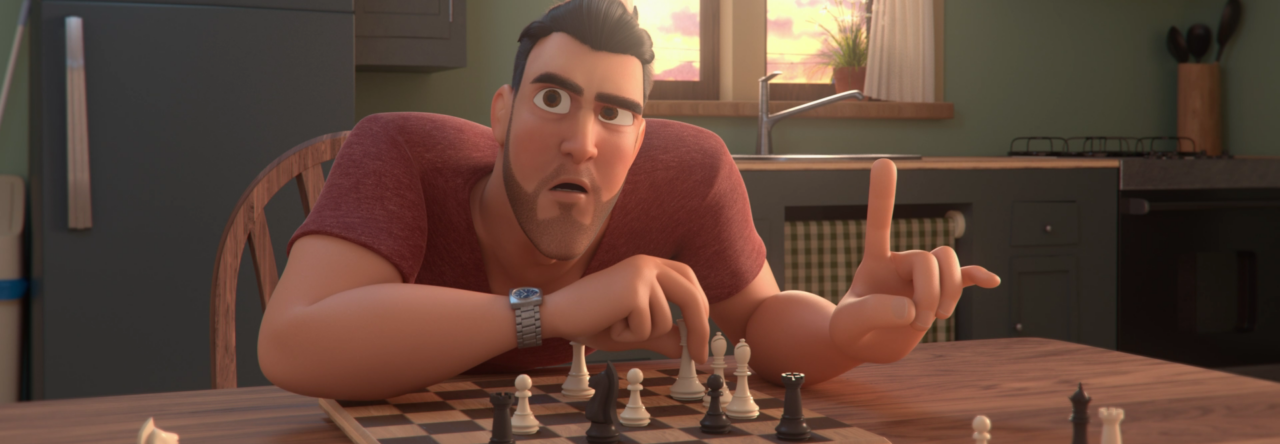
Autodesk Maya is a powerful tool to animate in 3D. However, in order to animate, one has to understand how to set up keys in order to make the shot work. Animschool offers one of the best online courses to teach Maya under the tutelage of professional animator Justin Barrett. This following clip is from one of his classes.
In this clip from his “Introduction to Maya” class, Animschool’s instructor Justin Barrett explains the history and usage of keyframes in Maya animation setup.
Visit www.animschool.edu for information regarding our animation program so that you could learn more such tricks and tips from our professional animator instructors.
Andrea Ferrara is a very talented graduate from AnimSchool who with his hard work and dedication not only passed the Animation program with a great shot, but also went on to work in feature films. Here is an interview where we learn about him and his workflow.
Andrea, tell us about yourself
My name is Andrea Ferrara, I am 26 and I am from Italy. In high school, I graduated in fine art and my course of studies was specialised in painting, mosaic and stained glasses.
At the age of 20, I moved to London where after two years working on different jobs, I started working as a barman to pay for my studies at AnimSchool.
What motivated you to become a 3D animator?
I have always wanted to work within the industry. When I was a child, I loved drawing and that led me to the idea of drawing for animation. This passion naturally made me pursue an art education.
I grew up between the ’90s and 2000s, and 3D animation was becoming the predominant way to make animated movies, I guess it turned out to be the obvious way to make animation and to become an animator for me as well.
Why did you decide to learn animation from AnimSchool?
After completing a one year 3D generalist course, I realised I needed to focus solely on animation if I wanted to achieve something in this industry; so I started researching for the best school to do that, and looking at every school’s student showcase, the AnimSchool’s reel was the one that made the best impression on me. It had more quality in my opinion and with the payment plan that they have, was also affordable for me.
Could you describe your work experience with The Secret Life of Pets 2 and how it was working on a project that big?
I had a lot of fun working on The Secret Life of Pets 2. It was my first project, and I really felt like I was improving shot after shot.
When you get the chance to work in a studio this big you really have to put in extra work and a lot of extra time, and you have to be open to improve, learn, and get as much feedback as you can. I really tried to show how much of a hard worker I am, and I was paid off by getting bigger and better shots every time.
I think I have animated just under 30 shots by the end of the production of various frame range. As today I have worked for Illumination Macguff for a little longer than 2 years. However, I animated on Pets 2 for 14 months.
Did your time / experience with AnimSchool help prepare you for a job like this? If so how?
Thanks to AnimSchool, when I was assigned my very first shot, I felt like I already knew what to do. The transition from school to work was easy enough because the basic concepts of how to make an animation; how to conceive a shot etc. are the same in the workplace. It really made me feel at home.
Tell us about your workflow.
I examine the storyboard and layout with great attention. I play it in a loop to create a good image of the shot in my head. I try to visualise the best possible acting choices and determine the mood of the shot. I try to get into the character’s personality.
When I feel I have the key poses, I sketch them down, and then I take a long time to pose the character into those key poses in Maya, then I put the in-betweens.
I work putting every control’s key on the same frame but I keep the curves in spline, it helps me when I am making new in-betweens, and it also helps me keeping everything in order on a mechanical and technical point of view. It gives me a better chance to avoid unwanted gimbal locks. Once my ideas are in for good I start asking for some feedback and sometimes people around me give me such cool ideas or inputs that I have to put them in even if I have to delete a big chunk of my animation.
Once I am happy with all the ideas, I start polishing the main controls (head, chest, root) then arms and legs at the end. When everything is looking smooth I add the details; more feedback really helps at this point as well.
Storyboard by Eric Favila
What are you up to now?
At the moment I am working on Sing 2, I have been on the project for a year already, and I will be on it until the summer.
What do you think animation students must focus to improve the quality of their works and get noticed and possibly be hired by a studio?
Just put those hours in, animate and animate till you are good. Putting as many hours a week on your animation is the only way to get better.
They should work on the ability to change their shots according to the supervisor’s notes. And trying to do that considering your instructor as your supervisor is the best way to do it in my opinion.
In the practical sense, I would encourage students to create a LinkedIn profile and apply for as many places as you can starting from the top. Don’t be shy about applying for the biggest studios. That is probably where you might get a bigger chance to get hired as a junior.
Thank you Andrea for giving us this interview.
If you want to watch Andrea Ferrara’s work, check out the video below.
Learn at our online animation classes and animation workshops. If you’re interested in our accredited 3D animation programs, check us out at www.animschool.com.
“The thought process reveals the feeling. Sometimes it can be shown with a single, held drawing or simple move. Other times there should be gestures, body moves, or full action. Determine which is best in each case.”
(The Illusion of Life, p. 507)
When animation acting shots, many animators struggle when deciding how to pose a character. One of the mistakes newer animators do is to have the character always moving. But sometimes the best acting choice is to let the character react; to either the situation in the environment, or another character.
When working on a dialogue shot, animators should think of your character’s reactions, and not just actions.
“There is an inherent danger in animating scenes of inner struggle, because most attempts to achieve clear, concise communication cause the character to overact badly and lose credibility. “ (The Illusion of Life, p.482)
For a better understanding of how to built up a good reaction, check out this lesson from our Animating Appeal and Entertainment instructor, Mitch Yager.
Today we would like to welcome the talented 3D Animator Kevin Jackson. Tell us a little about yourself, what is your background? How did you get into character animation?
Like most kids I grew up on cartoons, but I’d say a turning point for me was Roger Rabbit. The baby Herman cartoon at the opening and the three Roger Rabbit shorts that followed blew me away; I knew this is what I wanted to do. Also, like most animators, I have great admiration for the old goofy shorts. Nothing teaches the principles of animation better than goofy. I have entire shorts saved out as image sequences just so I can analyze the frames, memorize the timing, spacing, etc. In college I studied animation for four years, two of which were taught by former Disney director Hendel Butoy. Of all the influences that got me to where I am today, he is the one I have to thank the most.
Where are you currently working? What is your job there?
My first job in film was Rhythm and Hues. I started in 2007 and worked as an animator and supervisor until 2013 when I got hired at Sony Imageworks for Cloudy with a Chance of Meatballs 2. I’m currently working as a lead animator on Hotel Transylvania 2, directed by Genndy Tartakovsky, but in between projects I had the pleasure of working on the Popeye test with Genndy and a handful of animators.
You have an interesting reel with creature animation but also some cartoony stuff. What do you like about each style?
The nice thing about realistic animation is it forces you to be hypersensitive. Everyone is an expert on realistic motion, specifically human faces, so if anything is off it will be noticed right away, even if the viewer is unsure of what is actually flawed. In a way you have to rely on the principles of animation even more because things have to be exaggerated just slightly so they don’t feel flat. Timing, spacing and arcs are where you really want to focus the exaggeration. The downside to realistic animation is that most directors are not themselves animators and they have little understanding of the process. The animation is treated like a live action shot and they need to see a fully fleshed out, nearly complete version before they can give notes. It’s like someone is standing behind the camera saying, “Good! Now let’s try it this way, maybe one where you turn and walk this direction instead of that,” and so one, but in the animation world that takes weeks of work. If you get a shot that is particularly vague, meaning the director is really unsure of what he wants, you can be buried there for several months.
Cartoony animation, on the other hand, tends to move a lot quicker. In this world, most directors are animators themselves, and you get much better, more precise notes. Both Cloudy 2, HT2 and the Popeye test were a dream to work on because the notes are so clear and the director knows exactly what he wants. With those things in place, it really just comes down to how the shots are cast; making sure the right people get the shots that are just right for them. My passion is with cartoony animation, and I’m lucky to be at Sony because of all the big studios they seem to be pushing things in this direction the farthest. If you liked the Popeye test you will be blown away by what Genndy has planned for the film.
Having worked on realistic animation for about six years prior to Sony has taught me many valuable skills that I would have missed had I gone straight into cartoony stuff. I much prefer cartoony, but the former has made me a stronger animator.
Your latest “Wake Up Call” shot featuring Malcolm really caught the eye of the animation community and it’s really entertaining with some broad animation. Did you have any goals before approaching the shot? What was your process for it? Could you share your workflow with us?
My goal was to animate something just for the sake of animation. Obviously, there isn’t really much story to it. It’s “guy at work wakes up to a ringing phone and tries to answer it.” Try pitching that. “Seriously, it’ll be great! he gets stuck balancing on his chair, but can’t reach it, then he spins around and has all sorts of trouble… really you gotta believe me.” Nope, this is the kind of thing you want to do on your own, and really Malcolm is the perfect rig for it.
Malcolm is the perfect mix of speed and flexibility. You have no idea how lucky you are to be able to play your shot in real time and get those kinds of noodle limbs and deformations until you work with crazy slow rigs in feature film. Each set of arms attached to Malcolm is a complete rig, so I had maybe 8 extra rigs in the file and could still scrub at high speeds as long as they were un-smoothed.
As for my process: animation is an interesting thing, as soon as you think you have your workflow figured out the next shot you get will force you to re-examine your workflow. Every shot is unique and so your workflow is constantly evolving. I’ll try to share a few things that worked well for me this particular piece.
I started by posing out all the key pose Ideas I had in my head. I do this on ones, so each pose is a new frame. I’m not concerned with timing yet, I just want to get the ideas on screen so that I can step through them manually and try to visualize if the idea works or not. After a couple days I think I had about 70 poses, each one representing the pose Malcolm strikes for each balancing act. With all the poses in place, all you have to worry about is timing and how your going to transition to and from each pose. At this point, no constraints are set up. If you set up your constraints from the very beginning, you may find out later on that you wish you had set them up differently. In my blocking, I usually just put things where they belong, and then when I’m ready to spline I can figure out exactly how things need to be setup to enable the smoothest transition of my curves in the graph editor.
The next step was to get the timing down. So keeping the keys in stepped, I began adjusting them throughout the timeline until I had roughly the timing I thought was right. It’s never quite right going from blocking to spline because your mind fills in the gaps for the blocking even if there is not enough frames. Once the computer fills in the gap for you, you find out that you need a lot more time for a transition.
Next I figured out the constraints. I set it up so that the feet could be attached to the chair no matter which leg of the chair was the pivot. From there it’s just a matter of filling in the gaps, making sure each transition happens the way you want it.
The extra limbs and smear frames were the last thing to add. For the limbs, I took an extra Malcolm and deleted all his poly faces except for his arms. Then I referenced that in as many times as needed and parented them to his body. Whenever needed I just snapped them in place, then hid them afterwords. For the end there are about 8 rigs wrapping around his body. It proved too difficult to hide the connection point of each arm so instead I painted that out by hand in photoshop.
The most important part is the blocking. Make sure every part of each pose is deliberate. You want clear shapes and pleasing curves to move your eye where you want it. If something is not quite straight then commit to one or the other. Either make it obviously straight or not. Nothing should live in between shape ideas.
That’s it for now! I have another one in progress with lots of new exciting ideas, but who knows when that will finish. HT2 is getting busier and busier so it may be a while.