Month: June 2016

5 ZBrush Tools You Should Be Using

1.  Spotlight

While the Spotlight feature is primarily meant to be used to project textures, it’s also great for setting up reference images.

To do this:

  1. Go to the Texture menu. 
  2. Import an image. 
  3. Select the image so that it appears in the Current Texture box. 
  4. Then hit the “Add to Spotlight” button. 
Now your image(s) should be in the document. Also, the Spotlight Dial will appear. The dial allows you to scale, rotate, and move your images as well as change the opacity, etc. 
When you are done setting up your images, hit Z on your keyboard to remove the dial and start modeling. (Z will also bring the dial back for further adjusting.) Shift-Z allows you to show/hide all of the reference images if you need to. 
You can also save your spotlight set-up at the top of the texture menu so that you don’t have to redo it every time you reopen zbrush. 
For a more visual guide on setting up reference images using Spotlight, check out this tutorial: 

2.  ClayPolish

An important part of the modeling process is to define the planes. Clay Polish can help with that. It is located in the Geometry palette under the Tool menu, right above Dynamesh. This tool hardens the edges of your model while softening the rest. It’s good for when you are starting to roughly add details and helps you see the forms better and make decisions about where your planes should be.


3.  ReplayLast

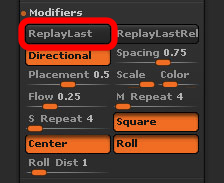
The ReplayLast button (under Stroke>Modifiers) re-traces your last brush stroke from mouse/pen click to release. This can really be useful when modeling in things like wrinkles or scratches. It allows you to start off with a more shallow brush stroke and then slowly make it deeper by just hitting ReplayLast as many times as needed. That way you get the exact intensity that you want, without having to undo or manually re-trace it yourself.

4.  ShadowBox

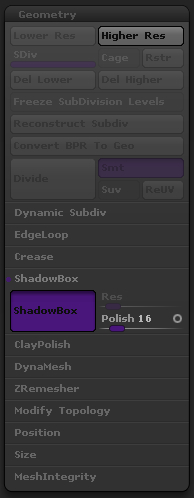
If you need a more complex primitive shape and you don’t want to have to go over to a different modeling program, you could try ShadowBox (Tool>Geometry menu above the ClayPolish section) instead. ShadowBox is a tool that can create any kind of shape by projecting masks from the front, side, and bottom of an isometric cube. It will generate a shape based on the projection of the masks toward a center volume. This method of creation can be good for making props or accessories for your character. It’s not meant to create finely detailed models, but rather as a starting point for more complex shapes.

5.  Lazy Mouse

Lazy Mouse (under the Stroke menu) is a tool that smoothes out your strokes by “averaging” them out. When activated, the stroke will be created by a virtual string (a red line) that follows your mouse cursor rather than directly under it. Lazy Mouse is especially good to use when modeling with a mouse, as it smooths away the jitteriness caused by your hand.

For more animation training at one of the top online animation schools, please join us at www.animschool.com

Class Time with Hans Dastrup: Twinning

In this video clip of our online animation class, Hans Dastrup talks about twinning in a shot- when to do it and when not to do it.

Come join us in our online animation school at http://www.animschool.com

Rigging Eyebrows with Nico Sanghrajka

In AnimSchool’s Advanced Rigging class, Nico Sanghrajka, Rigger at Atomic Fiction, shows how to take eyebrow blendshapes to the extreme in order to give the animators more flexibility.

To learn more about facial rigging from one of the best online animation schools, join us at animschool.com

AnimSchool’s Game Animation Student Showcase 2016

AnimSchool has released our new Game Animation Student Showcase for their work in 2015-2016!
We would like to salute our game animation students, recognizing the amount of
work each one of these assignments represents and the level of talent
they are achieving.

The quality of our students, our programs, and instruction is seen in this impressive showcase.

If you want to recognize their efforts, comment on the youtube section.

To learn 3D game animation skills with us, apply at www.animschool.com. Talk to an admissions advisor using our Live Chat, phone, or email.
(The work of AnimSchool’s feature film animation students and amazing rigging and modeling students (Character Program) are featured separately in another Showcase.)

5 Reasons to Shoot Video Reference

Finally, after spending hours on YouTube and audio clip sites, you have finally found an amazing audio byte that you think is perfect to make an awesome animated shot. You are excited. In your head this would be your “THE shot” to apply for jobs with. So excitedly you open Maya and start animating. But as you progress, your enthusiasm begins to fade away and you realize that even after laboring over this shot for days, it is nowhere as good as it should have been. It was perfect in your head, what went wrong?

The answer is may be simple: you didn’t plan your shot well.

Pre-planning a shot is an important step that we 3D animators tend to forget. In our quest to jump into Maya and start blocking the shot, we leave a lot to our imagination. Things like camera angles, character position with respect to camera, storytelling poses and the character’s thought process become a subject of whims and moods. The shot starts with a lot of energy, but then as we start questioning our acting choices, the shot begins to reflect our frustration. There are parts of it that work and parts of it that just don’t. In other words, it is nothing like your imagined shot.

“Shooting video reference is one of the most important tools  at your disposal to add believability to your shot . “

How? I am glad you asked.
Reason#1: Experimentation
Video references help you to experiment with a lot of ideas. In this fast paced global world, having a good animated shot is not enough to get a job. You have to be a good storyteller and must have some good original or interesting story ideas. Usually it is said that after getting a dialogue shot, you need to understand the subtext of the scene and know where your character is coming from and where it’s going to. Then you’ll probably need to scratch the first three ideas for they likely will be cliched. For the rest of the ideas, experiment with them. 
With video camera on a tripod, start experimenting with the ideas, and see which one works best for you. Check the camera angles you think are interesting, and act standing in the character’s position and move around to see how much freedom of movement you can have without compromising the clarity of poses and silhouette. In other words, this is your time to be loose and check all the ideas that you have for your story without making any serious commitment to any. Use props, be an alien– heck, become a stranded pirate in desert. Everything is allowed.

Reason#2: Body mechanics
Hips certainly don’t lie and neither does every other part of the body, especially in an animated shot. They have to work together to be believable. One tiny movement out of ordinary and every person will notice that. You can’t take a risk there.
So when you shoot a video reference, acting a shot out the way you want it to be, it helps you to study how the body moves from one pose to another. You then bring that knowledge to your poses and suddenly poses and transitions begin to work. 
There are many ways you can translate the body mechanics aspect of your video reference to your shot. One of the ways is to bring all the movements of the body into your poses. You might have to essentially block in 4’s for that. Then get rid of the reference, and build on the existing body mechanics. With a strong body mechanics base, exaggerating poses and pushing them to the cartoony side becomes easier–without getting out of the realm of believability.

Reason#3: Acting choices
Once you refine a pose in Maya, it becomes harder for you to kill it because you feel committed to it. You have spent hours on it and it is “perfect” so you become attached to it and try to keep it in your shot even at the expense of the storytelling. Shooting video reference and experimenting with acting choices are much easier and less time consuming.
A general tip to follow is to go as non-traditional as possible. Bring in acting choices that are interesting to look at and are different from what anyone else is doing. Don’t go too random, but try to bring in something that is unique to your shot. So if you are acting standing up, sit down. If you are sitting, try to move around. Will it be ok for your character to move his hands a lot or just use them only once? Every idea that you get, perform it and then perform the opposite of it. Within the parameter of your story idea and character’s personality, test as much as possible. Figure out the beats, the motions and the poses. Go with the choices that get the point across as clearly as possible and still bring out the personality of the character you are going to animate.
Try to work within the pose as much as you can. New animators tend to
overact and move the character too much. Hitting a few strong
storytelling poses and working within them results in much clearer and 
more appealing acting.

Reason#4: Nuances
Sometimes while shooting reference, our body subconsciously brings out movements that we never plan. Maybe it’s subtle breathing, a certain way of moving hand, a micro eye-movement, or a subconscious gesture during one of the pauses: all these small actions bring the 3D rig into life. They make the whole shot seem very natural and effortless. Without reference, you’re not likely to get these moments no matter how good you are at animating characters.

Reason #5: Time saving
Having a deadline often makes the idea of ditching reference shooting plausible, but the truth is that this 2-3 hours of video shooting saves you from spending hours later in your shot. It is far better to open Maya with everything mapped out than “planning as you go”. Never underestimate the power of pre-planning your shots. Experiment and have fun.

So next time, don’t skip the video reference step. There is no reason why it can’t be fun. AnimSchool instructor and Disney Animator Tony Bonilla must have been having fun when he shot this video reference for one of his students. Enjoy!

Join us at www.animschool.com to make great animation shots.