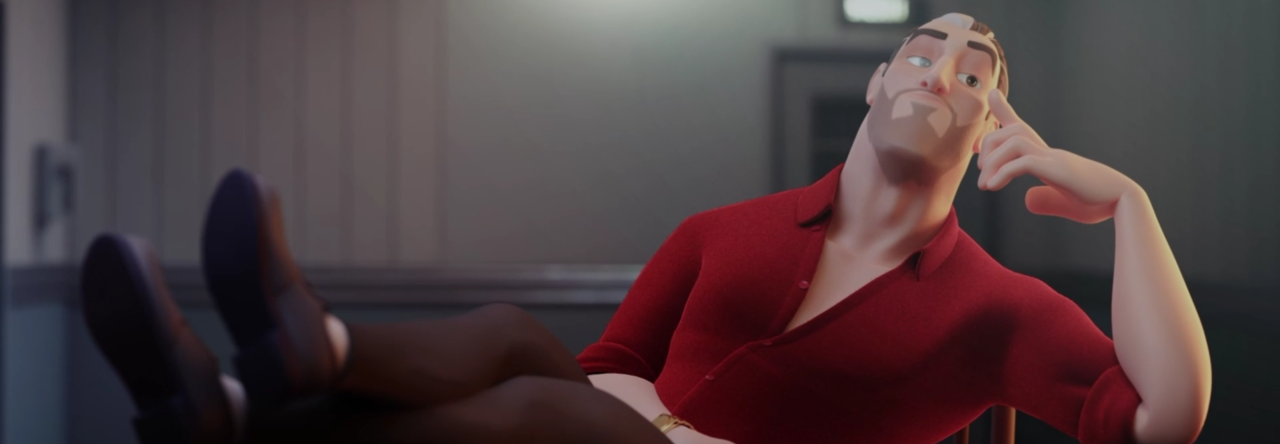
We’d like to welcome DreamWorks Animator and AnimSchool Instructor Juan Pablo (JP) Sans. JP, can you tell us a little about yourself and how you became interested in becoming an animator?
 For me, it definitely started with drawing at a very early age, from the moment I picked up a crayon. I was born in Caracas, Venezuela, and like every other kid, I watched a lot of cartoons and animated movies, but I always thought it was “magic” rather than something that was made. It was when I was seven that I realized, thanks to my mom, that the credits were the names of artists who worked on the movies. Since then I knew I wanted to be part of that world, somehow. I moved to Florida when I was 10 without having a word of English in my vocabulary, and I think that only pushed me to draw more since I had no idea what the teachers were saying in class. My middle school books became animation paper as I made a habit of animating stick figures in the corners of the pages.
As I grew older, I took as many drawing classes as I could. In high school, I continued to take all the drawing classes available as well as some acting classes. I doubt I was any good at acting, but I really liked the idea of performing and becoming a new personality and character, which only strengthened my pursuit of animation. I continued my studies at the Miami International University of Art and Design. Once I began my studies there, I only fell more deeply in love with animation. As I started creating life and making characters think, I knew it was the stamp of approval indicating how I never wanted to do anything else with my life.
JP GRD REEL from Juan Pablo Sans on Vimeo.
Who are some of your favorite artists?
I definitely have to start with mentioning some of the pioneers of it all, the nine old men. It is truly inspiring to witness what they were able to accomplish. The early Disney movies were, and still are, my biggest inspiration. Movies like Sword in the Stone, Robinhood, and Alice in Wonderland are some of my favorites. To this day I look through their work in constant awe with what I see, not only with their execution and choices, but with their beautiful line quality and appeal. In animation, Glen Keane has to be another favorite of mine; he has always been one of my idols. His drawings and animation are beyond appealing and magical, and what is most inspiring is how humble he is about his accomplishments and his contribution to the industry. The more I animate the more actors and actresses I follow and admire as well; after all, we are “actors with a pencil”. One of my favorite actors that I follow and try to learn from is Gary Oldman. I believe he is one of the most diverse and talented actors we’ve seen in a long time. The way he delves into his roles and adds to his characters very specific and individual characteristics is truly amazing. His work is something that I would love to be able to achieve and bring more of into my work.
In Rio, you were one of the leads on the bull dog, Luiz, what were some of the challenges that arose with this character? What did you do to solve them?
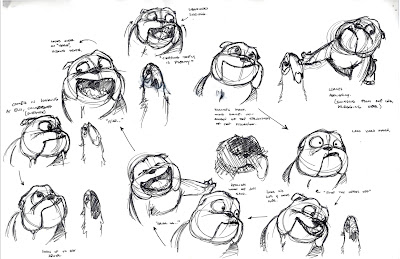 |
| Juan Pablo Sans Luiz thumbnails, Blue Sky Studios, Rio |
|
|
I first have to give a shout out to Pete Paquette. I had the great pleasure and honor of working with him on Luiz. He was the true bulldog not only in the sense of the character, but also to the animation department. I learned a lot working with him and I genuinely thank him for his help.
I had one of the greatest times animating Luiz; he was such a fun character to animate. He was super energetic, which is what highlighted one of the biggest challenges- to keep him organic. As an animator in CG, you are always trying to keep your characters organic and alive, and that challenge will only increase if the character is “big” and “fleshy”. Add energetic and active to the mix, and you’ll have your work cut out for you. What makes a bulldog is all the extra skin that giggles and wiggles, and that is something that we had to keep a really close eye on when we animated him. We needed to maintain his fleshiness while keeping him heavily grounded and organic.
We accomplished this by really layering all his movements, as well as morphing the graphic lines within the silhouette of the character, specially on the face, while keeping him in model. Rigging did a great job giving us all the controllers we needed to be able to achieve this as well. We made sure we had control over the main masses, as well as the individual skin flaps like his jowls. I also watched a lot of traditional animation for inspiration. I wanted to bring the “inconsistencies” in the drawings to CG, and get that organic feel to Luiz, something that stayed with me which I’m still putting in my work today.
For Rise of the Guardians you were on the Pitch character team. Can explain the teams process and your responsibilities on the film?
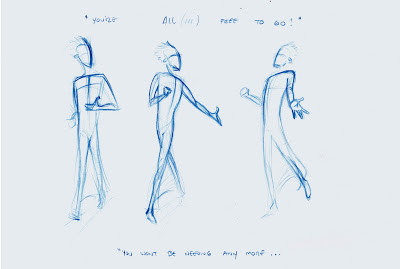 |
| Juan Pablo Sans Pitch Thumbnails, DreamWorks Studios, Rise of the Guardians |
Rise of the Guardians had a character-lead system, which I think really benefit the film. Each character had a supervisor and a team to mainly concentrate on that character when possible. Pitch’s supervisor was Steven “Shaggy” Hornby; his experience and knowledge really helped the character grow. Our Pitch-team would meet twice a week to talk and discuss anything and everything about the character, from technical conversations to character development. So our responsibilities really branched out from just animating. We had a very collaborative workflow, and we really helped each other to make sure our choices and executions best represented Pitch. We helped each other on anything from meeting up for reference sessions to feedback and critiques. This was a great way to help us keep Pitch consistent, with his look and performance. Most importantly, it helped us keep a close eye on his character arc.
Can you talk a little about your experiences animating the villain, Pitch. What were your main thoughts you kept in mind when working with this character?
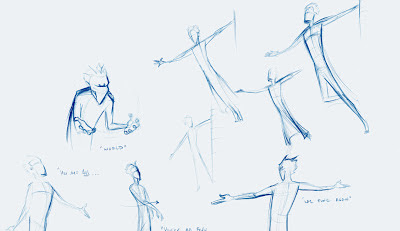 |
| Juan Pablo Sans Pitch Thumbnails, DreamWorks Studios, Rise of the Guardians |
Working on a villain was super fun, and completely opposite of what I was used to. Before Pitch, I would usually get cast cute, energetic characters, which were just as fun to animate. Pitch was equally as entertaining, but for the complete opposite reasons. Pitch is dark, internal, composed, and just downright creepy. I was surprised about just how much I liked animating him. There was something so intriguing about a villain, that I completely fell in love with. In every show you “find” the character as you animate the movie, sometimes not really “finding” the character until the very end. I think we got lucky in the sense that we found who Pitch was early on.
We had a lot of inspirations when it came to Pitch. We reference the Joker for his unusual movements and personality. We were captivated and inspired by Hannibal’s stare. I always watched Anthony Hopkins’s scenes and even podcast and interviews to help me bring that into the character. And lastly, my favorite, Gary Oldman’s Stansfield in Leon: The Professional. I loved watching that character, and trying to bring that randomness and aura to Pitch.
I think the most challenging shots in animating Pitch was when he was in “control”. He had to be composed, yet feel threatening and powerful. To see him do nothing while his eyes screamed in emotion and rage was truly captivating. Pitch was a very challenging and difficult character to work on, but he was so much fun at the same time that I hope I get to work on another villain again.
Out of all the characters you’ve animated in your career, which one has been the most fun to work with, why?
I’ve been lucky to have been able to work on some really great characters, but I think the most entertaining one was the one that I only animated twice, Scrat. I only got to animate him in Ice Age 4: Continental Drift, but I enjoyed every second of it.
Scrat is a fun character to animate because he is sporadic and energetic. Emotionally and physically he is crazy and scattered. I always saw Scrat as having a bipolar personality- one second he can be in calm, and the next he is screaming and scattering all over the place in anger or fright. But, what made him the most memorable for me was being able to get away with almost anything. With Scrat you can choose not to anticipate anything, take away his follow through, add a crazy one-frame transition (if you even want one) – an animator’s dream. The less perfect and more dirty you can be with repetitive motions like a leg scramble, the better it comes out with him. He can even defy gravity.
I will never forget a shot that Mike Thurmeier animated. Before directing, Mike had animated a shot where Scrat jumped and leaped higher and higher into the air to reach a nut, and only used air to jump from each time. It was crazy brilliant!
You still have to keep him on model of course, and there are still rules you have to follow, but after that, you are free to do anything. The less rules there are, the more possibilities you have which makes it more fun to animate, and Scrat is the perfect example of that.
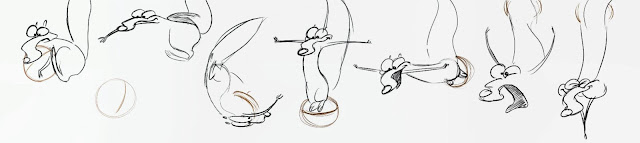 |
| Juan Pablo Sans Scrat thumbnails, Blue Sky Studios, Ice Age 4- Continental Drift |
What has been the most challenging shot in your career? What made this shot more challenging then others?
For me, I almost want to say every single one. This is a hard one to answer; I really try to give my all in every shot. I try to explore every option and try to choose and execute it the best I can. I really think this promotes challenges and growth, so I hope I never think something is easy.
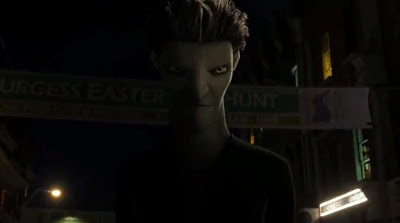 |
| copyright DreamWorks, Rise of the Guardians |
I guess the most challenging shot I’ve had to animate so far was a Pitch shot. Pitch crawling back with fear and revealing it was all an act (“You can have them back”). I think it wasn’t just one aspect but more of a combination of things that made this shot challenging. First of all, it was my first Pitch shot. So, not knowing the character fully and finding the look of him in the shot was always something I had to constantly keep an eye on. This becomes easier as you animate the character, but the first one is always like this.
Shooting reference was also a challenge, which I want to thank Shaggy for helping me with it. We explored different options and choices for hours, and finally went with something that best represented the character. The last thing was the amount of time I had on it. There was very little time to explore different ideas and choices which was what made it all the more challenging.
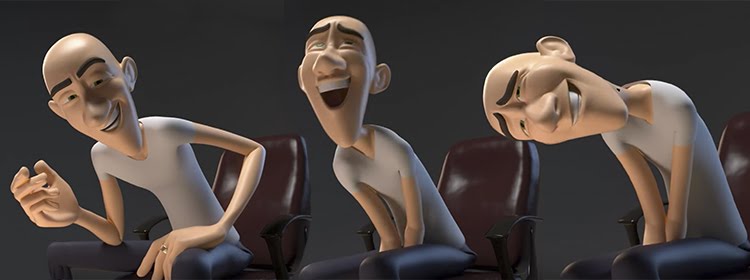
You’ve had a chance to teach a couple different classes at AnimSchool, including General Reviews. How has teaching changed you as an animator?
Teaching has been a great experience for me. Teaching is great because it forces you to talk about what you know, as well as to learn to share with your students and keep them growing as animators.
You forget sometimes how much you know, and it helps you to remember those things even more when animating at work.
What’s great about teaching is the learning that you receive from it. For one, I prepare as much as I can for my lectures, which forces me to do research and to form examples, which results in me finding and discovering new things.
The other great way you learn from teaching is by continuing to see work outside from your own, as well as seeing the process and the solutions for problems. The more you animate, the more you learn, and teaching for me is like animating multiple shots at a time. I also get inspired by the work I see, and the energy that the students bring every week. I love teaching and will continue to do it as long as I can.
JP Sans Reel from Juan Pablo Sans on Vimeo.
Lastly, what advice do you have for students trying to get into the animation field?
Work hard, never stop learning, and stay humble. After you graduate, learning doesn’t stop, so stay hungry! Keep animating and challenging yourselves. The more you animate the more you will learn. Keep doing your research as well. Listen to podcast, read books and watch behind the scenes to stay updated. Keep working and improving your reel. I always tell my students to pick your worst shot in your reel, and replace it with your best and newest shot. Always be on the look out for job openings. There are always open doors, you just need to keep your eyes wide open. I think the most important tip that I can give is to get your foot in the door, no matter where it is. It’s easy to just want your ideal job or company, but the best way to get there is within the industry. Any animation job, whether it’s gaming, freelance, or at start up studios, they’re all a great way to learn and grow. This is also a great way to increase your contacts. You’d be surprised how small the industry actually is. A lot of artists know each other in the industry which brings me to my last tip, stay humble. Know that you still have a lot to learn, and help others and let others help you in the process. Like your animation is important, your personality is just as important. The way you get along and work with others will really help you grow in the industry, as an artist and as a person. Never give up as well, perseverance and dedication will get you anywhere.
To view some of JP’s General Review and class sessions, visit the links below.
Come join all the students learning online at AnimSchool. Apply now for AnimSchool’s Summer Term, beginning July 1st.