Tag: storytelling Page 1 of 4

Reference Analysis: Capture Convincing Footage

Do you ever wonder how an animator can capture such realistic and convincing movements? For most animators, it all starts with good reference. Being able to act authentically and realistically can elevate a scene from unexceptional to awe-inspiring. AnimSchool instructor and professional animator Scott McWhinne breaks down some reference from his friend and mentor, Jeff Gabor, and gives tips on how to capture convincing reference quickly, effectively, and economically.

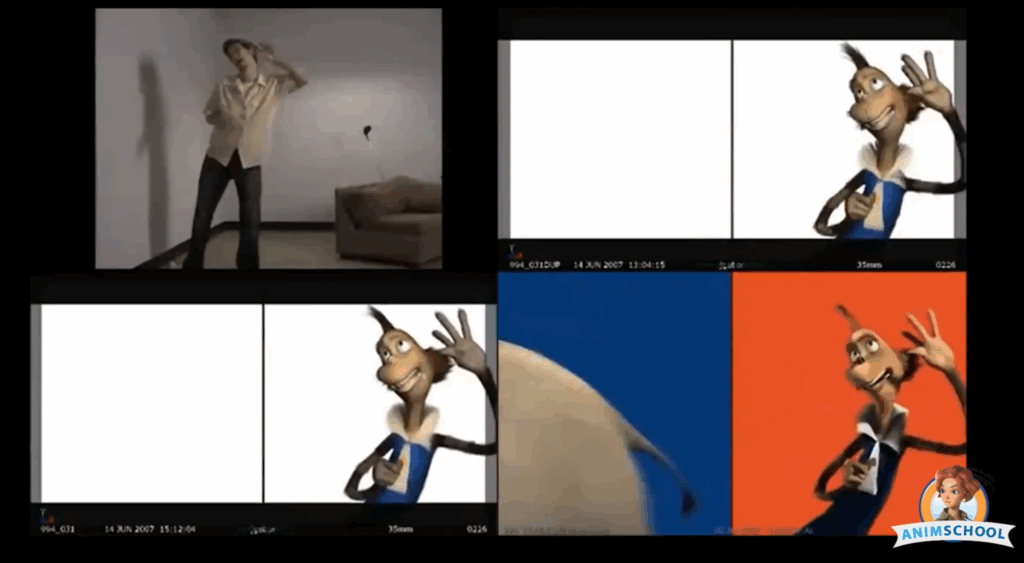
One strength of a good animator is to extract the essence of the reference footage—keeping what’s useful and discarding what isn’t. Rather than simply copying the reference, push it further to serve the animation, emphasizing clarity, caricature, and believability. A key part of his process is camera alignment. In the example below, he ensures that the framing of his reference matches the intended shot as closely as possible. If it’s a close-up in the animation, he shoots a close-up. This minimizes the gap between reference and final output, making it easier to translate movements and poses accurately.

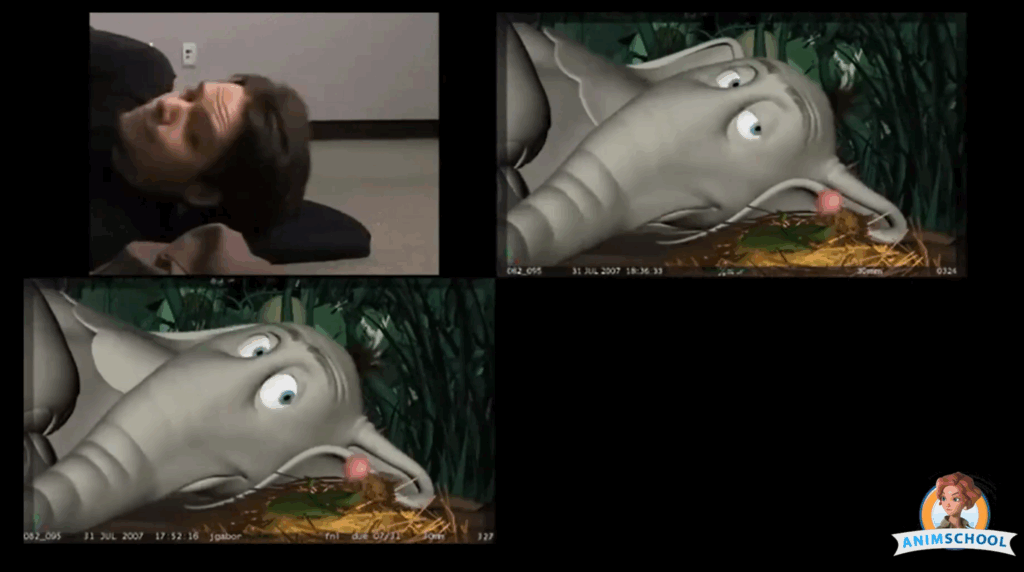
Jeff also keeps his shooting environment clean and clear. He avoids clutter, wears clothing that highlights body movement, and ensures the lighting is strong enough to clearly see facial expressions and physical shifts. Props are another essential part of his method—if the scene involves a hat, he uses a real hat. If the character is lying down, he lies down too—authentic interaction matters.

What sets apart a good animator during the reference process is taking a deliberate and analytical approach. In Jeff’s case, rather than recording dozens of takes in a row, he records one take at a time, reviews it, critiques it, and then makes purposeful adjustments before shooting again. This iterative method allows for real progress with each attempt. Additionally, he experiments. He’ll do takes where he restricts head movement, or emphasizes a different physical choice, pushing himself to explore a broader acting range and ensuring each take is different. This helps break creative habits and leads to unexpected, sometimes better, performances.

In the end, the goal isn’t just to imitate reality, but to enhance it through animation principles—improving silhouettes, exaggerating weight, and making sure every choice supports the emotion and storytelling of the shot. Don’t just copy the action—focus, analyze, and create something new.


Watch the full clip from an AnimSchool lecture here: 

At AnimSchool, we teach students who want to make 3D characters move and act. Our instructors are professionals at film and game animation studios like Dreamworks, Pixar, Sony Pictures, Blizzard & Disney. ⁠Get LIVE feedback on your Animation from the pros. Learn more at https://animschool.edu/

Animating a Quadruped

It’s time to walk the dog… or, at least, the quadruped. Learning how to animate a human on two legs walking is no small feat, much less a creature on four legs! How can we break down a quadruped walk into something more approachable? Luckly, quadrupeds aren’t that different from bipedal or human characters. Simply put, a dog walk cycle is just two bipedal characters walking slightly offset from each other. Animschool instructor and professional animator, Daniel Paul, is here to “walk” us through the doggie steps.

When animating a quadruped like a dog, understanding the underlying structure of its walk cycle is essential. Much like bipedal animation, dog locomotion relies on key poses—contact, passing, down, and up positions—which form the foundation of believable motion. While the specifics differ from human movement, the core principles remain consistent and extremely useful for animators.

In a typical dog walk, think of the front and back limbs as two offset bipedal systems. When the front right leg hits a contact pose, for example, the back right leg is likely passing through a mid-stride position. This offset timing is what gives dogs their distinctive gait, and getting this relationship right helps maintain balance and rhythm in your animation.

The pelvis and spine play crucial roles in this movement. As the legs spread during a contact phase, the pelvis drops downward. It then lifts again during the up position, mimicking a wave-like vertical motion throughout the stride. This “up and down” movement is not symmetrical front to back. The rear hips typically show more vertical bounce due to the strong, springy musculature in the hind legs, while the front chest—weighted with organs—moves with more restraint.

From a top-down perspective, the spine also rotates subtly. The chest twists in the direction of the lead paw, while the hips counter-rotate, helping to maintain balance during stride transitions. While this sounds complex, much of it happens naturally if your leg and pelvis animation is accurate.

Another key point: dog walks are not one-size-fits-all. Breed, size, and personality all influence gait—a large German shepherd is not going to have the same walk as a chihuahua. You must adapt your movement style to suit the anatomy and character of the dog you’re animating. Think of it not as copying a generic walk, but as crafting that dog’s version of it.

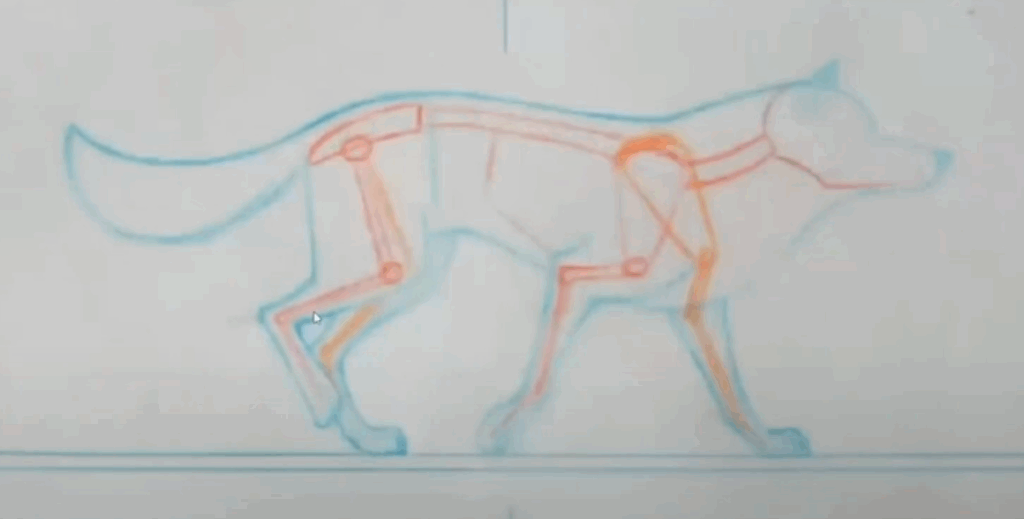
When studying reference, a good rule of thumb is to study the motion as it happens in real life. For a dog walk, that may involve finding the nearest pet dog and observing its movement. However, as real footage may become cluttered and hard to track, Paul also recommends studying the Balto pencil test, which breaks down wolf locomotion into clear, color-coded poses. One of the most important insights from the Balto pencil test is how the wolf transitions from contact to passing in just two frames, much faster than a human walking, making timing critical.

Contact pose
Passing pose

A good dog walk animation is about balance, rhythm, and sensitivity to anatomy. Use the foundational poses to block in your motion, study strong references like the Balto test, and then refine based on breed and performance. It’s a fine balance between technical accuracy and expressive storytelling. When done correctly, it brings your character to life, adds charm, and, most importantly, creates believability.


Watch the full clip from an AnimSchool lecture here: 

At AnimSchool, we teach students who want to make 3D characters move and act. Our instructors are professionals at film and game animation studios like Dreamworks, Pixar, Sony Pictures, Blizzard & Disney. ⁠Get LIVE feedback on your Animation from the pros. Learn more at https://animschool.edu/
Avoiding Spline Depression

Spline and polish—two essential stages in the animation process—can often feel like a frustrating uphill battle, especially for newer animators, which can result in “spline depression.” Yet, as with any skill, with time and practice, the process becomes more intuitive and manageable. Still, that dreaded “ugly phase” never completely goes away—it just becomes easier to push through. In this clip from a live AnimSchool lecture, instructor Martin Scotto offers some important step-by-step tips in taking an animation from blocking to spline.

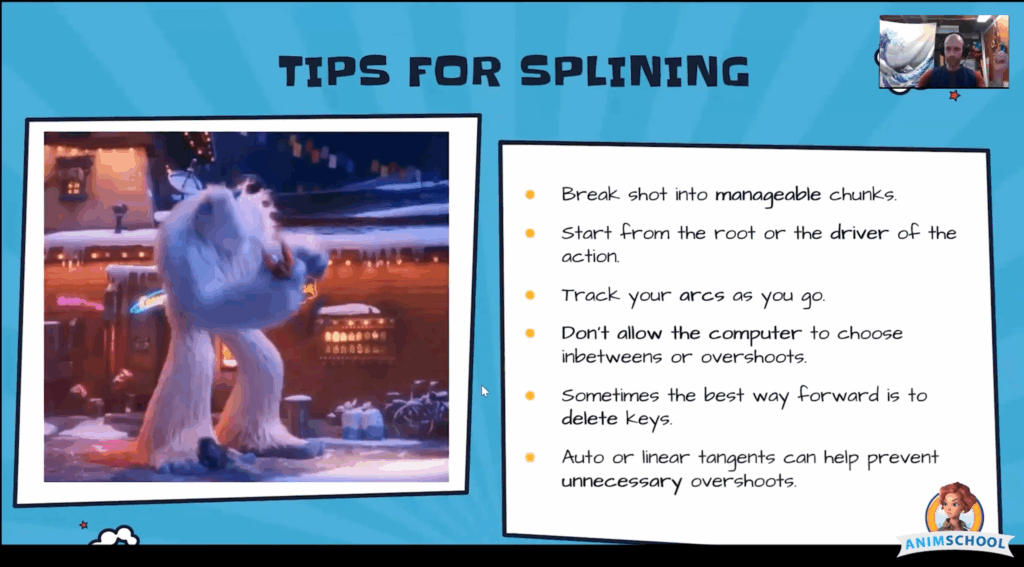
One of the most effective strategies to navigate this stage is to break the shot into manageable chunks. Whether it’s by frame range or body parts, working piece by piece helps avoid feeling overwhelmed. For example, you might start from the root of the motion and begin by polishing the body and center of gravity, then move on to the legs, spine, arms, and so on. Trying to spline everything at once often leads to chaotic results and progress that feels scattered, or, even worse, feeling like you are undoing work.

Track the arcs. If something feels off, it can often be traced back to the arcs. Try to draw out what is happening, whether on the screen or on a separate piece of paper or whiteboard, to help visualize the flow of motion. Furthermore, don’t solely rely on the computer to do the work for you—the default spline and auto tangent settings don’t take into account timing, weight, or intent. It’s only the first step in connecting the dots.

Don’t be afraid to delete keys. Simplifying the animation can make it easier to create a clean arc and polish up the motion. Analyze the curve and reduce it to just the essential poses; this will offer better control and cleaner results. If needed, don’t hesitate to rework a section by starting over from the blocking. Clean up and lock in the key poses, delete the clutter, and spline from a clean slate so that you are not working with a messy timeline.

Finally, be intentional with your tangents. Auto tangents can introduce overshoots that ruin otherwise solid motion. Use linear tangents when you want a clean hold, or adjust handles manually to sculpt the curve just right. You may even find that adding a few more keys in the right places creates better control than trying to wrestle with just two.


Watch the full clip from an AnimSchool lecture here: 

At AnimSchool, we teach students who want to make 3D characters move and act. Our instructors are professionals at film and game animation studios like Dreamworks, Pixar, Sony Pictures, Blizzard & Disney. ⁠Get LIVE feedback on your Animation from the pros. Learn more at https://animschool.edu/
What Makes Good Reference

Whether you’re a painter or an animator, reference is essential to any artist’s creative process. In this clip from a live AnimSchool lecture, instructor Timothy Suarez explains how to film good video reference that will make animating easier. He covers the importance of proper staging, collaborating with others, and how to film when you don’t have the same props as your character. Though reference may seem like it’s taking away from your time animating in Maya, Suarez reminds us that reference is the basis of the animation so it’s important to put the time in and get it right.

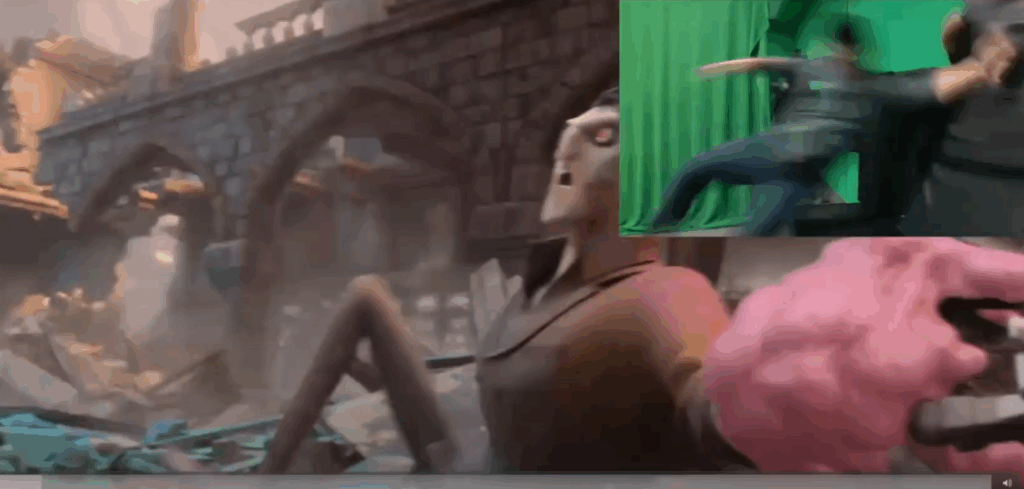
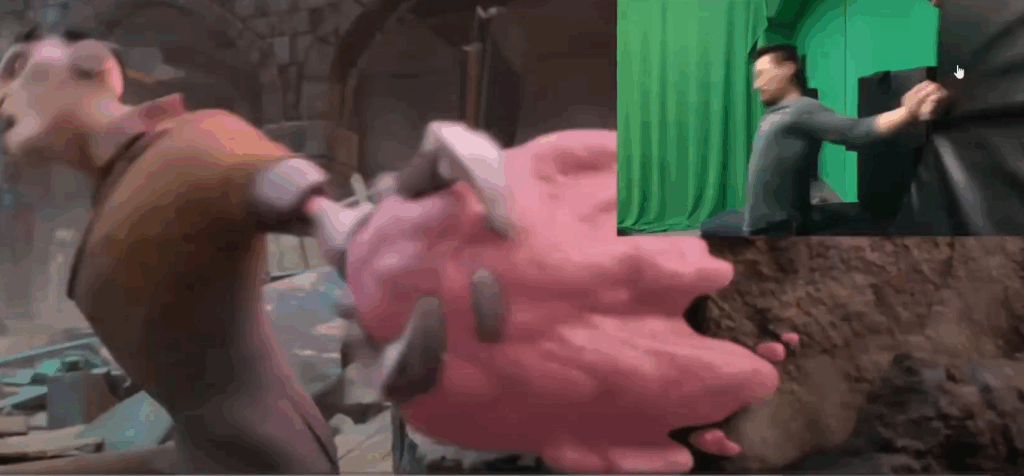
Using video reference doesn’t mean copying or rotoscoping. Instead, it’s about building a solid foundation to caricature and push performance. Having real physicality and genuine acting beats to work from gives your animation weight, timing, and believability.

What Makes a Good Video Reference

  1. Cover All Acting Beats
    Reference should include every key moment — emotional shifts, physical actions, and most importantly, moments of thought. Characters don’t always move; sometimes they pause, hesitate, or react internally, and these subtle beats bring performances to life.
  2. Match the Camera Angle
    Shoot your reference from a camera angle that’s as close as possible to the animation camera setup. This helps with staging and ensures that movement translates properly in the final animation.
  3. Act It Out
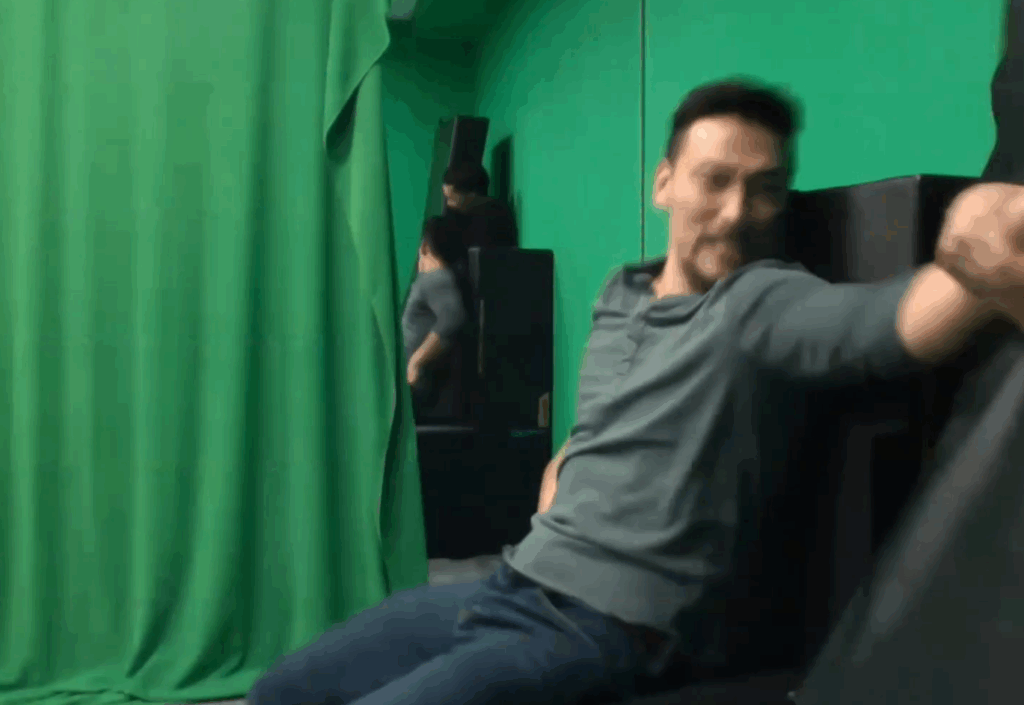
    Whether the character is lifting a heavy object or reacting to sticky goo on a wall, don’t fake it. Use props with real weight, or collaborate with someone who can physically perform the motion. Your body needs to experience the mechanics for the animation to feel right.
  4. Consider a Sketch Pass
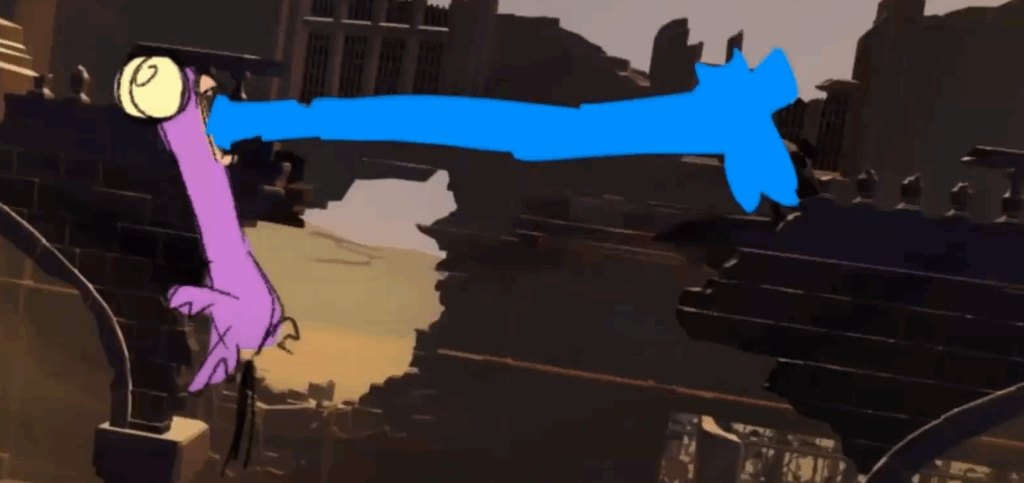
    For shots that are too fantastical for live-action reference — like a bird shooting ice from its beak — rough sketches can help block out timing and layout.
  5. Shoot Multiple Takes and Edit
    Don’t settle on the first take. Record several and review them, then edit the best parts together or pick the strongest single performance to guide your work.
Example of a sketch pass
Don’t fake the physicality, and don’t be afraid to direct the actors!

Ultimately, good reference starts with good planning. Research the shot, understand the physics and emotion behind the action and characters, and don’t be afraid to look a little ridiculous in the process. The best performances come when animators let go of self-consciousness and fully commit to creating a great shot.


Watch the full clip from an AnimSchool lecture here: 

At AnimSchool, we teach students who want to make 3D characters move and act. Our instructors are professionals at film and game animation studios like Dreamworks, Pixar, Sony Pictures, Blizzard & Disney. ⁠Get LIVE feedback on your Animation from the pros. Learn more at https://animschool.edu/
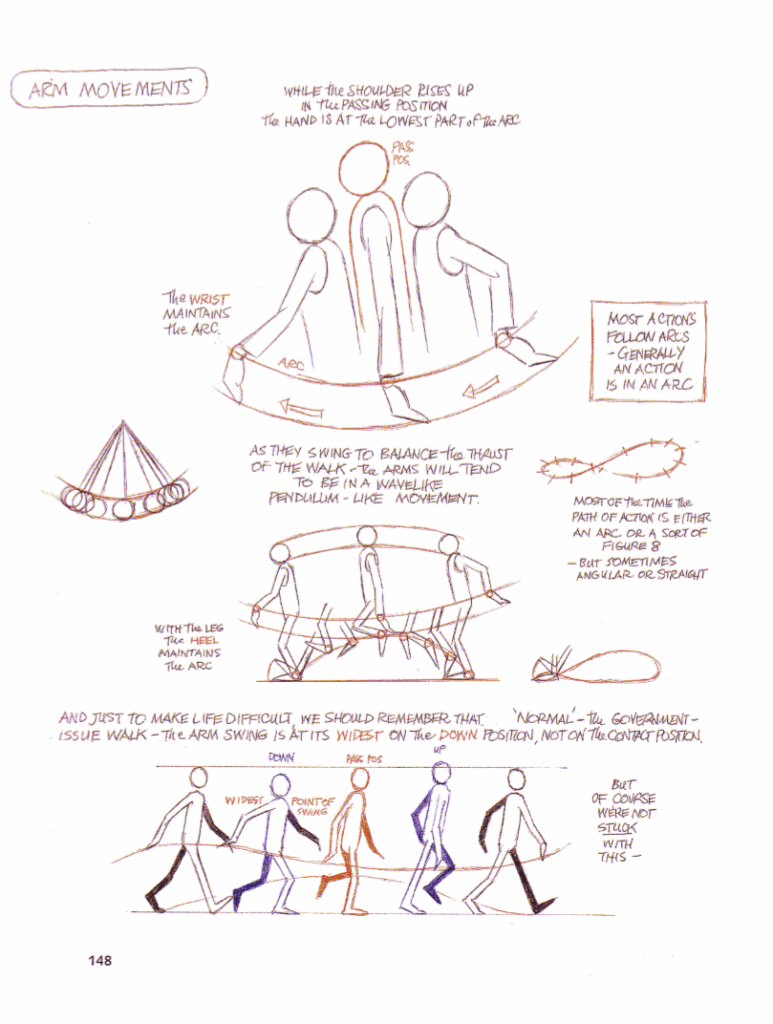
Dynamic Poses: Tilt, Rhythm, & Twist

When it comes to creating compelling animation, strong posing is everything. But crafting great poses isn’t just about technical skill—it starts with understanding character. Effective posing is a storytelling tool, and every pose should say something intentional, emotional, and clear. In this clip from a live AnimSchool lecture, instructor Tyler Kakac talks about how to create appealing, interesting poses that are genuine to who the character is using tilt, rhythm, and twist.

Before even touching a rig in Maya or any animation software, animators must ask the core questions: Who is this character? What are they doing? Why are they doing it? A pose is more than a static image; it’s a reflection of the character’s personality, mood, and intent. If you, as the animator, do not have a solid grasp of who the character is, you will not be able to translate that effectively to the audience—they will not understand the character anymore than you do.

Kakac draws from The Illusion of Life, explaining how three guiding principles can shape stronger poses:

  1. Emotional – A pose should carry feeling. But avoid overcomplicating it: “Too much action spoils acting.” Subtle, intentional movement often speaks louder than a flurry of motion.
  2. Intentional – Every pose must have purpose. Mushy actions lead to unclear storytelling. Clear poses stem from knowing exactly what the character is trying to convey.
  3. Simple – Clarity is king. If a character is doing too much, the pose loses impact. Keep it focused so the audience knows exactly what to feel.

To add dynamism and visual interest, three elements can elevate any pose:

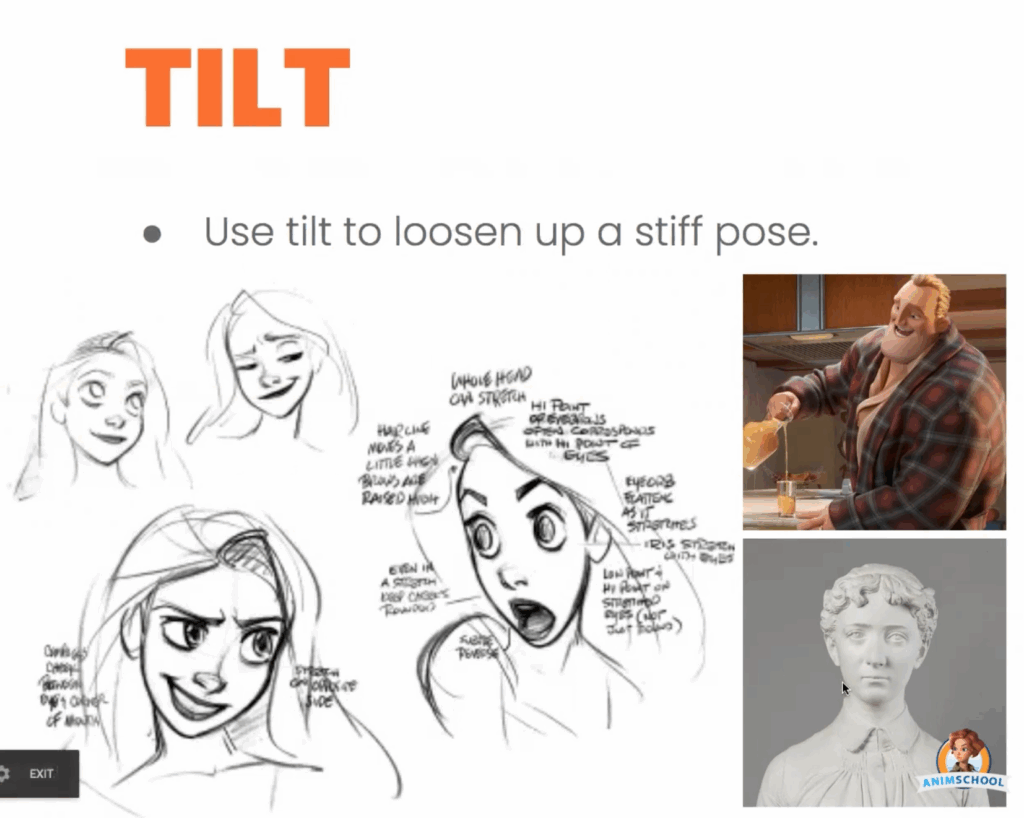
  • Tilt – Breaking symmetry adds appeal. A simple tilt of the head or hips loosens a stiff pose and creates a more natural feel.
Consider the bust in the bottom right: it feels stiff in comparison with the drawings to the left, demonstrating how tilt can add life and loosen up an otherwise rigid pose.
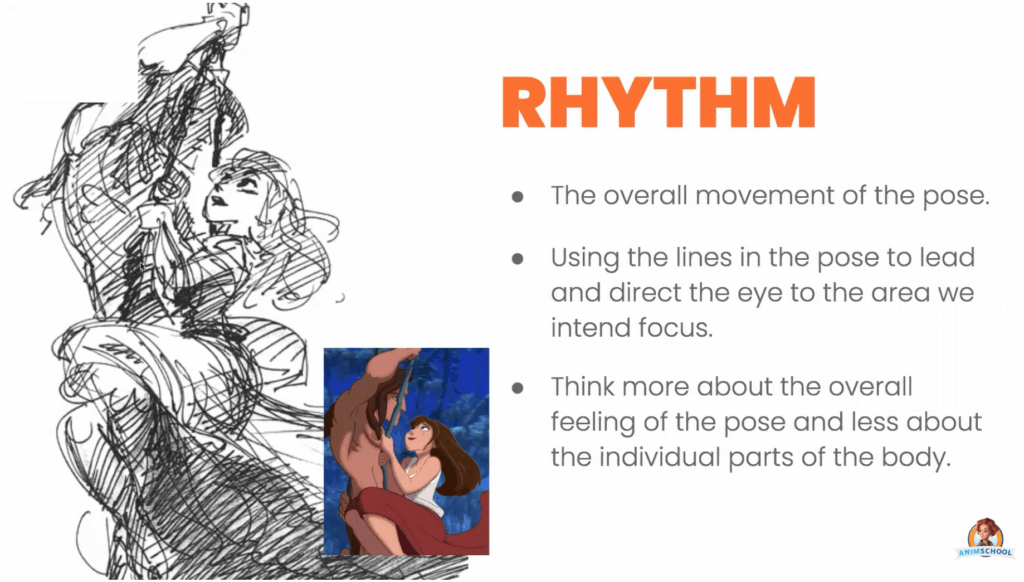
  • Rhythm – Think of the body’s overall flow. Strong poses use curves and lines to lead the eye where it needs to go. It’s not about detailing fingers or facial expression right away—it’s about capturing the essence of the movement.
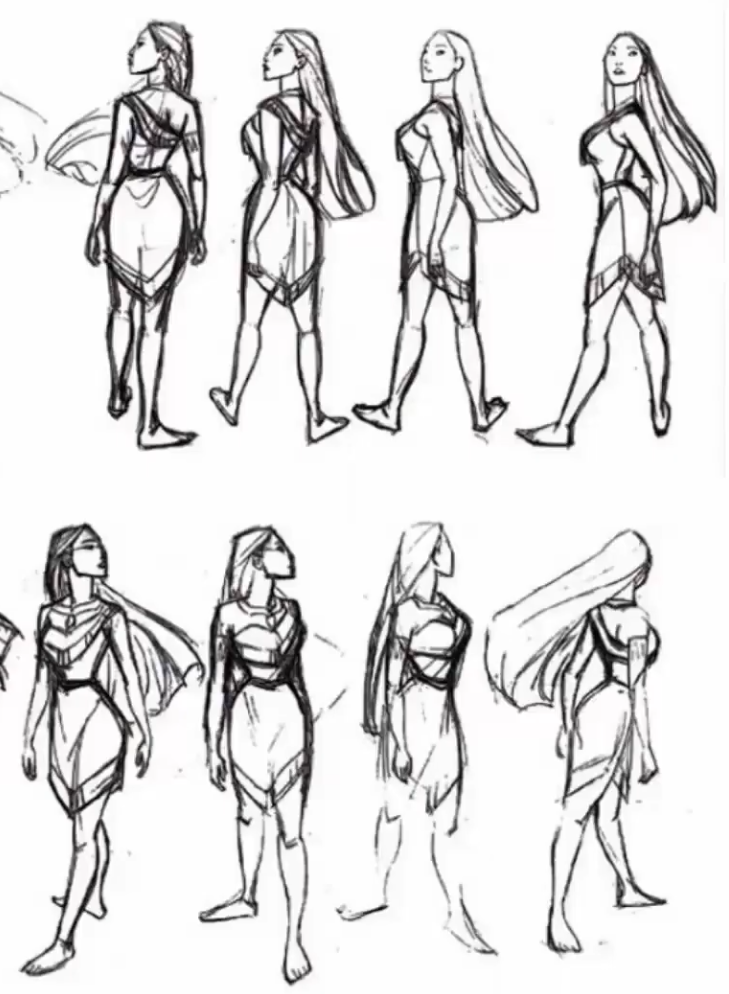
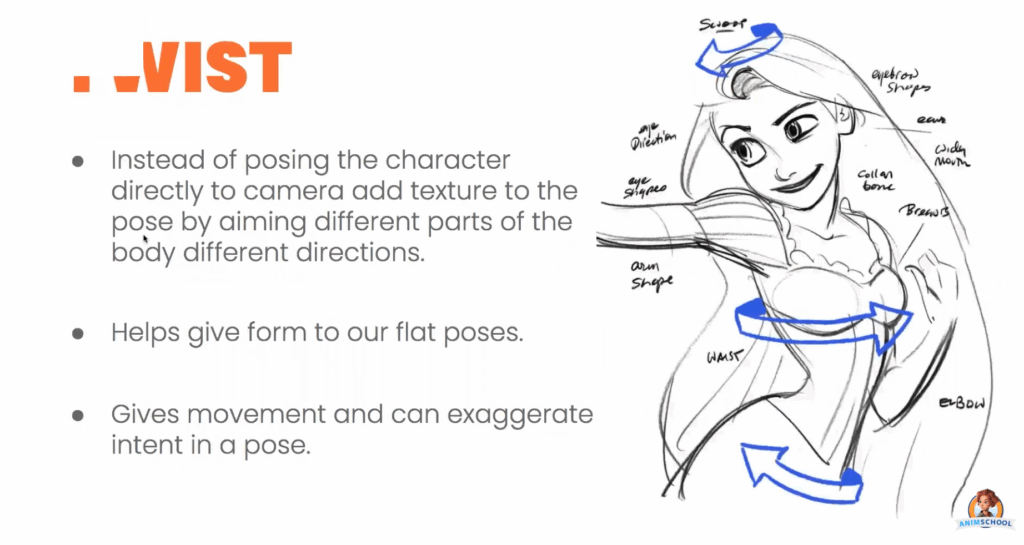
  • Twist – Turning different parts of the body in varying directions adds form, movement, and dimensionality. Avoid flat, direct-to-camera poses unless there’s a good reason. Twist introduces energy and helps tell the story more clearly.

Strong posing is the animator’s first line of communication with the audience, bridging the gap between motion and meaning. When used with intention, tools—tilt, rhythm, and twist—power is added to the pose, and a single pose can not only tell a story, but elevate the entire story to another level.


Watch the full clip from an AnimSchool lecture here: 

At AnimSchool, we teach students who want to make 3D characters move and act. Our instructors are professionals at film and game animation studios like Dreamworks, Pixar, Sony Pictures, Blizzard & Disney. ⁠Get LIVE feedback on your Animation from the pros. Learn more at https://animschool.edu/

Creating Rig Controllers in Maya

Whether you are an aspiring character rigger or an animator trying to rig a simple prop for a shot, knowing how to create rig controls is essential. In this clip from a live AnimSchool lecture, instructor Daria Jerjomina demonstrates how to create rig controls with NURBS curves, change their colors, and create attributes attached to them.

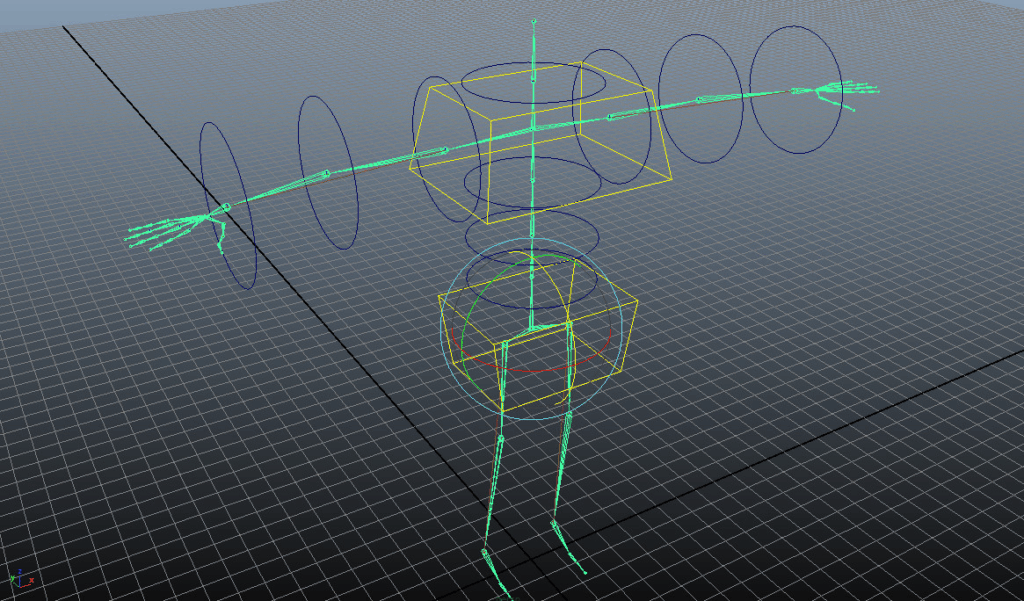
Controllers allow animators to interact with complex rigs in an intuitive and manageable way. While there are various options for building these interfaces, NURBS curves have become the standard for a number of reasons: non-renderable, easily distinguishable, scriptable, customizable, and overall easy to use.

From Unreal Engine forums

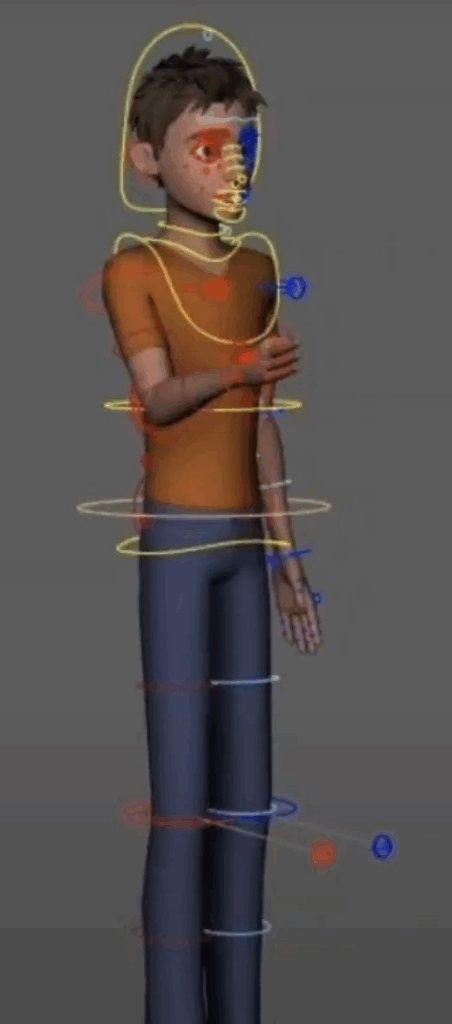
The fastest way to create a controller is by creating a NURBS circle, which can instantly be used as a controller. However, the circle an also be further customized, or the user can draw out their own custom control using the CV curve tool. More complex and three-dimensional shapes can be achieved through creating a polygon and snapping the curve points to the vertices. These shapes are easily distinguishable from the rest of the 3D scene, which make them more user-friendly. Color coding further enhances usability—typically red for right-side controllers, blue for left, and yellow for center—allowing animators to instantly understand the layout of the rig.

Some things to keep in mind when creating a controller:

  • The controller should be a single object (parent shape or draw one curve)
  • Delete the history on the controller
  • Freeze transformation on the controller

Custom attributes can be added directly to curves to expose useful controls—like switches, sliders, or dropdown menus for facial expressions, visibility toggles, or rig modes. NURBS controllers also support advanced UI functionality. By locking or hiding certain transform channels, riggers can prevent users from breaking constraints or applying unintended transformations. Attributes can even be muted temporarily or add additional data with string or enum fields for scripting.

NURBS curves controllers blend seamlessly into the animation workflow by being visible where needed and invisible where not. Their scriptability, customizability, and efficiency make them ideal for building controllers that are both technically sound and easy to use.


Watch the full clip from an AnimSchool lecture here: 

At AnimSchool, we teach students who want to make 3D characters move and act. Our instructors are professionals at film and game animation studios like Dreamworks, Pixar, Sony Pictures, Blizzard & Disney. ⁠Get LIVE feedback on your Animation from the pros. Learn more at https://animschool.edu/
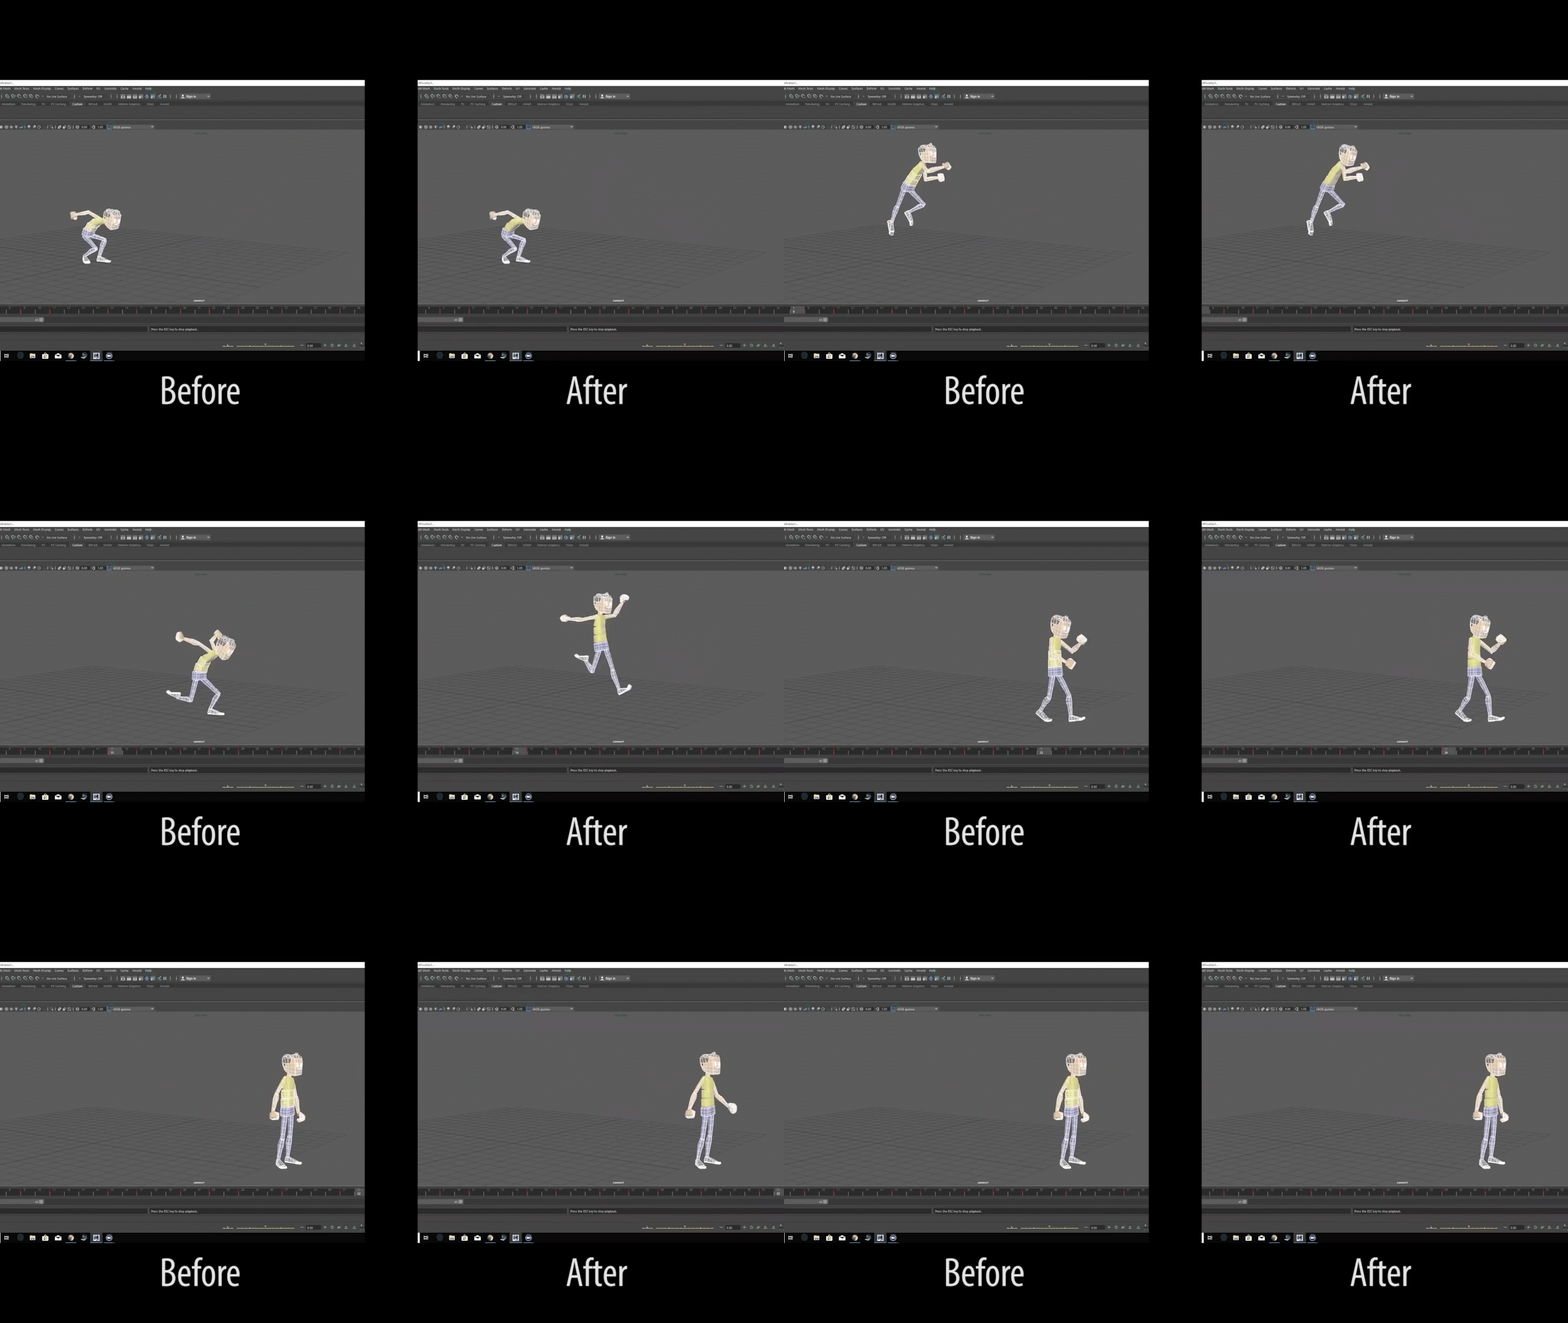
Animating Weight

When animating any sort of physical action, understanding and being able to effectively convey force is crucial. It’s about using motion to communicate struggle, weight, and intention. In this clip from a live AnimSchool lecture, instructor Anthea Kerou discusses the basic principles of animating weight. Through the classic “lift a heavy object” animation assignment, Anthea demonstrates what key features your animation should have in order to create a feeling of believable weight and force.

Force and weight becomes visible through the pose. A character pushing a heavy object won’t stand straight—they’ll lean, brace, and shift their center of gravity. This imbalance, with feet pushing backward and the torso leaning forward, is how animators signal effort. If a character’s center of gravity stays balanced, it won’t convincingly show that the object is heavy. Another useful way to assess how heavy an object is is the relationship between effort and effect. If a character puts in little effort but causes a big movement, the object appears light. But if there’s a lot of effort and little effect—like a character straining to lift something that barely moves—it signals weight and struggle, and force being applied.

An example of a character lifting a heavy bowling ball – the action of lifting the ball upwards and back creates momentum in that same direction, causing the character to step backwards to compensate for the change in center of gravity.

Note the difference in poses. In the upper example, the character stands straight—if they tried to push a box, it wouldn’t appear heavy/work properly because the center of gravity is straight with the body. In the lower example, the character’s pose allows for more force to be applied towards the box, indicating that it is heavy and requires more effort to be moved.

Gravity also plays a major role in how we perceive weight. Heavy objects fall faster and take longer to change direction. This principle can be applied through proper spacing—using arcs that accelerate as objects fall and decelerate as they rise or shift direction. Even spacing takes away from believability and realism, feeling robotic and stiff; instead, variation in timing and arcs gives the impression of mass and momentum.

From cristinateachingart.com

Storytelling in animation goes beyond motion—it’s about intent and response. If a character tries something that doesn’t work, they should visibly readjust and try harder. This adds realism and emotional depth, creating a much more compelling shot. Whether it’s a simple lift or a complex push, mastering these principles of force and weight is essential to creating realistic animations that resonate with audiences.


Watch the full clip from an AnimSchool lecture here: 

At AnimSchool, we teach students who want to make 3D characters move and act. Our instructors are professionals at film and game animation studios like Dreamworks, Pixar, Sony Pictures, Blizzard & Disney. ⁠Get LIVE feedback on your Animation from the pros. Learn more at https://animschool.edu/
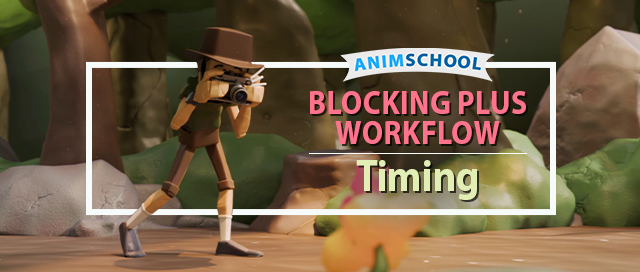
Understanding Constraints in Maya

Knowing how to use Maya constraints is important for both riggers and animators. Navigating the world of constraints and parenting can be confusing, but mastering them opens doors to a more flexible and nuanced approach to control. In this clip from a live AnimSchool lecture, instructor Daria Jerjomina demonstrates how the different kinds of constraints work, and how to utilize constraint weights.

Constraints allow an object to follow another’s position, rotation, or scale without the strict dependency of parenting. By applying constraints, you can fine-tune how one object behaves in relation to another. This method offers greater flexibility, especially in complex rigs, by allowing animators to maintain offsets, blend movements, and create more dynamic interactions.

Types of Constraints

  1. Parent Constraint: This is the most commonly used constraint. It links both the translation and rotation of an object to another—essentially mimicking the behavior of parenting but without directly linking the two objects. A major advantage here is that scale is not affected by a parent constraint. This makes it ideal when you need to control the position and rotation of one object without altering its size.
  2. Point Constraint: The point constraint focuses only on translation. This means one object will follow the position of another but will not inherit its rotation. It’s a useful tool when you need one object to follow another in space, but with independent orientation.
  3. Orient Constraint: The orient constraint only affects an object’s rotation. It makes one object rotate in the same way as another, without influencing its position. This is particularly useful when you need an object to face a specific direction or match another object’s rotation.
  4. Aim Constraint: The aim constraint affects the direction that an object faces or points, which is especially useful in creating eye rigs. Adding an aim constraint will allow the eyes to always face the controller, which gives animators easy control over facial animations.
  5. Pole Vector Constraint: Used more in IK (Inverse Kinematics) rigs, pole vectors allow for more precise control over joints and limbs, offering a different and potentially more intuitive way to pose characters depending on the situation.

Constraints can also be used in tandem with one another. For instance, combining point and orient constraints will allow it to follow the translation and rotation of multiple objects independently, which can create more complex behaviors.

Benefits of Constraints

  1. Maintaining Offsets: The ability to maintain an offset between objects is a powerful feature of constraints. For example, when a parent constraint is applied with the “maintain offset” option enabled, the constrained object won’t snap to the parent’s position—it will retain its relative position in space.
  2. Adjustable Weights: Constraints come with adjustable weight attributes, meaning you can control how much influence one object has on another. Setting the weight to zero will completely remove the effect of the constraint, while a weight of one will fully enforce it. This is useful for creating dynamic rigs where an object might follow another at certain times and not at others.
  3. Multiple Constraints: You can also apply multiple constraints to a single object. For example, you can apply both a point and orient constraint to an object, allowing it to follow another in both position and rotation independently. This can be expanded further by blending the influence of multiple objects, as seen when applying a parent constraint to an object, or directly parenting it via the hierarchy, and controlling its position between two different objects.
  4. Separation of Controllers and Mesh: By constraining objects rather than parenting them, animators can separate controllers and mesh components into distinct groups. This ensures a more organized rig and hierarchical structure, where controllers and mesh elements can be toggled on or off as needed.

Constraints are an essential tool for animators and riggers, providing flexibility and control that parenting alone cannot achieve. By understanding the different types of constraints—such as parent, point, orient, and aim constraints—you can create more dynamic rigs with cleaner hierarchies. Constraints not only improve the organization of your project but also enable more nuanced animation controls, which is crucial for creating sophisticated, interactive animations.


Watch the full clip from an AnimSchool lecture here: 

At AnimSchool, we teach students who want to make 3D characters move and act. Our instructors are professionals at film and game animation studios like Dreamworks, Pixar, Sony Pictures, Blizzard & Disney. ⁠Get LIVE feedback on your Animation from the pros. Learn more at https://animschool.edu/
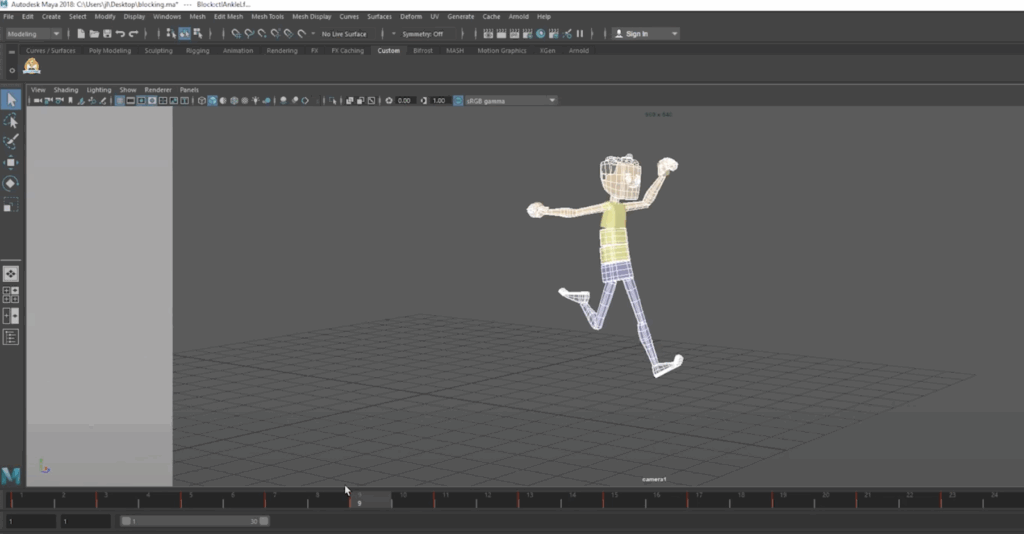
Animating the Eye Mask

One aspect of facial expressions in animation that is often overlooked is the eyelids. Typically, focus is placed on the more noticeable features, such as the eyebrows. However, the eyelids are just as crucial in conveying the full range of human expressions – they work tandem with the brows to create cohesive and believable facial movements. In this snippet from a live AnimSchool lecture, instructor Scott McWhinnie discusses what the eye mask is and how important it is to understand how it works in order to create unified, appealing eye poses on your characters.

While it’s true that eyebrows do a lot of the heavy lifting when it comes to expressing feelings like surprise, anger, or joy, the eyelids are just as important. The lids support the brows by reinforcing the emotional tone. If the eyebrows are raised in surprise, the eyelids should also reflect that motion—gently lifting or widening in response. If the brows are furrowed in anger, the eyelids will typically compress or narrow in the same direction. In the example below of Flynn Rider’s expression board, note how the eyebrows are the main driver of the emotion, while the shape of the eyelids supplement it by telling the same story.

The key here is unity – the brows and lids should not contradict one another. Working together and supporting each other allows them to convey a clear and homogenous emotion.

The eye mask typically refers to the entire region around the eyes, including the brows, eyelids, and surrounding area. By thinking of these parts as a whole, singular unit, it becomes more easy to ensure the consistency of expressions. When creating an expressions in animation, it’s important to consider how the entire eye mask stretches or squashes. For example, in a surprised or shocked expression, the eyes and eyebrows will both stretch upward. The eyelids will widen, the brows will arch, and the whole eye area will elongate. Conversely, for a more focused or determined expression, the eye mask may compress inward, with the lids narrowing and the brows angling downward.

While symmetry is important for certain expressions, asymmetry can add a lot of depth and nuance to a character’s face. For example, when creating an angry or surprised face, one side of the eye mask may be stretched out, while the other side will be squished to convey more emotional tension. This slight asymmetry can make a character’s expression feel more natural and dynamic, as human faces rarely show perfectly symmetrical emotions. A subtle shift in the direction the character is facing helps reinforce the character’s gaze and emotional direction, guiding the viewer’s perception and keeping the expression grounded.

To create believable expressions, treat the brows and eyelids as part of the same system. By using the eye mask concept, all elements of the face can work together harmoniously to express the same emotion. This leads to more natural, unified expressions.


Watch the full clip from an AnimSchool lecture here: 

At AnimSchool, we teach students who want to make 3D characters move and act. Our instructors are professionals at film and game animation studios like Dreamworks, Pixar, Sony Pictures, Blizzard & Disney. ⁠Get LIVE feedback on your Animation from the pros. Learn more at https://animschool.edu/
Caricaturing the Face: Exaggerated Expressions

One of the biggest challenges in designing facial expressions for animation lies in deciding how realistic or exaggerated the design should be. Interpreting and adapting real-life references plays an important role, but it’s also essential to understand when to push the boundaries of realism to better convey emotion and expression. In this clip from a live AnimSchool lecture, instructor Hans Dastrup demonstrates using a reference image to create a more stylized and appealing pose for the face.

One key to effective facial animation is understanding the balance between mimicking real-life expressions and adjusting them to suit the character and animation style. Avoid directly copying facial expressions from reference material without considering the unique needs of the character, as replicating a facial expression exactly as it appears in real life does not always translate well in animation. Mimicking expressions can often result in awkward or less appealing designs, especially if the goal is to achieve clarity and emotional impact.

Matching the reference exactly.

To create a more visually pleasing expression, subtle changes, like simplifying, are often necessary. For instance, in the process of creating a smile, adjusting the mouth shape and adding slight asymmetry can go a long way, as real human faces are inherently asymmetrical and can help maintain a more natural look. A smile in real life might have one side slightly higher than the other, and exaggerating this asymmetry can enhance the character’s expression.

When working with the eyes, it’s important to consider the character’s anatomy. In animation, characters often have larger eyes with exaggerated white areas, which can make them appear more expressive. However, it’s crucial to avoid pushing this too far, as extreme eye shapes can lead to unnatural or unsettling appearances. By adjusting the eye shape slightly, such as making the lower eyelid flatter, a more balanced and appealing look is created without overdoing the exaggeration.

Adjusted eye and mouth shapes to incorporate asymmetry.

Another important consideration is the character’s overall design. For instance, in a happy character, a more graphic and simplified mouth shape may work better than trying to replicate a realistic smile. Pushing the design in this way helps to exaggerate the emotion and adds visual clarity, making it more readable to the audience. The expression doesn’t have to be entirely unrealistic must be entirely unrealistic—it’s about finding the right level of push to enhance the emotion without distorting it beyond recognition.

Pushing the final expression.

While it’s important to consider real-life references, animation often requires tweaking those references to fit the style and emotional needs of the character. By simplifying, adding asymmetry, and adjusting features like the eyes and mouth, animators can create more engaging and believable facial expressions that convey the intended emotion. Ultimately, the goal is to find the balance between realism and stylization to craft a performance that resonates with the audience.


Watch the full clip from an AnimSchool lecture here: 

At AnimSchool, we teach students who want to make 3D characters move and act. Our instructors are professionals at film and game animation studios like Dreamworks, Pixar, Sony Pictures, Blizzard & Disney. ⁠Get LIVE feedback on your Animation from the pros. Learn more at https://animschool.edu/
Page 1 of 4