Establishing good practices in 3D modeling is crucial to ensure that the model deforms correctly during animation, allowing for smooth and natural movements of characters or objects. Additionally, clean topology facilitates easier modification and editing of the model, enabling artists to iterate quickly and make adjustments as needed. It not only improves the visual quality of the model but also streamlines the entire production process, making it an essential aspect of professional 3D modeling.
AnimSchool instructor Jackie Marion shows how she gets started in creating new 3D character models and discusses the workflow of a production modeler.
Creating a Head: The Forms
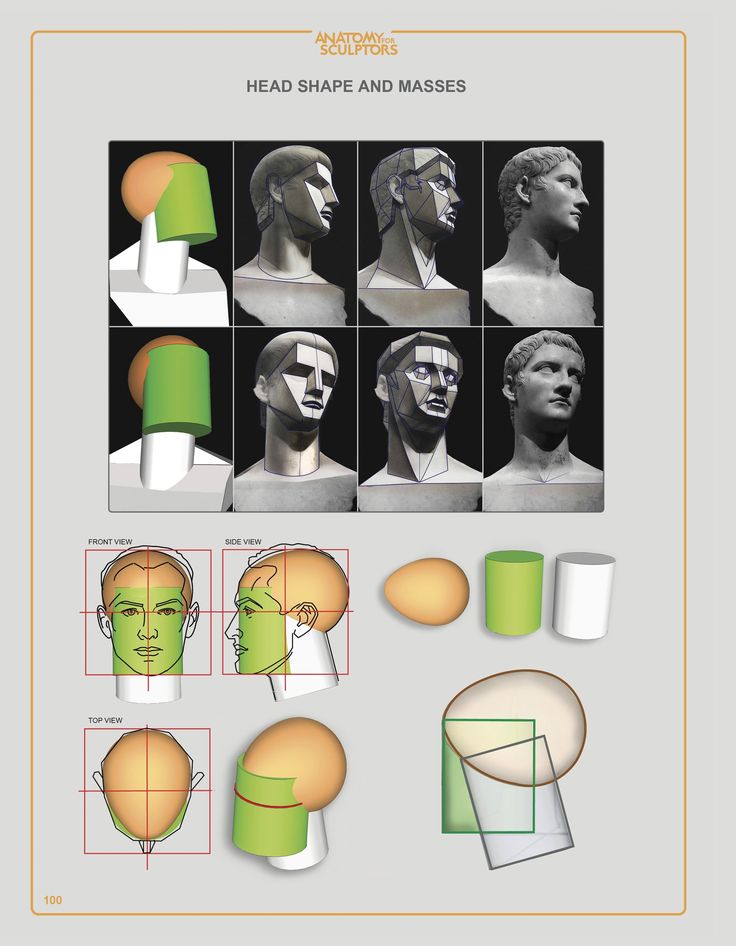
When modeling a head, consider what different forms make up the overall shape of the head. Jackie advises against starting with a sphere – though it may be your initial instinct to start with a sphere, the grid-like topology and edge flow of a basic sphere primitive in Maya will work against the design of a face.
The head is typically much more than a sphere (though some stylized characters can have a very spherical head). Generally, the top of the head is egg-shaped, while the face and neck areas can be formed with cylinders.
Start Modeling
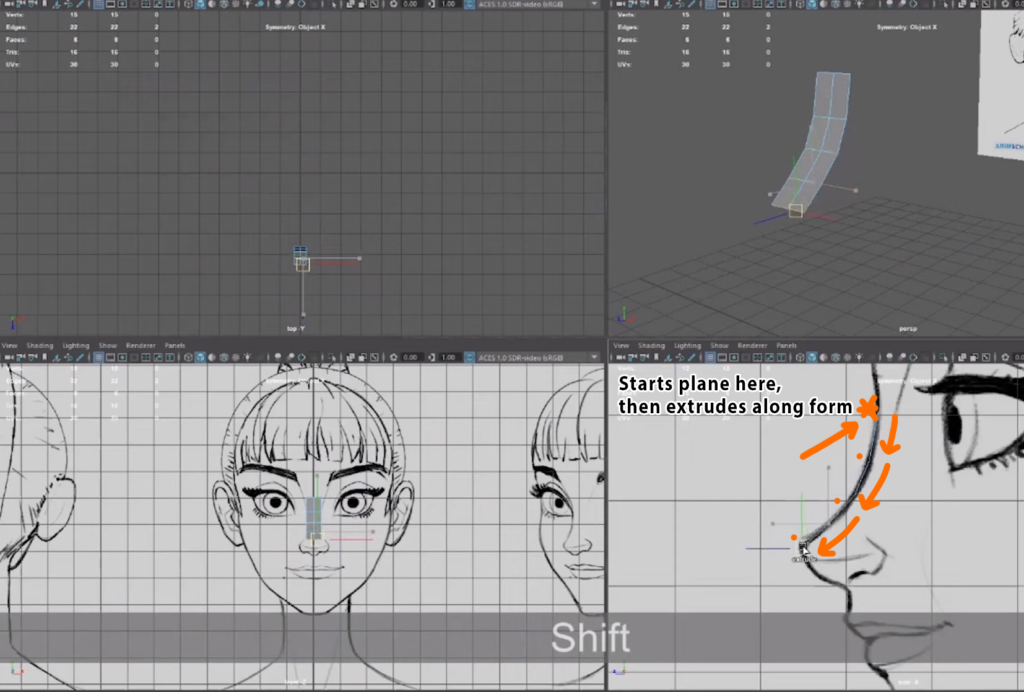
When patch modeling a head, Jackie explains that she starts with a plane (subdivisions width 2, height 1). This plane has an edge running down the center which will allow her to maintain symmetry across the X axis as she extrudes new faces and edges from the plane. She typically places the plane somewhere near the center of the face, such as along the bridge of the nose, and then starts to extrude new segments that follow the form and contour of the face.
Jackie recommends to find a good rhythm as you place new sections – don’t go so far apart that you lose the form, but also don’t go too close together that you end up with too many edges and too much detail. Once she has formed a basic frame that wraps around the form of the head, she uses Fill Hole to start closing the gaps.
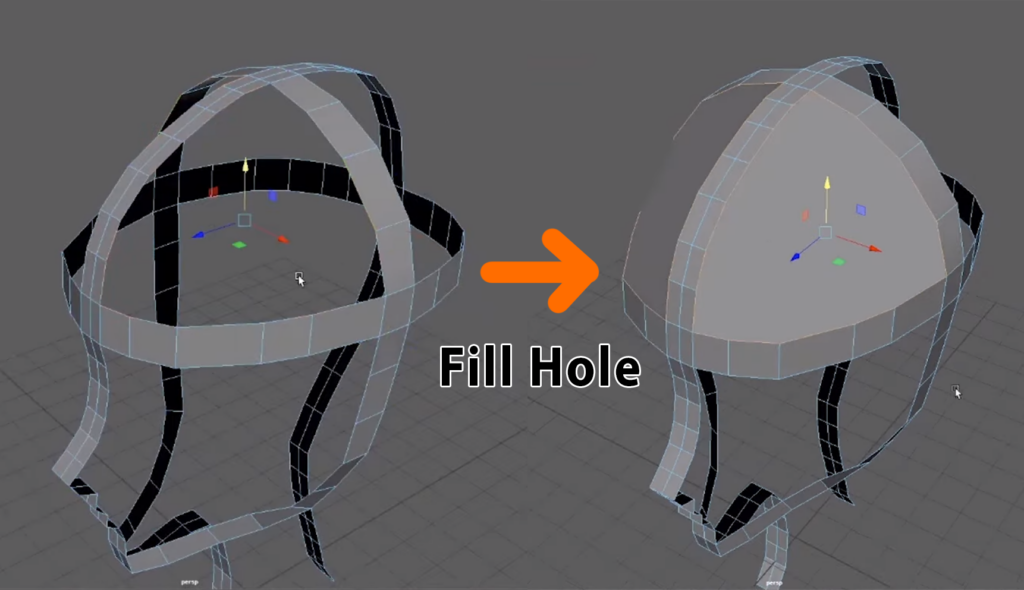
There are various alternative methods to closing these gaps, such as extruding the inner edges or using the Append tool, but Jackie mentions that she prefers to use Fill Hole so that she can add in the topology and edge flow afterwards with the Multi-Cut tool.
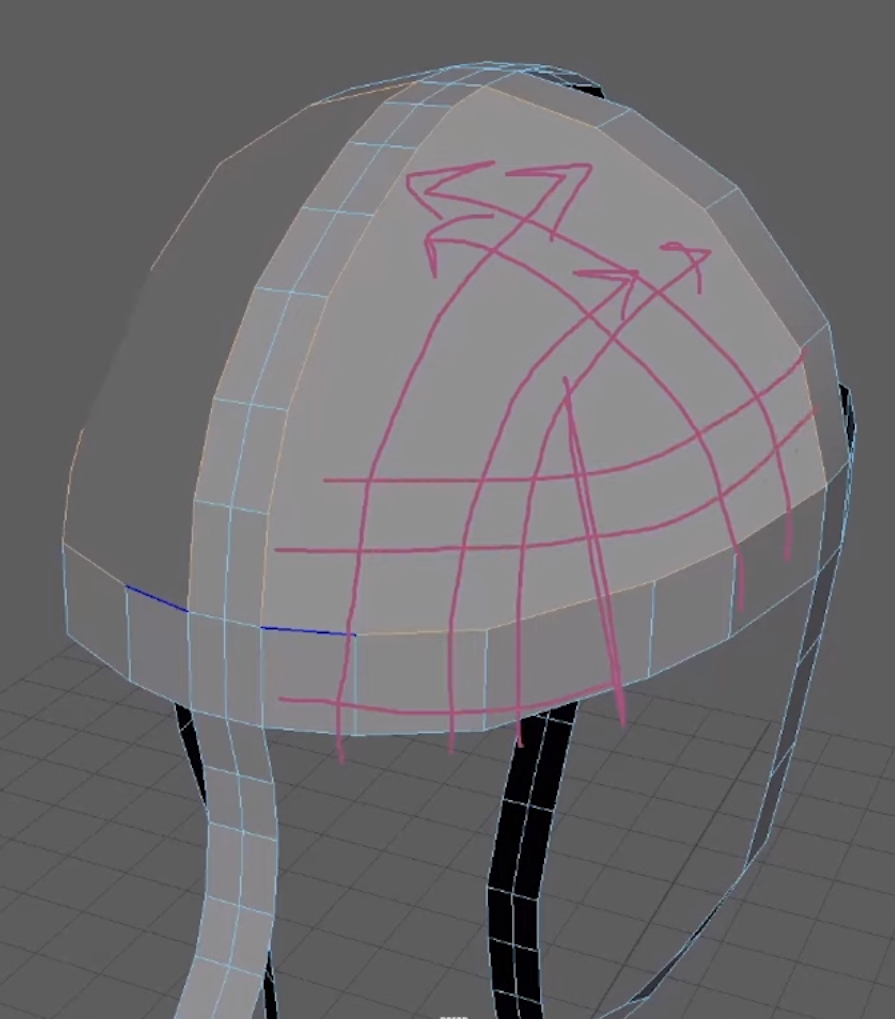
Jackie explains that the “rule” to follow here is to determine where the “corner” is, and build your edge flow from that. For instance, all edges on the left and in front of the corner might flow towards the back, while edges on the right and behind the corner might flow up and towards the left. Once you have established the rule for your own models, you can apply it to the other sections as well.
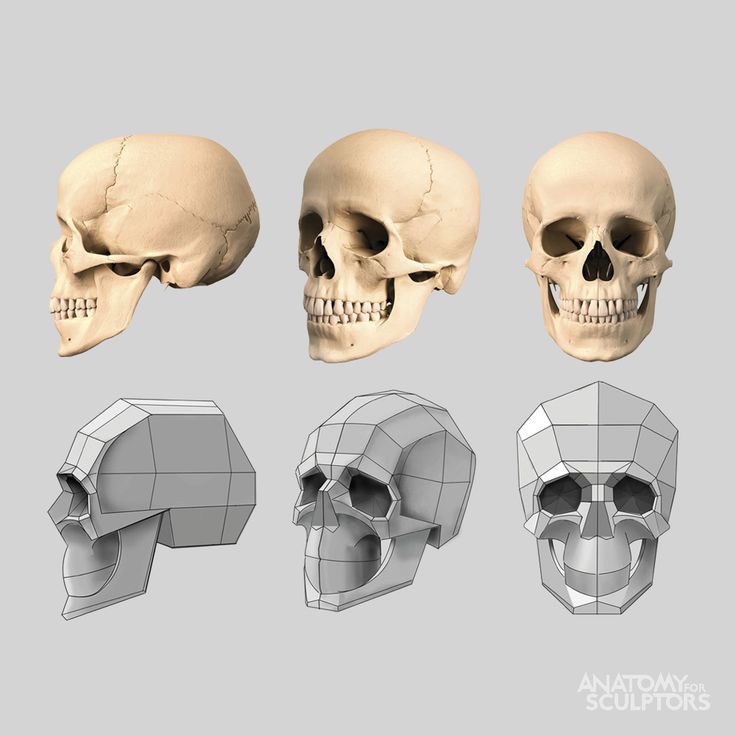
When building out the form of the face, remember that, even though you are only making the exterior “shell,” there is anatomy underneath that is informing the shapes you are building. This is what will help you achieve a realistic and believable look.
Watch the full snippet from an AnimSchool class lecture here:
At AnimSchool, we teach students who want to make 3D characters move and act. Our instructors are professionals at film and game animation studios like Dreamworks, Pixar, Sony Pictures, Blizzard & Disney. Get LIVE feedback on your Animation from the pros.
Learn more at https://animschool.edu/

