Tag: game animation

Camera Tips for Film and Games

ames

In the world cinematography, every choice, from the way a scene is shot to how the camera moves, plays a critical role in telling a story. In this clip from an AnimSchool lecture, AnimSchool Instructor John Paul Rhinemiller goes through the basics of cinematography and illustrates how film and videos games use camera movements to create a specific emotion and feeling. JP addresses the importance of having motivated camera movements that have a purpose and also add to a character’s personality or story.

One of the most subtle yet effective tools for filmmakers is the use of a “locked-off” camera, which stays in one place without movement. The key purpose of a locked-off camera is to create stillness, focusing the viewer’s attention entirely on the subject or scene at hand. However, despite the growing trend of fast-paced, dynamic shots in modern filmmaking, sometimes the most powerful storytelling comes from controlling the camera, rather than letting it move.

Ensuring that any camera movement (or lack thereof) has a purpose is key. Whether the camera is panning left to right, following a character, or offering a point-of-view shot, every movement must serve the story. For instance, moving the camera in a specific direction can subtly indicate unease or tension. Left to right feels more natural due to the way people read in Western cultures, whereas moving in the opposite direction can suggest that something is wrong or unsettling. In contrast, a stationary camera can communicate a sense of control and deliberation. This is especially important in dialogue-focused scenes where unnecessary movement may detract from the characters’ performances or the emotional depth of the conversation.

JP offers some camera tips:

  • Moving the camera during dialogue can be distracting
    • This is why the camera cuts many times during dialogue
    • Always focus on the person speaking
  • Never use longer than 50mm when two characters on screen (no limit with one character)
  • Lead and follow
    • Lead through a scene to suggest that the scene stays somewhat equidistant
    • Follow through a scene – common in 3rd person

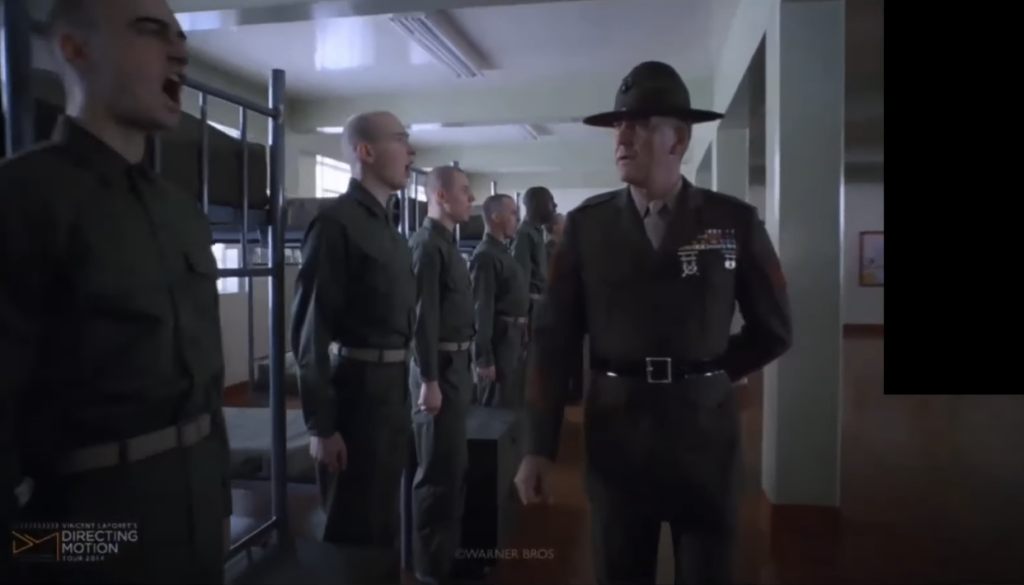
In this example from Full Metal Jacket, JP explains that the camera moves backwards as the sergeant steps forward, creating a sense of unease and tension within the scene, reflecting the discomfort of the recruits.

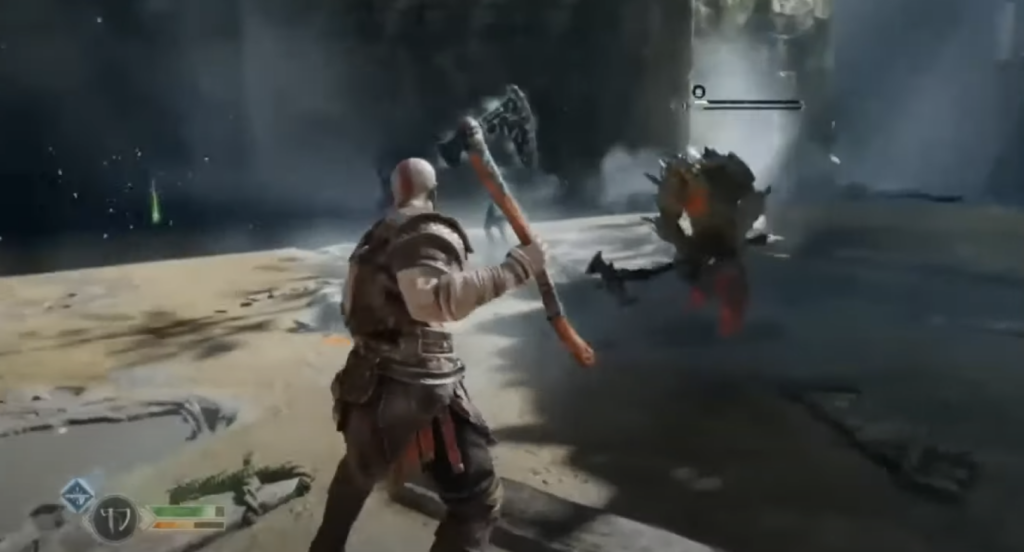
In this example from God of War, JP points out how the camera is consistently equidistant from the character, with some flexibility in zooming in at different parts to emphasize the action, such as attacking.

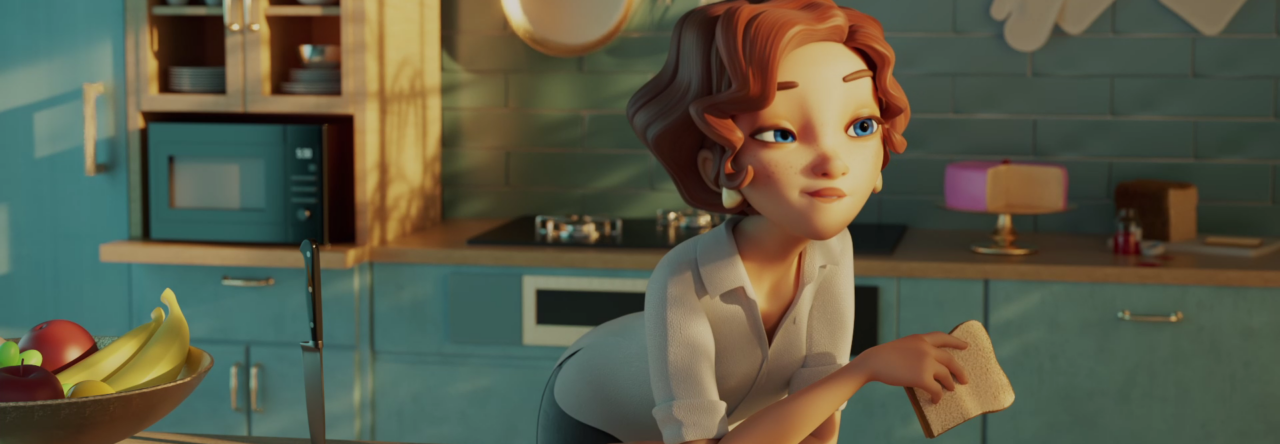
Another camera technique is “rack focus,” which shifts the focus of the lens from one subject to another, is used to draw attention to a specific element within the frame. This subtle shift guides the audience’s gaze, highlighting important details and directing the flow of the narrative.

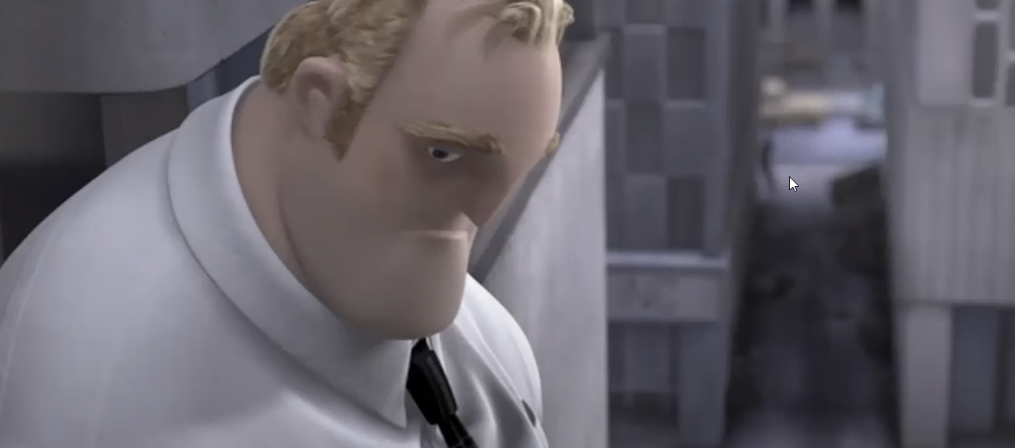
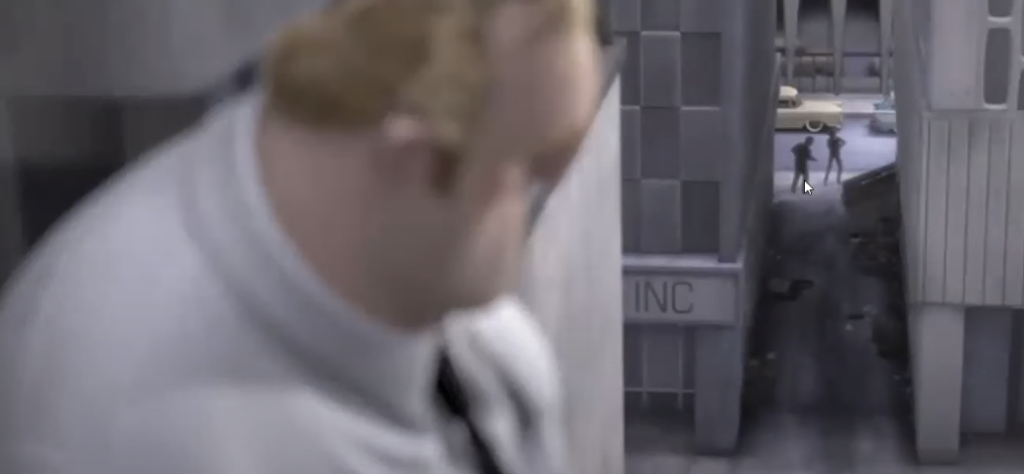
An example of rack focus from The Incredibles.

Ultimately, camera movement, when used with purpose and intent, becomes a vital tool in shaping the emotions and experience of the viewer. Whether through subtle shifts or deliberate stillness, the camera can profoundly impact how a story unfolds, making it an indispensable element in visual storytelling.


Watch the full clip from an AnimSchool lecture here: 

At AnimSchool, we teach students who want to make 3D characters move and act. Our instructors are professionals at film and game animation studios like Dreamworks, Pixar, Sony Pictures, Blizzard & Disney. ⁠Get LIVE feedback on your Animation from the pros. Learn more at https://animschool.edu/

Cinematic Camera Setup for Game Animation

Setting up a cinematic camera for game animation is a key skill. In this video, AnimSchool instructor and pro game animator John Paul “JP” Rhinemiller explains how to set up a camera for a moving character in a cinematic scene. He also demonstrates an exercise that covers a fundamental step in mastering camera setups.

JP explains that, generally, cinematic camera movement involves one main “key” move in either translation or rotation. In the early stages, it is crucial to ensure that the camera’s main movement feels good and works well in the scene. From there, more layers and complexity can be added.

Camera Setup

JP begins by demonstrating how to create a “slide” cinematic camera. He mentions that starting with the render settings is a good idea to ensure that the aspect ratio is correct and helps you understand the framing of your characters as you animate the camera. The settings he chooses are:

  • Presets: HD_720
  • Width: 1280
  • Height: 720
  • Resolution: 72 pixels/inch

He also adjusts the attributes of the camera to change the gate mask opacity in order to control what can be seen offscreen.

Animating a Slide Shot

To begin animating, JP first sets his first and last key frames for the desired camera and then addresses the curves. He notes that, by default, the camera curves will be set to auto tangent with slow out and slow in. Depending on the shot and what the next cut is, that may not be what you want; in this case, you would need to change those curves further.

For JP’s shot, he explains that he wants it to appear as though the camera is catching up to the character. To achieve this, he adds a few more frames at the beginning to first match the pace of the character’s movement and then have the character appear to pull ahead, making it seem like the character is ramping up in speed. He then further adjusts the position of the keys to get a smoother movement.

JP explains some fundamentals of a typical “slide” shot to keep in mind:

  • Ensure that the character is always in frame
  • The character appears to be motivating the camera to move, or slide
  • The character should not get too far into the left/right third of the frame, where it seems like they are “pushing” the camera (unless there is motivation to do so)
  • As the character slows down to a stop, the camera can keep moving for a few frames after
  • The start and end frames should not be on the first/last keys on the shot – there should be continuous motion that goes beyond the shot, especially in a cut with action

Watch the full clip from an AnimSchool lecture here: 

At AnimSchool, we teach students who want to make 3D characters move and act. Our instructors are professionals at film and game animation studios like Dreamworks, Pixar, Sony Pictures, Blizzard & Disney. ⁠Get LIVE feedback on your Animation from the pros. Learn more at https://animschool.edu/

Breathing Life into Idle Animations

How do you keep a character alive, when they aren’t moving? How do you enable a character to feel real and animated when they are stuck in one spot? 

Animschool Game Animation Instructor Seth Kendall breaks down a successful idle animation. The term idle often means to sit still and do nothing, but in animation, to idle means to breathe life and personality into a character in the most minute and delicate manner. To idle successfully is a true test to see if you understand what it means to create the “illusion of life.”


Preparing to Create

  • Get inspired
  • Get reference
  • Have an idea/vision of what you want to do

Creating the Idle

Seth explains that the first thing you should consider is the “base loop.” Generally, this may be some type of breathing cycle with back-and-forth movement, tensing and relaxing, etc. You’ll want something that can loop well to form a “ground texture” for the overall animation.


What to Pay Attention to

Seth breaks down a few examples of idle animations and points out notable details in each, including common elements that make a looping animation successful:

  • Good overlap: hips are driving the motion – overlap occurs as the motion travels up the spine and though the arms
  • Layers of motion: in a simple breathing idle (as seen in the examples), this may be the up/down motion of the body as the base layer, a slight head shake as another layer, accessories jingling as another, etc. Layers can become more complex as you add more specific movement.
    • Try to ensure that the layers complement each other!
  • Use variation in timing and frequency to create contrast  + draw the viewer’s attention
  • Consider adding macro variations that occur over three to six loops
    • Remember not to just repeat the fidget multiple times
  • For a more dynamic loop, blend and overlap the fidgets so that the character is never still; having the character constantly in motion can be a good way to hide the loop
  • Ensure that your base idle animation has life and variation to it

Watch the full clip on the AnimSchool YouTube channel here:

At AnimSchool, we teach students who want to make 3D characters move and act. Our instructors are professionals at film and game animation studios like Dreamworks, Pixar, Sony Pictures, Blizzard & Disney. ⁠Get LIVE feedback on your Animation from the pros. 
Learn more at https://animschool.edu/