Tag: facial animation

Animating the Eye Mask

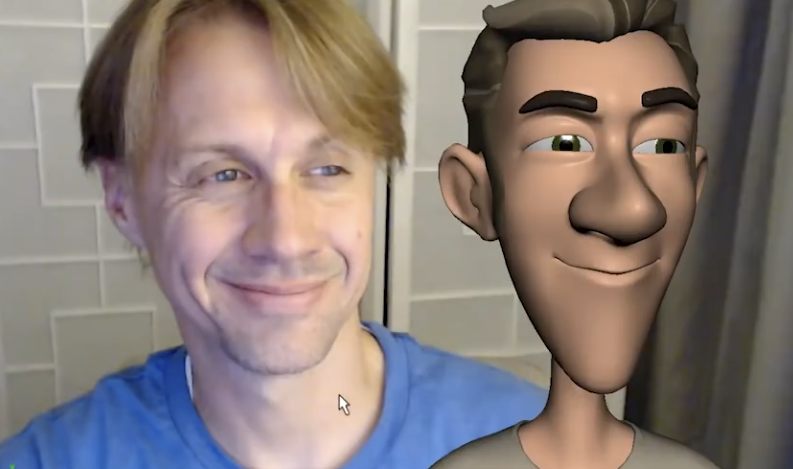
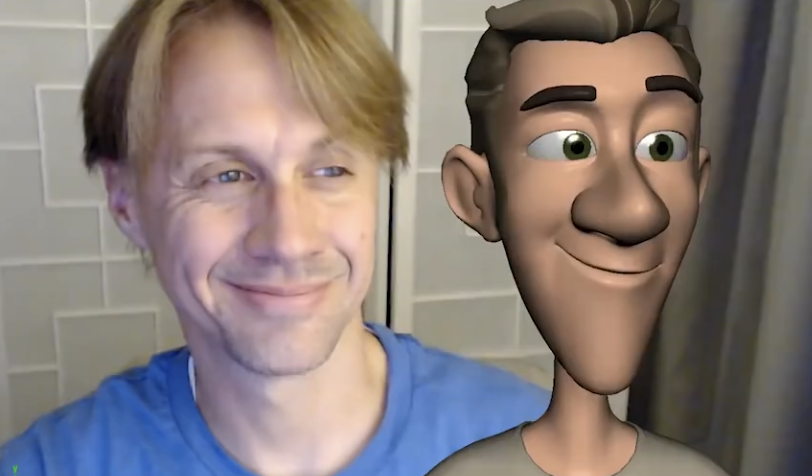
One aspect of facial expressions in animation that is often overlooked is the eyelids. Typically, focus is placed on the more noticeable features, such as the eyebrows. However, the eyelids are just as crucial in conveying the full range of human expressions – they work tandem with the brows to create cohesive and believable facial movements. In this snippet from a live AnimSchool lecture, instructor Scott McWhinnie discusses what the eye mask is and how important it is to understand how it works in order to create unified, appealing eye poses on your characters.

While it’s true that eyebrows do a lot of the heavy lifting when it comes to expressing feelings like surprise, anger, or joy, the eyelids are just as important. The lids support the brows by reinforcing the emotional tone. If the eyebrows are raised in surprise, the eyelids should also reflect that motion—gently lifting or widening in response. If the brows are furrowed in anger, the eyelids will typically compress or narrow in the same direction. In the example below of Flynn Rider’s expression board, note how the eyebrows are the main driver of the emotion, while the shape of the eyelids supplement it by telling the same story.

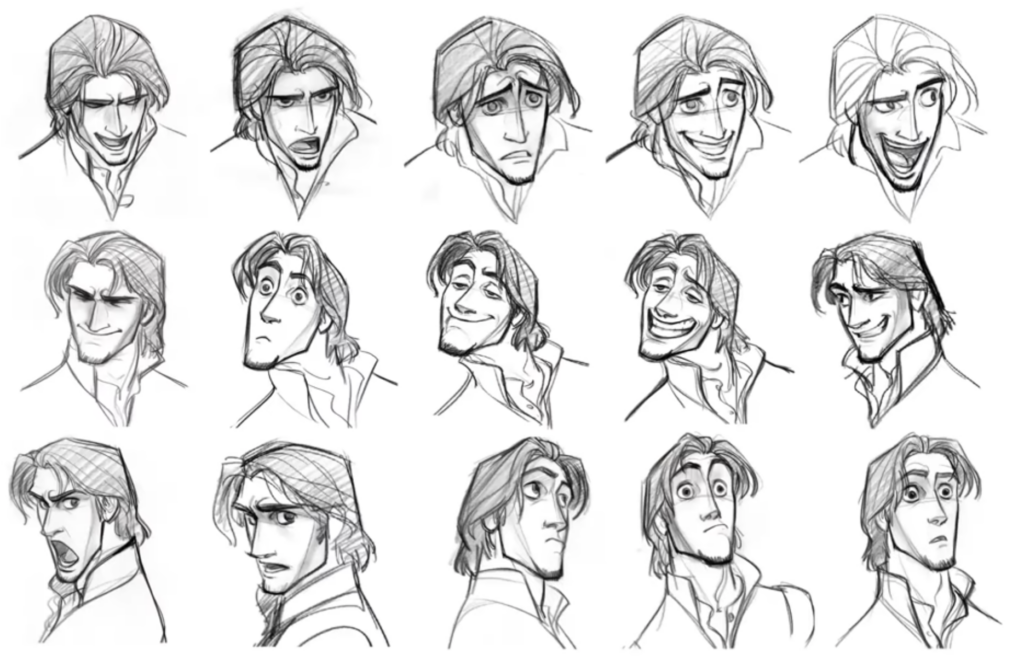
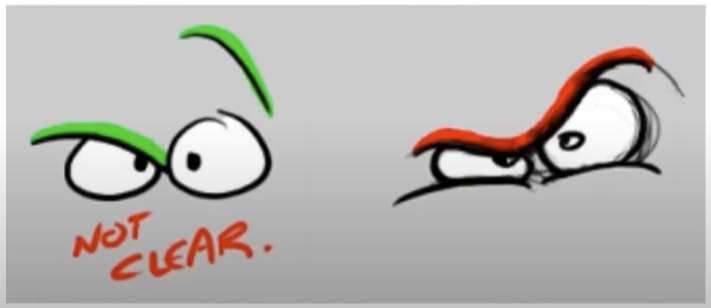
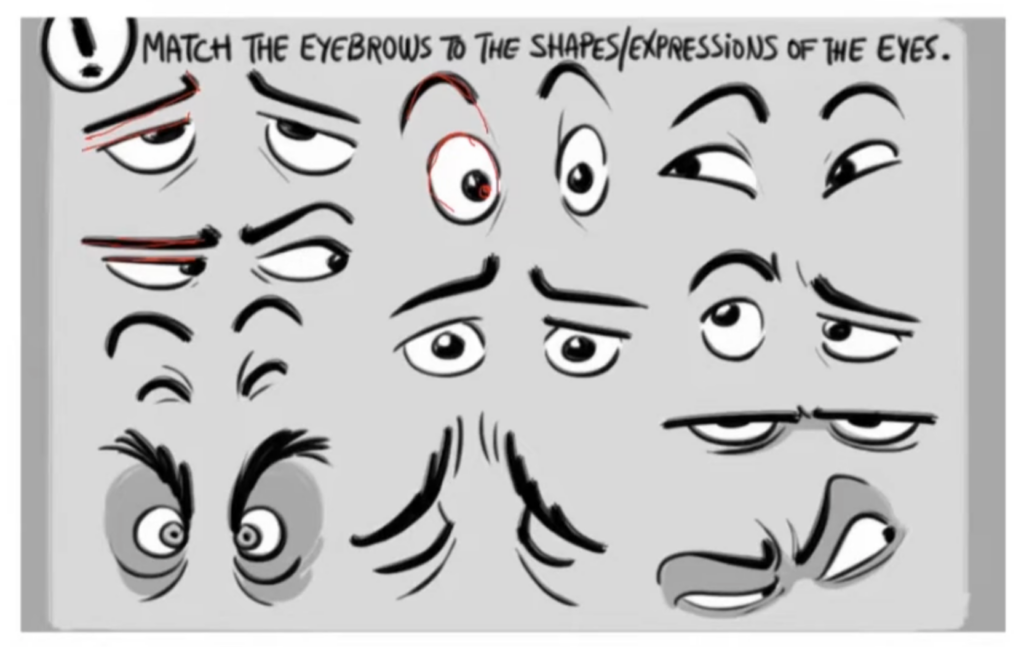
The key here is unity – the brows and lids should not contradict one another. Working together and supporting each other allows them to convey a clear and homogenous emotion.

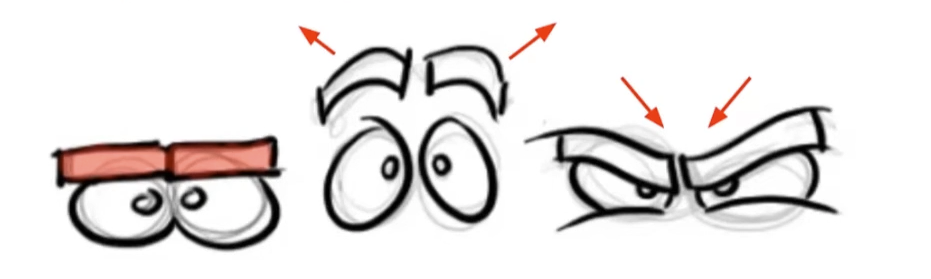
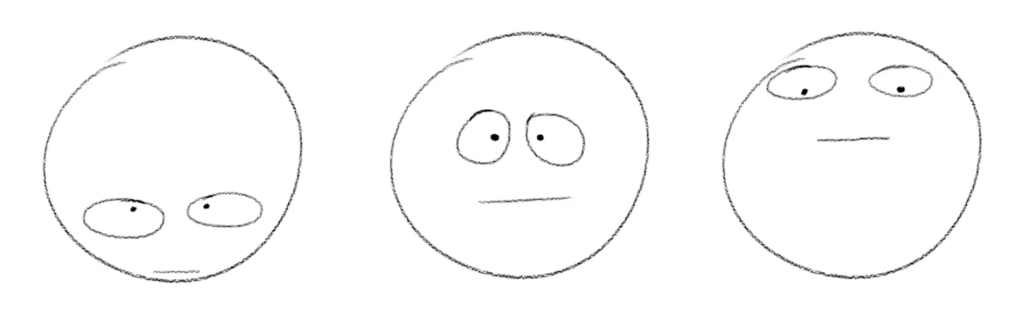
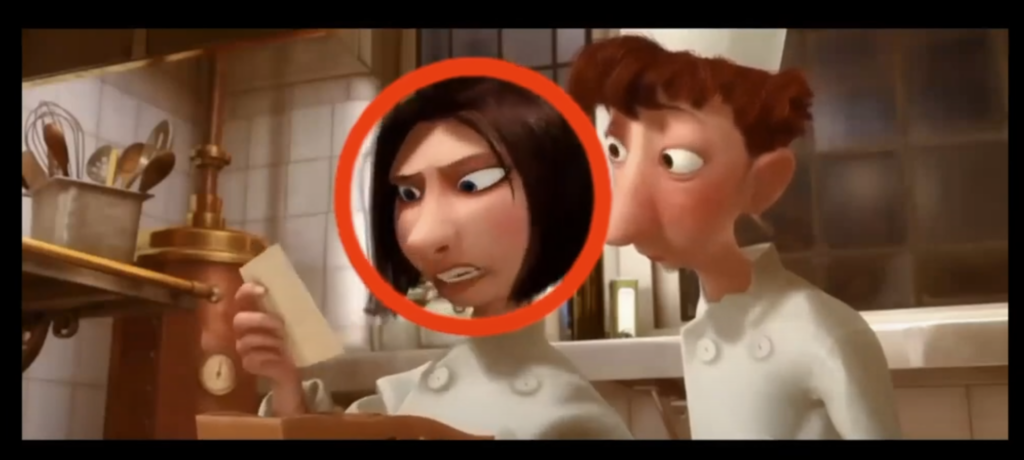
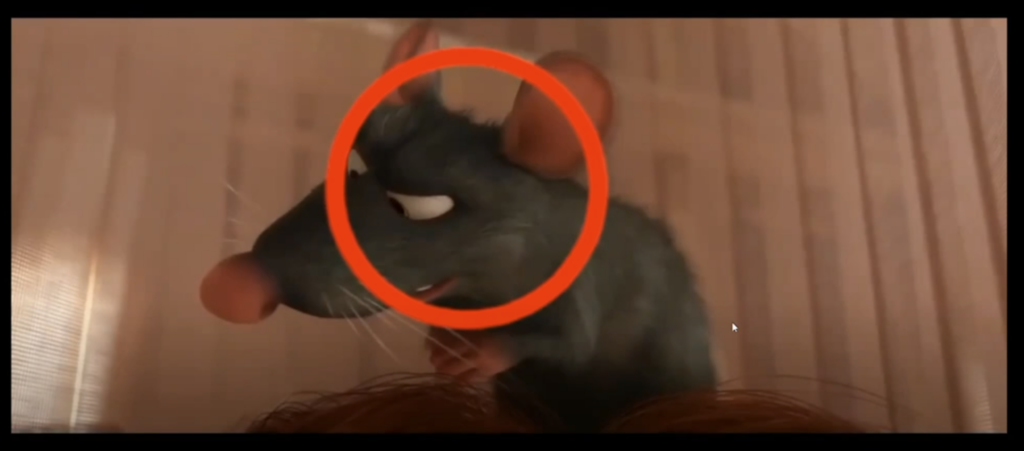
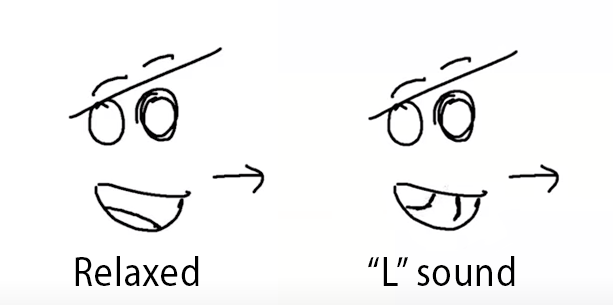
The eye mask typically refers to the entire region around the eyes, including the brows, eyelids, and surrounding area. By thinking of these parts as a whole, singular unit, it becomes more easy to ensure the consistency of expressions. When creating an expressions in animation, it’s important to consider how the entire eye mask stretches or squashes. For example, in a surprised or shocked expression, the eyes and eyebrows will both stretch upward. The eyelids will widen, the brows will arch, and the whole eye area will elongate. Conversely, for a more focused or determined expression, the eye mask may compress inward, with the lids narrowing and the brows angling downward.

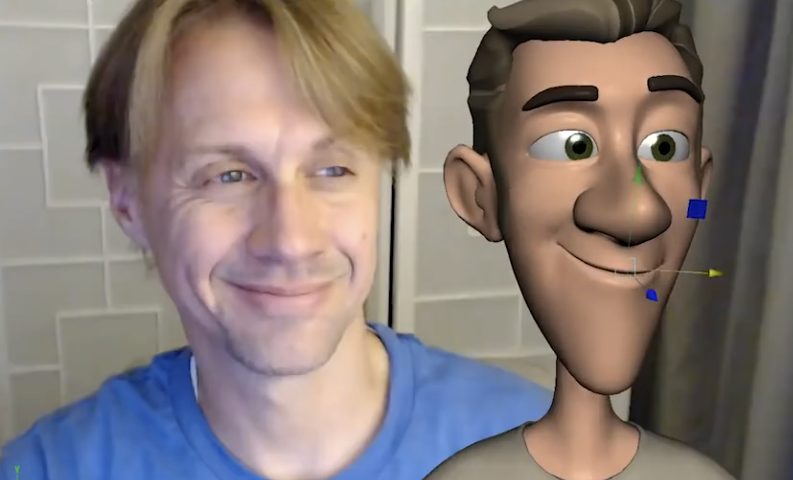
While symmetry is important for certain expressions, asymmetry can add a lot of depth and nuance to a character’s face. For example, when creating an angry or surprised face, one side of the eye mask may be stretched out, while the other side will be squished to convey more emotional tension. This slight asymmetry can make a character’s expression feel more natural and dynamic, as human faces rarely show perfectly symmetrical emotions. A subtle shift in the direction the character is facing helps reinforce the character’s gaze and emotional direction, guiding the viewer’s perception and keeping the expression grounded.

To create believable expressions, treat the brows and eyelids as part of the same system. By using the eye mask concept, all elements of the face can work together harmoniously to express the same emotion. This leads to more natural, unified expressions.


Watch the full clip from an AnimSchool lecture here: 

At AnimSchool, we teach students who want to make 3D characters move and act. Our instructors are professionals at film and game animation studios like Dreamworks, Pixar, Sony Pictures, Blizzard & Disney. ⁠Get LIVE feedback on your Animation from the pros. Learn more at https://animschool.edu/

Caricaturing the Face: Exaggerated Expressions

One of the biggest challenges in designing facial expressions for animation lies in deciding how realistic or exaggerated the design should be. Interpreting and adapting real-life references plays an important role, but it’s also essential to understand when to push the boundaries of realism to better convey emotion and expression. In this clip from a live AnimSchool lecture, instructor Hans Dastrup demonstrates using a reference image to create a more stylized and appealing pose for the face.

One key to effective facial animation is understanding the balance between mimicking real-life expressions and adjusting them to suit the character and animation style. Avoid directly copying facial expressions from reference material without considering the unique needs of the character, as replicating a facial expression exactly as it appears in real life does not always translate well in animation. Mimicking expressions can often result in awkward or less appealing designs, especially if the goal is to achieve clarity and emotional impact.

Matching the reference exactly.

To create a more visually pleasing expression, subtle changes, like simplifying, are often necessary. For instance, in the process of creating a smile, adjusting the mouth shape and adding slight asymmetry can go a long way, as real human faces are inherently asymmetrical and can help maintain a more natural look. A smile in real life might have one side slightly higher than the other, and exaggerating this asymmetry can enhance the character’s expression.

When working with the eyes, it’s important to consider the character’s anatomy. In animation, characters often have larger eyes with exaggerated white areas, which can make them appear more expressive. However, it’s crucial to avoid pushing this too far, as extreme eye shapes can lead to unnatural or unsettling appearances. By adjusting the eye shape slightly, such as making the lower eyelid flatter, a more balanced and appealing look is created without overdoing the exaggeration.

Adjusted eye and mouth shapes to incorporate asymmetry.

Another important consideration is the character’s overall design. For instance, in a happy character, a more graphic and simplified mouth shape may work better than trying to replicate a realistic smile. Pushing the design in this way helps to exaggerate the emotion and adds visual clarity, making it more readable to the audience. The expression doesn’t have to be entirely unrealistic must be entirely unrealistic—it’s about finding the right level of push to enhance the emotion without distorting it beyond recognition.

Pushing the final expression.

While it’s important to consider real-life references, animation often requires tweaking those references to fit the style and emotional needs of the character. By simplifying, adding asymmetry, and adjusting features like the eyes and mouth, animators can create more engaging and believable facial expressions that convey the intended emotion. Ultimately, the goal is to find the balance between realism and stylization to craft a performance that resonates with the audience.


Watch the full clip from an AnimSchool lecture here: 

At AnimSchool, we teach students who want to make 3D characters move and act. Our instructors are professionals at film and game animation studios like Dreamworks, Pixar, Sony Pictures, Blizzard & Disney. ⁠Get LIVE feedback on your Animation from the pros. Learn more at https://animschool.edu/

Animating Eyebrows

Animating eyebrows plays a crucial role in conveying facial emotions and enhancing the overall appeal of animated characters. Though often overlooked, brows are essential in portraying mood and personality. In this clip from a live AnimSchool lecture, instructor Justin Weg explains the importance of eyebrow animation.

When animating eyebrows, think of them as a single unit – try to connect them with a line flowing into one another, while matching the shape/expression of the eyes. This will create a smooth and cohesive look, which is key in creating a natural, expressive character. The brows tend to react to the inner emotional state of the character, so connecting them helps maintain this unity.

Additionally, keep in mind that brows are very dynamic shapes, with the inner sections being more active and expressive than the outer. When the brows go down, the inner brows tend to crunch in. When the brows go up, they will pull out.

One key technique in animating brows is having them lead the head/body movement. When a character is about to speak or make a dramatic gesture, the brows often move ahead of the rest of the face. This can help with timing, allowing the character’s expression to build up before the full action, such as opening the mouth. For example, a character about to speak might raise their brows before they open their mouth, signaling anticipation.

Facial expressions can be either voluntary or involuntary. Involuntary reactions, like surprise or fear, tend to make the brows more symmetrical. Voluntary emotions such as curiosity, suspicion, or contempt tend to create asymmetry in the brow movements. A character questioning something, for example, will raise both brows evenly, while a character expressing doubt or confusion might raise one brow more than the other, creating an asymmetrical look.

When animating brows, arcs are important for creating more natural movement. Instead of linear motion, which feels stiff, adding arcs to the brow movements introduces fluidity to the animation. For instance, when lowering the brows, the outer brow usually leads, and the inner brow follows in a smooth arc. The same principle applies when raising the brows—start with the outer brow, and let the inner brow follow, creating a wave-like effect.

To enhance the realism of the movement, it can be helpful to offset the X and Y positions of the brows. This offsetting technique creates a more dynamic motion, especially when working with diagonal movements. By including slight delays between the movements of the inner and outer brows, you can achieve a more organic feel.

By focusing on the unity, expression, and subtlety of brow movements, animators can bring a new level of depth to their character animation. Refining the movement of the brows is an essential skill for any animator looking to create more relatable and emotionally engaging characters.


Watch the full clip from an AnimSchool lecture here: 

At AnimSchool, we teach students who want to make 3D characters move and act. Our instructors are professionals at film and game animation studios like Dreamworks, Pixar, Sony Pictures, Blizzard & Disney. ⁠Get LIVE feedback on your Animation from the pros. Learn more at https://animschool.edu/

Animating the Head

When animating a character’s head, think of the head like a stage and the face as the actors. The two must work together in order to convey a believable performance the audience can understand and connect with. In this clip from a live lecture, AnimSchool instructor Ricky Renna discusses some tips on how to animate the head in order to allow the audience to follow the character’s facial changes and emotions.

Small adjustments to head positioning can completely alter the mood or message of a shot. A subtle head tilt, for instance, can express a range of emotions. A slight tilt downwards may indicate humility or insecurity, while a slight tilt upward can convey confidence or even superiority. By controlling the head’s direction, animators can manipulate how a character is perceived, whether they’re viewed as an equal, an antagonist, or someone who feels subservient. For instance, in scenes where a character looks straight ahead, the tone might come across as neutral or straightforward. However, when the same line is delivered with the head tilted slightly, it can introduce an entirely new layer of meaning. It’s all about the small changes—animators don’t need to overdo it with exaggerated head movements. A little goes a long way in shaping the audience’s emotional response.

In the above example, though the head is very simplistic and quickly drawn, audiences can quickly recognize the difference in emotion and intention from something so basic as the tilt of the head.

Another critical aspect to pay attention to in animation is head stabilization. Birds, for example, have acute control over their heads, allowing them to stay focused on their prey while in flight. Animators strive to replicate this level of stability to maintain focus on a character’s face. In scenes where the head moves too dramatically, it can pull the viewer’s attention away from the character’s facial expressions or dialogue, making the scene harder to follow.

A prime example of controlled head movement in animation can be seen in the character Colette from Ratatouille. While delivering her lines, Colette’s head remains steady, keeping the audience’s attention on her eyes and the expression she’s conveying. Even as her emotions shift—from apathetic to more animated—her head stays focused, allowing her subtle facial expressions to communicate her changing feelings without overwhelming the viewer with unnecessary movement.

In the world of animation, there’s a technique known as eye trace, where the director ensures that the focus remains on the same point of interest across different shots. This technique helps prevent the audience from losing focus when the scene changes. For instance, when the camera shifts to Remy inside Linguini’s hat, the focus remains on the same point of interest, making the transition seamless and keeping the viewer engaged.

Note that, in the previous shot, Colette’s face is in the red circle; as it cuts to Remy, his face remains in the red circle – this technique is called eye trace.

Ultimately, the key to effective head movement in animation is balance. A steady head allows for clear, expressive communication while preventing distraction. Whether you’re animating a confident antagonist or a shy protagonist, controlling head movement is an essential tool for bringing your characters to life.


Watch the full clip from an AnimSchool lecture here: 

At AnimSchool, we teach students who want to make 3D characters move and act. Our instructors are professionals at film and game animation studios like Dreamworks, Pixar, Sony Pictures, Blizzard & Disney. ⁠Get LIVE feedback on your Animation from the pros. Learn more at https://animschool.edu/

Student Spotlight: Lena Zahoruiko

AnimSchool graduate Lena Zahoruiko discusses her experience creating an emotionally driven animation using audio from the film Midnight Sun (2018). She dives into her process from start to finish, addressing the changes made and how that impacted the final scene. Her shot was featured in the 2024 AnimSchool Student Showcase.

Zahoruiko explains that this shot was her first ever attempt at a dialogue shot. She was cautiously excited about trying something new, and wanted to create a more emotional shot about two individuals—in this case, sisters—parting ways.

Zahoruiko adds that the biggest challenge that she ran into was filming reference footage – after discussing with her class, many mentioned that it would be beneficial if she had real crying to help push the emotional aspect of the shot. As a result, she cried on more consecutive days than she had ever before.

“It took me, I think, around three days to come up with the final version,” she says.

Initially, Zahoruiko mentions, her animation lacked small gestures, and felt a bit stiff because of it. To overcome this, she layered in more hand and arm movement, such as a sweeping motion with the hand. As she played with the balance of exaggeration and subtle movements, she ultimately learned that, for such an emotionally driven shot, “less is more.”

Watch her featured clip below:


At AnimSchool, we teach students who want to make 3D characters move and act. Our instructors are professionals at film and game animation studios like Dreamworks, Pixar, Sony Pictures, Blizzard & Disney. ⁠Get LIVE feedback on your Animation from the pros. Learn more at https://animschool.edu/

Student Spotlight: Fabiana Dell’Aquila

AnimSchool graduate Fabiana Dell’Aquila animated a scene using audio from the TV show “Desperate Housewives” (episode aired 2009), and details all the changes that occurred in her creative process. Her shot was featured in the 2024 AnimSchool Student Showcase.

Dell’Aquila explains that, when starting the shot, she immediately knew that she wanted to work on a funny shot with personality. She got the chance to dive into a character and act as she never would in real life, which she saw as a self-confidence boost.

“I just had so much energy, so much desire to play with a bit of a more funny timing,” she notes.

Initially, Dell’Aquila had started with more of a slouched pose for her character. However, her instructor gave her a quick sketch of a much more dynamic pose, having the character adjust and admire her own appearance in a handheld mirror. From that drawing, she rebuilt the animation and added more dynamic movement within the arms. She mentions that she ultimately had a lot of fun playing with smaller, more subtle animations of the hands and face.

Watch her featured clip below:


At AnimSchool, we teach students who want to make 3D characters move and act. Our instructors are professionals at film and game animation studios like Dreamworks, Pixar, Sony Pictures, Blizzard & Disney. ⁠Get LIVE feedback on your Animation from the pros. Learn more at https://animschool.edu/

The Basics of Facial Animation

AnimSchool instructor Scott McWhinnie starts the discussion on facial animation by breaking down the face into its three main components, the eyes, brows, and mouth. 

When learning to animate, most students will slowly build their knowledge over time and, typically, facial animation is saved for an advanced level. This can lead many new animators to approach facial animation with fear and trepidation. However, just like the rest of the body, the face can be animated successfully by employing the 12 principles of animation and approaching the process thoughtfully and intentionally.


Speed

Eyes and Lids

  • Pupils and lids move very quickly, typically 1-2 frames for movement.
  • Eye darts
    • Note that eye movements are typically very jumpy (unless tracking a moving object) because the eyes need to “lock onto” something
  • Blinks
    • Down movements are quicker than ups
    • Try to offset the movements to help relieve the robotic feeling

Scott McWhinnie uses examples from The Incredibles 2 to demonstrate how quickly each part of the face moves as well as how they influence one another by counting the amount of frames used for each action.

Brows

  • Brows can move slower than the eyes
  • Typically move sharply but can move intentionally slower
    • At times this could have jumpy movements if moving slowly
  • Generally staying in 3-10 frame range for speed, but can depend on the situation/context – not as hard of a rule as with the eye speed

Mouth

  • Variation in speeds – depends on the situation/context
  • With lip sync, things are going to move fast
    • This is why animators try to live within an expression and animate the lip sync within that pose rather than changing the whole pose of the mouth
  • Hold the M, B, and P shapes for at least 2 frames
  • Try not to have the mouth open up for just one frame and then close (sometimes the closed shapes don’t always have to be closed all the way)
  • If the mouth moves very slowly (which it can), it will feel more deliberate and purposeful

Understanding how the major facial components independently move while influencing one another will allow an animator at any skill level to improve how they approach facial animation.


Watch the full clip from an AnimSchool lecture here: 

At AnimSchool, we teach students who want to make 3D characters move and act. Our instructors are professionals at film and game animation studios like Dreamworks, Pixar, Sony Pictures, Blizzard & Disney. ⁠Get LIVE feedback on your Animation from the pros. 
Learn more at https://animschool.edu/

Posing the Mouth in 3D Animation

Whether you are animating a complicated Lip Sync or just posing a character to look their best, there are two details that are often overlooked: the teeth and the tongue. 

When a character has their mouth closed, their teeth can be ignored. What about when they are smiling, laughing, crying, or any other open-mouthed emotion? That’s when the teeth come into play. 

The answer is simple: don’t get caught up in 3D – take it back a step and think about what looks most appealing. AnimSchool instructor Rohini Kumar explains to approach it as a 2D drawing and think about the small details as a sketch artist would. By combining that perspective with the insight of an animator, you can create more appealing asymmetrical poses that not only look right, but feel right in motion.


Teeth

  • Favor the upper teeth for a smiling or relaxed mouth, lower teeth can sometimes follow the opposite arc
  • Shape the teeth to follow the curvature of the mouth/lips
  • cheat the natural position of t he teeth
    • Seeing the back teeth breaks appeal – rotate the upper teeth to hide the back
  • Create symmetry between the shape of the teeth and the mouth corners
  • Distance between the teeth lines should be similar
  • In more subtle smiles, create appeal by converging the teeth and mouth corners

Tongue

  • Very rare to open mouth and not see the tongue except in extreme angles
  • More appealing to show the tongue than a black gap, but may depend on the shape of the sound
  • Tongue helps to hit your lip-sync, especially when talking rapidly

Rohini explains to treat the tongue like a drawing, rather than a 3D object. Keep it simple – ensure that the curvature of the tongue is clear and that the viewer does not see any extraneous geometry at the base of the tongue, behind the tongue, etc. In a more relaxed position, the tongue can be “cheated” to sit back and tilted in the direction that the character is looking.

Additionally, consider when the tongue may be distracting from the overall animation – Rohini mentions that “N” and “S” sounds can often get away with not showing the front of the tongue flashing in and out to reduce distractions.


Watch the full snippet from an AnimSchool class lecture here:

At AnimSchool, we teach students who want to make 3D characters move and act. Our instructors are professionals at film and game animation studios like Dreamworks, Pixar, Sony Pictures, Blizzard & Disney. ⁠Get LIVE feedback on your Animation from the pros. 
Learn more at https://animschool.edu/