Tag: asymmetry

Posing the Mouth in 3D Animation

Whether you are animating a complicated Lip Sync or just posing a character to look their best, there are two details that are often overlooked: the teeth and the tongue. 

When a character has their mouth closed, their teeth can be ignored. What about when they are smiling, laughing, crying, or any other open-mouthed emotion? That’s when the teeth come into play. 

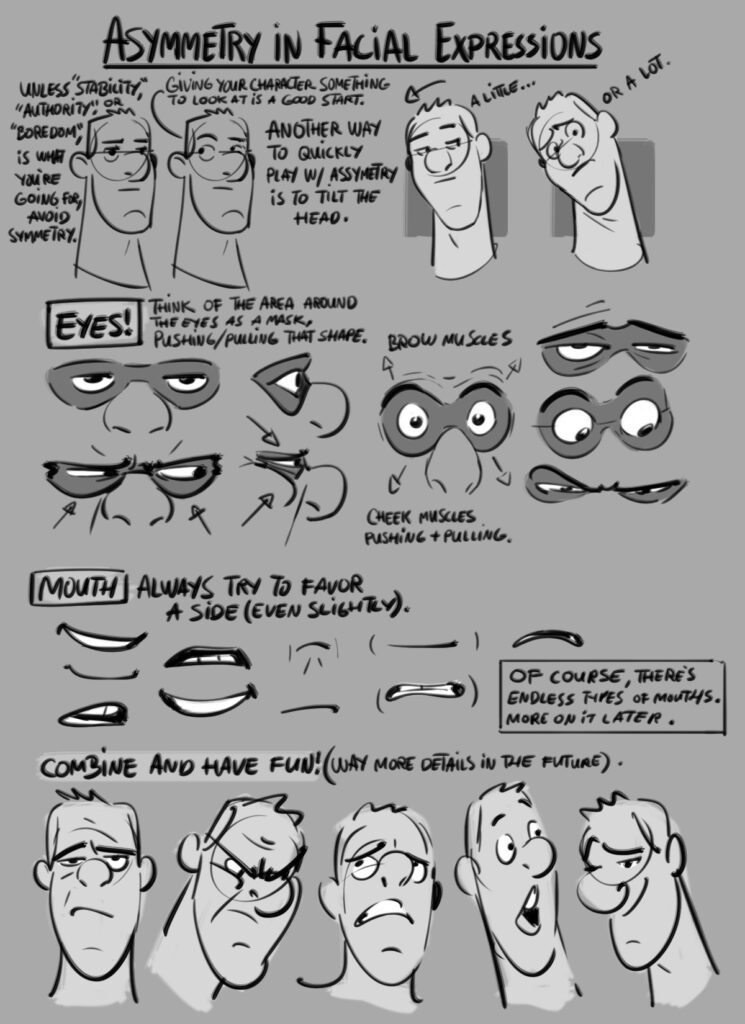
The answer is simple: don’t get caught up in 3D – take it back a step and think about what looks most appealing. AnimSchool instructor Rohini Kumar explains to approach it as a 2D drawing and think about the small details as a sketch artist would. By combining that perspective with the insight of an animator, you can create more appealing asymmetrical poses that not only look right, but feel right in motion.
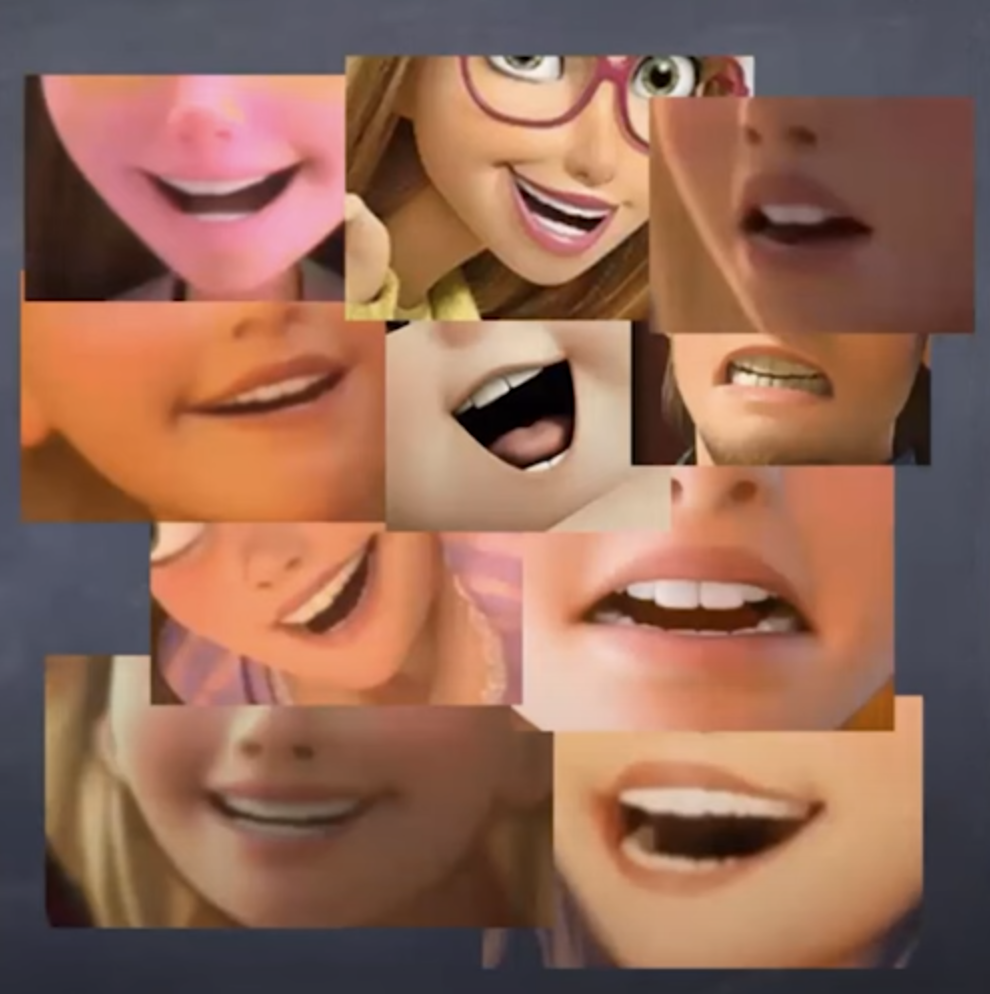

Teeth

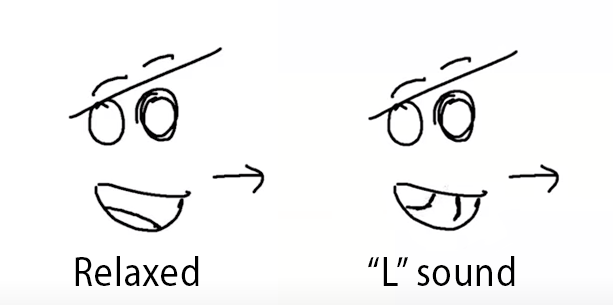
  • Favor the upper teeth for a smiling or relaxed mouth, lower teeth can sometimes follow the opposite arc
  • Shape the teeth to follow the curvature of the mouth/lips
  • cheat the natural position of t he teeth
    • Seeing the back teeth breaks appeal – rotate the upper teeth to hide the back
  • Create symmetry between the shape of the teeth and the mouth corners
  • Distance between the teeth lines should be similar
  • In more subtle smiles, create appeal by converging the teeth and mouth corners

Tongue

  • Very rare to open mouth and not see the tongue except in extreme angles
  • More appealing to show the tongue than a black gap, but may depend on the shape of the sound
  • Tongue helps to hit your lip-sync, especially when talking rapidly

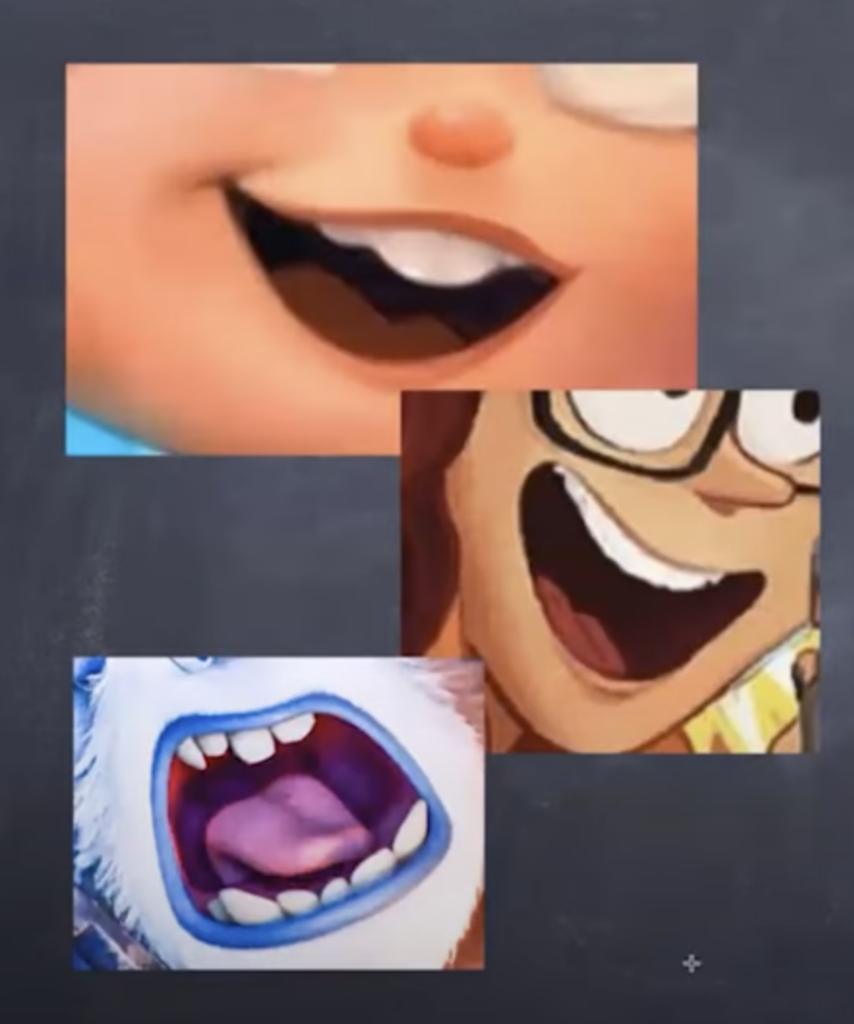
Rohini explains to treat the tongue like a drawing, rather than a 3D object. Keep it simple – ensure that the curvature of the tongue is clear and that the viewer does not see any extraneous geometry at the base of the tongue, behind the tongue, etc. In a more relaxed position, the tongue can be “cheated” to sit back and tilted in the direction that the character is looking.

Additionally, consider when the tongue may be distracting from the overall animation – Rohini mentions that “N” and “S” sounds can often get away with not showing the front of the tongue flashing in and out to reduce distractions.


Watch the full snippet from an AnimSchool class lecture here:

At AnimSchool, we teach students who want to make 3D characters move and act. Our instructors are professionals at film and game animation studios like Dreamworks, Pixar, Sony Pictures, Blizzard & Disney. ⁠Get LIVE feedback on your Animation from the pros. 
Learn more at https://animschool.edu/

Crafting the Perfect Animated Pose

In animation, the significance of well-executed poses cannot be overstated. Posing is the foundation upon which character expression, emotion, and storytelling are built. A carefully crafted pose communicates the essence of a character’s personality and intentions, providing vital visual cues to the audience.

AnimSchool instructor Aleksander Kolev explains how to find appealing poses, and how they can be used effectively in your shots.


Asymmetry
Having both asymmetry in the face and body will keep your poses interesting. Depending on how realistic or unrealistic your shot is, you can push and pull exaggeration in certain places to create asymmetry. This can include subtle changes like raising an eyebrow and tilting a hip, or more extreme changes like stretching the eyes and head. 

Aleksander also mentions that he uses > and < as a guide to dictate directional poses, such as where a character is looking. For instance, if a character looks to the left, the facial features and head will be positioned so that implied angles form in a > shape to drive the character’s action. (See pink draw-over lines below)


Shapes
Shapes help to define and simplify poses. While it may seem like more of a 2D concept, thinking with shapes can be helpful to create contrast throughout different poses, in both 2D and 3D. Aleksander shows an example of a scene he worked on from Hotel Transylvania, in which a round mummy character, Murray, dances. He explains how he pushed the stretching and squashing of the character to imitate vase-like shapes, and posed the arms in such a way to create flow throughout the form. 


Line of Action
The line of action is the most general line of flow through a character’s body. It helps to focus the audience’s attention, give the character energy and flow, and clarify the character’s pose. Tom and Jerry offers some great examples of utilizing the line of action to depict how energy is transferred with clear posing and action.


Silhouettes
Silhouettes are essential in defining a clear idea of who the character is and what they are doing. When the audience can identify the character and action just from looking at the blacked out shape, it means you have a good pose. Oftentimes silhouettes can be simplified into a general shape that defines the flow and overall form, but more complex and less cartoony animations may result in more complex silhouettes as well. Watch out for tangents as poses and silhouettes get more complex with overlapping objects! Keeping readability in mind is key for crafting any pose.


Watch the full excerpt from a live AnimSchool lecture below:

At AnimSchool, we teach students who want to make 3D characters move and act. Our instructors are professionals at film and game animation studios like Dreamworks, Pixar, Sony Pictures, Blizzard & Disney. ⁠Get LIVE feedback on your Animation from the pros. 
Learn more at https://animschool.edu/