Tag: animation curves

How to Spline Your Shot

As you take your shot from stepped to spline animation, you begin to refine the timing and spacing of each movement – these are critical in ensuring that the character’s actions feel natural and engaging. In this snippet from an AnimSchool lecture, instructor and professional animator Jason Behr works directly on a student’s file to demonstrate his process with the transition to spline animation.

Start by tightening up the timeline and addressing any inconsistent movements. Shift keys to refine the timing and spacing of frames. Pay attention to where the spacing starts to feel “drifty” or “swimmy” and make adjustments to avoid that. Additionally, if a movement feels too even or stiff, play around with the spacing and cushioning between poses. Stretching certain frames can make for smoother transitions and help the overall animation feel more dynamic – avoid robotic and uniform timing.

Next, add in some anticipation and overlap. Pay attention to where small movements can help prepare the audience for an upcoming action and allowing different parts of the character’s body to move at slightly different times or drag behind. For instance, consider adding small shifts or pauses in the character’s spine to allow time for other body parts, such as the head or arms, to react or move. This can help avoid stiff and mechanical motions.

As you adjust the movements of specific body parts, consider how all of the movements are balanced across the body. Pay attention to how each body part moves in relation to the entire character. Leading with the core can establish a strong base for the motion, allowing limbs to follow and creates more organic and fluid movement.

Finally, polish your animation. Begin refining details, such as overlap and arcs. Start with the most important elements, such as the head or spine, and gradually move outward to ensure that the primary movements are clear and defined before adding more layers of complexity. Work to ensure that the movements between each key pose and spacing are as smooth as possible to achieve a polished and professional look.

Watch the full clip from an AnimSchool lecture here: 

At AnimSchool, we teach students who want to make 3D characters move and act. Our instructors are professionals at film and game animation studios like Dreamworks, Pixar, Sony Pictures, Blizzard & Disney. ⁠Get LIVE feedback on your Animation from the pros. Learn more at https://animschool.edu/

Cleaning Up Curves: Splining 101

Understanding the basics of splining your animation is key to crafting a smooth performance. AnimSchool instructor Ricky Renna explains how to spline a shot for beginner animators by demonstrating his method, in which the first step is cleaning up curves in the Graph Editor.


Before splining, Ricky recommends to ensure that your animation is stepped with keys on at least every three or four frames. Depending on the action, you may be able to get away with keying every five frames; however, the more keys you have, the more accurate your blocked animation will be to the final result. 

When you are ready to spline, select all of your keys and controllers and switch them to auto tangents. Ricky explains that he prefers to start cleaning up with the “biggest” controllers, such as the body and gimbal controls. He also mentions that he will split up the animation into sections and fully spline them one section at a time, rather than splining one controller through the entire animation, then moving on to the next. One section may range from 30-40 frames; however, depending on the animation, it may make more sense to split it up according to when one action ends and another begins, resulting in varying lengths.

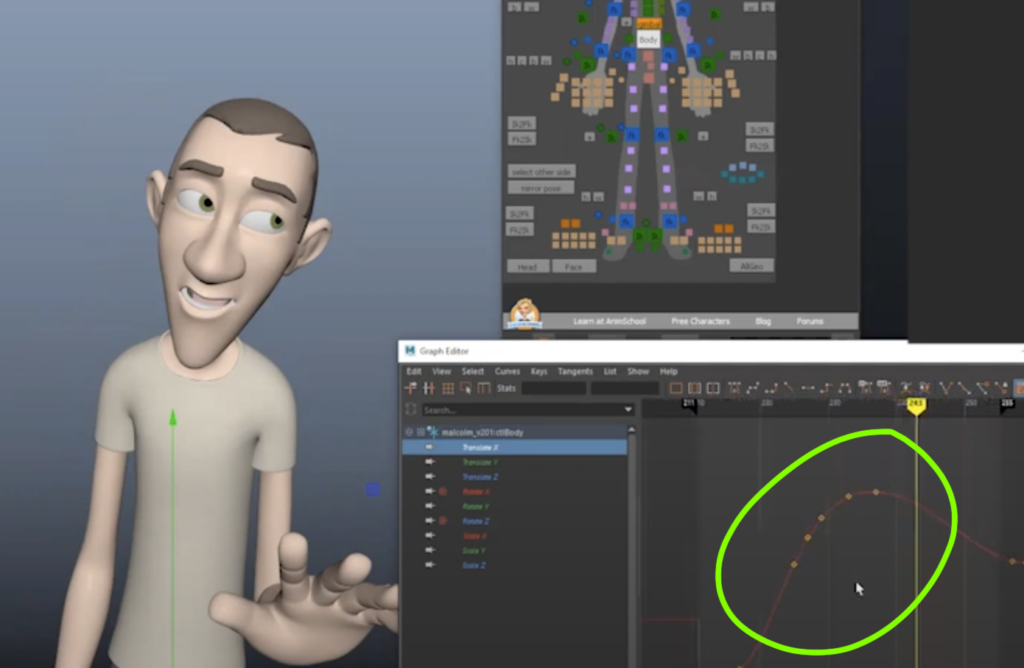
Before cleaning up the curves – note the overall shape of the curve

In the Graph Editor, the key is to look for smooth curves. Ricky explains that he simply addresses one channel curve at a time before moving onto the next: Translate X, Translate Y, Translate Z…

After cleaning up the curve – note the reduced keys and smooth shape

As you delete and rearrange keys, consider how the changed keys affect the shape of the curve: is it making it more jagged? If so, try adding some keys back in to make a smoother and cleaner action. Keep in mind that one of the most important aspects is whether or not your animation reads well: does adding in an extra key actually affect the feeling and believability of the overall animation? Don’t overcomplicate things! Simplify the curve, and ensure that the intended action still reads in the easiest way possible.


Watch the full clip from an AnimSchool lecture here: 

At AnimSchool, we teach students who want to make 3D characters move and act. Our instructors are professionals at film and game animation studios like Dreamworks, Pixar, Sony Pictures, Blizzard & Disney. ⁠Get LIVE feedback on your Animation from the pros. Learn more at https://animschool.edu/