Setting up a cinematic camera for game animation is a key skill. In this video, AnimSchool instructor and pro game animator John Paul “JP” Rhinemiller explains how to set up a camera for a moving character in a cinematic scene. He also demonstrates an exercise that covers a fundamental step in mastering camera setups.
JP explains that, generally, cinematic camera movement involves one main “key” move in either translation or rotation. In the early stages, it is crucial to ensure that the camera’s main movement feels good and works well in the scene. From there, more layers and complexity can be added.
Camera Setup
JP begins by demonstrating how to create a “slide” cinematic camera. He mentions that starting with the render settings is a good idea to ensure that the aspect ratio is correct and helps you understand the framing of your characters as you animate the camera. The settings he chooses are:
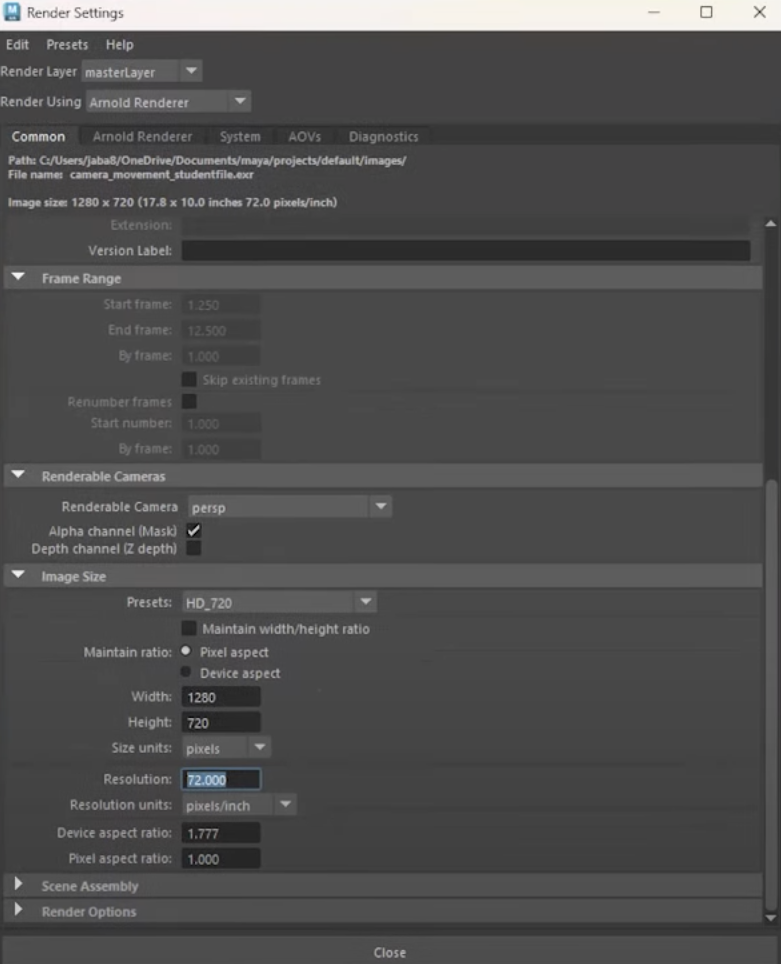
- Presets: HD_720
- Width: 1280
- Height: 720
- Resolution: 72 pixels/inch
He also adjusts the attributes of the camera to change the gate mask opacity in order to control what can be seen offscreen.
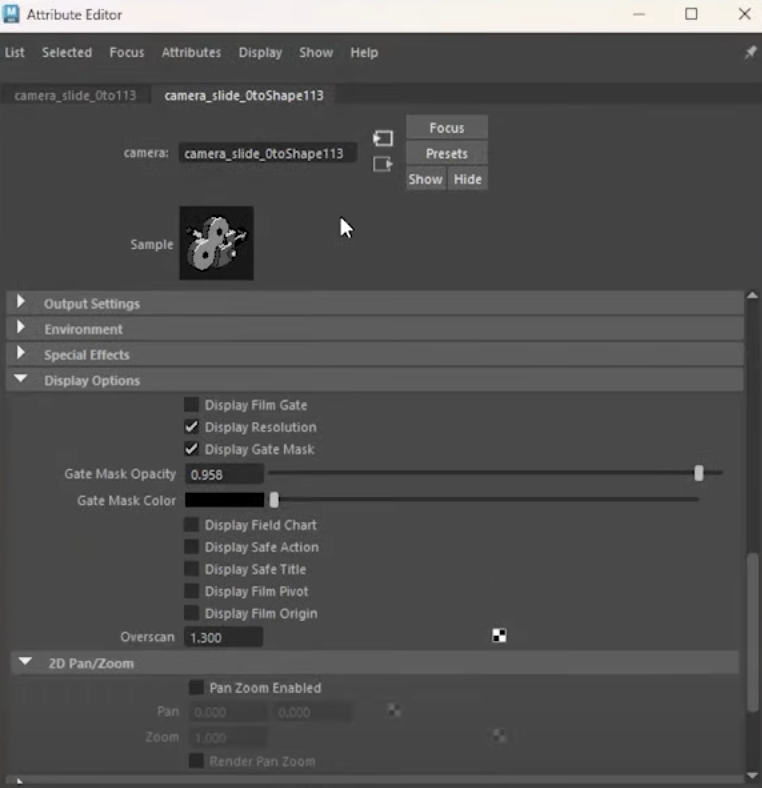
Animating a Slide Shot
To begin animating, JP first sets his first and last key frames for the desired camera and then addresses the curves. He notes that, by default, the camera curves will be set to auto tangent with slow out and slow in. Depending on the shot and what the next cut is, that may not be what you want; in this case, you would need to change those curves further.
For JP’s shot, he explains that he wants it to appear as though the camera is catching up to the character. To achieve this, he adds a few more frames at the beginning to first match the pace of the character’s movement and then have the character appear to pull ahead, making it seem like the character is ramping up in speed. He then further adjusts the position of the keys to get a smoother movement.
JP explains some fundamentals of a typical “slide” shot to keep in mind:
- Ensure that the character is always in frame
- The character appears to be motivating the camera to move, or slide
- The character should not get too far into the left/right third of the frame, where it seems like they are “pushing” the camera (unless there is motivation to do so)
- As the character slows down to a stop, the camera can keep moving for a few frames after
- The start and end frames should not be on the first/last keys on the shot – there should be continuous motion that goes beyond the shot, especially in a cut with action
Watch the full clip from an AnimSchool lecture here:
At AnimSchool, we teach students who want to make 3D characters move and act. Our instructors are professionals at film and game animation studios like Dreamworks, Pixar, Sony Pictures, Blizzard & Disney. Get LIVE feedback on your Animation from the pros. Learn more at https://animschool.edu/

