Tag: 3D Page 2 of 4

Student Spotlight: Jonathan Gibney

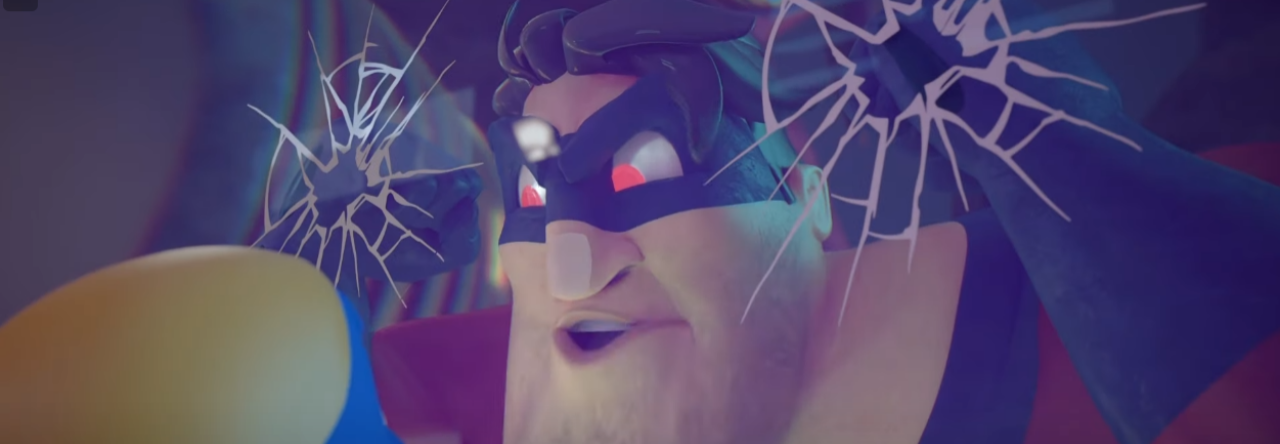
AnimSchool student Jonathan Gibney discusses his experience and walks through the process of animating his shot featured in the 2024 AnimSchool Student Showcase. Using audio of Willem Dafoe’s monologue from The Lighthouse (2019), Jonathan explains how he crafted a villainous pirate performance.

Jonathan explains that, while he filmed a reference video for his animated shot, much of what he actually used is not on video. Rather, if he needs to, he will simply stand up from his desk and act out the shot in order to understand first hand how certain body parts move in the scene.

For Jonathan, the biggest challenge within the shot was grappling with the moving camera, as it affected animation arcs and screen space. In as early as his blocking phase, he had the camera movement planned out to allow for more freedom with the character.

To create an antagonistic character with villainous qualities, Jonathan and his instructor bounced various ideas off one another and adjusted the animation. Jonathan mentions that, in the beginning, the villain was simply going to cut the rope early on, immediately dropping the other character into the ocean. However, this was later changed to have the villain hold on to the rope after cutting it and deliberately releasing it later to maintain tension, play with shape language, and reflect how the choice—and life of the other character—is in his hands.

Watch his featured clip below:

Watch the full AnimSchool Student Showcase Livestream here:


At AnimSchool, we teach students who want to make 3D characters move and act. Our instructors are professionals at film and game animation studios like Dreamworks, Pixar, Sony Pictures, Blizzard & Disney. ⁠Get LIVE feedback on your Animation from the pros. Learn more at https://animschool.edu/

Student Spotlight: Daniela Lobo Dias

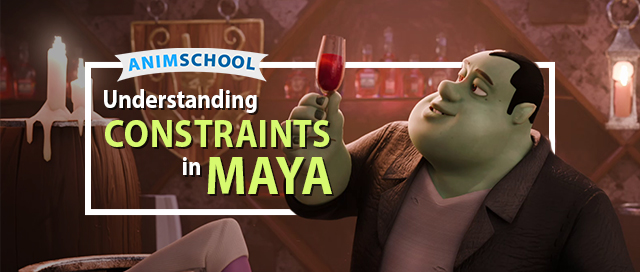
AnimSchool student Daniela Lobo Dias shares her perspective and offers behind-the-scenes insight on animating one of her shots shown in the 2024 AnimSchool Student Showcase. Featuring audio from a clip of a professional ice cream taste tester, Daniela discusses how she transforms the character into a charming sommelier with a taste for blood.

Daniela mentions that she particularly enjoys the workflow of starting in stepped animation, then later filling in the gaps and transitioning to splined. This allowed her to focus on the main poses and their silhouettes before slowly adding in-betweens as the animation became more polished.

She also explains how she thought outside of the box to achieve the look of swirling liquid in a glass without particle simulation by creating blend shapes and animating geometry.

“This was very much one of those labor of love shots where I was just really having fun with it the entire time. Despite being very hard on myself, at the end of the day I still really enjoyed the shot.” – AnimSchool student Daniela Lobo Dias

Watch her featured clip below:

Watch the full AnimSchool Student Showcase Livestream here:


At AnimSchool, we teach students who want to make 3D characters move and act. Our instructors are professionals at film and game animation studios like Dreamworks, Pixar, Sony Pictures, Blizzard & Disney. ⁠Get LIVE feedback on your Animation from the pros. Learn more at https://animschool.edu/
Student Spotlight: Carl Nyasore

In this clip from the AnimSchool 2024 Showcase Livestream, Carl Nyasore talks about his process behind what he describes as one of his “best shots at AnimSchool.” Pulling inspiration from Disney movies like Encanto, studying shots frame by frame, and utilizing AnimSchool’s network of instructors currently working in the industry all played a critical role in helping his shot shine.

Carl explains that working on his shot taught him to always look for something new to learn. Being open to exploring new styles, practicing, and talking to others about your craft is how growth is achieved.

For his shot featured in the 2024 AnimSchool Showcase, Carl mentions that he thoroughly examined Disney’s Encanto and took his shot to General Reviews to aid in refining his smooth transitions, polishing flourishing actions, and making other small changes to make a big impact.

“Before this class, I didn’t know how to do things like head accents and leading action, so I learned a lot from just studying animated films. That’s why it turned out to be one of my best shots at AnimSchool.” – AnimSchool student Carl Nyasore

Watch his featured clip below:

Watch the full AnimSchool Student Showcase Livestream here:


At AnimSchool, we teach students who want to make 3D characters move and act. Our instructors are professionals at film and game animation studios like Dreamworks, Pixar, Sony Pictures, Blizzard & Disney. ⁠Get LIVE feedback on your Animation from the pros. Learn more at https://animschool.edu/
Student Spotlight: Noemi Rajczyba

In this clip, AnimSchool student Noemi Rajczyba used dialogue from the 2006 feature film The Break-Up to create what she called a “funny, joyful, singing” moment that shows her character singing in a shower along to “Owner of a Lonely Heart” by 1970s progressive rock band Yes.

Noemi discusses her experience working on the shot for her facial performance class, coming up with entertaining dance moves to reimagine the scene.

Noemi’s animation was recently featured in the 2024 Student Showcase: “The opportunity to be featured in this showcase alongside my peers is a huge honor. I can’t help but think it’ll lead to even bigger things in my animation career.” – AnimSchool student Noemi Rajczyba

Watch her featured clip below:

Watch the full AnimSchool Student Showcase Livestream here:


At AnimSchool, we teach students who want to make 3D characters move and act. Our instructors are professionals at film and game animation studios like Dreamworks, Pixar, Sony Pictures, Blizzard & Disney. ⁠Get LIVE feedback on your Animation from the pros. Learn more at https://animschool.edu/
Common Maya Mishaps

Whether you’re a modeler, a lighter, a rigger, or an animator, the one software we all share is Maya. Maya is an incredibly powerful tool that can help you as an artist achieve amazing, incredible, and unimaginable things, but with great power comes great… troubleshooting. We’ve all been there: we open Maya and something unexpected occurs. Most of the time a quick Google search will lead you back in the right direction, but sometimes the problem is just so odd and confusing that you are at a complete loss as to what to do next. In this short lecture, AnimSchool Instructor Luis Labrador highlights just a few of the most common Maya mishaps he has seen students struggle with over his career. No matter your specialty or how far in your career you are, these tips could save you time and energy that you can now spend on making your next masterpiece.


Clipping Plane

When an object is extremely small and the user attempts to zoom in, the object may appear to cut open or clip through the perspective camera. The reverse can also happen when objects are extremely large. To remedy this, open the camera’s attributes and adjust the Near Clip Plane (default is 0.1) and the Far Clip Plane (default is 10000) by multiples of 10. In Luis’s example, he sets the Near Clip Plane to 0.001, which allows him to zoom in closer to the small object without the clipping occurring. When zooming out, you may need to increase both the Near Clip Plane to prevent shading artifacts, and increase the Far Clip Plane to prevent “losing” the object as it clips from behind.

Exporting/Importing as OBJ

Sometimes, you may find that something in your file has changed unexpectedly, resulting in various issues across your project. The best way to “bleach” and clean up your project, as recommended by Luis Labrador, is to export as an OBJ file and reimport it into a fresh Maya file. To do so, first ensure that OBJ exports are enabled in the Plug-in Manager by checking the “Loaded” and “Auto load” boxes. Then, the OBJ option should appear in the drop-down list of export file types. When exporting as OBJ, two file types will be exported: OBJ and MTL. The MTL file is a reference file that can typically be ignored.

OBJ files work well for “resetting” your project because, in 3D, it is the most basic file type, and only represents coordinates of points in space.

Maya ASCII vs Maya Binary File Types

When saving out a Maya file, you may come across two main file types: Maya ASCII (.ma) and Maya Binary (.mb). Maya ASCII files are generally “heavier,” containing data that allows the file to be opened in test editors that have the ability to change the version of Maya being used. Maya Binary files are much lighter and more efficient in comparison, as they store the data as 1s and 0s. Luis explains that neither are technically “better” to use – it’s up to personal preference.


Watch the full clip from an AnimSchool lecture here: 

At AnimSchool, we teach students who want to make 3D characters move and act. Our instructors are professionals at film and game animation studios like Dreamworks, Pixar, Sony Pictures, Blizzard & Disney. ⁠Get LIVE feedback on your Animation from the pros. Learn more at https://animschool.edu/
Breaking Down Breakdowns

In this lesson, AnimSchool instructor Scott McWhinnie takes us through his process of creating breakdowns that will best define a character’s motion. As Scott says in his lesson, “In CG animation, the computer is your inbetweener— and it’s the dumbest inbetweener — so it’s your job to give it all the information it needs.”

What is a Classic Breakdown Pose?

A classic breakdown is typically defined as the “middle transition pose,” giving the computer information to describe the arcs, what is leading, dragging, overlapping, etc. There can be more than one classic breakdown.


Analyzing a Scene

Scott offers an example scene from Zootopia (2016), in which Nick rests his head into his hand, leans forward, and speaks to Judy. The main key poses consist of Nick’s starting position, leaning in, leaning down, and leaning forward towards Judy.

To identify the classic breakdown poses, look for the poses that begin to describe arcs, what’s leading, and what’s being delayed or dragging behind.

The next step is to look for antics and overshoots, ensuring that any build up of action is present and any overshoot of emotion is visible. Generally, great and intense emotions don’t come to a full stop because there simply isn’t enough time; as a result, emotions will often overshoot and settle back. The sharper and more abrupt an action, the greater the overshoot. Anticipations and overshoots are not always necessary.

Then, it’s time to identify the spacers. Spacers define the spacing for the action. As an action starts to move from a resting state, a spacer sets of the ease out; by the same token, as an action settles into a resting state, the spacer sets the ease in. Additionally, as a character or object changes directions, the spacers help define the slow down in order for the change to occur.

Being able to identify and properly use different types of in-between poses is vital to the animation process in creating smooth, flowing actions and preserving efficiency.


Watch the full clip from an AnimSchool lecture here: 

At AnimSchool, we teach students who want to make 3D characters move and act. Our instructors are professionals at film and game animation studios like Dreamworks, Pixar, Sony Pictures, Blizzard & Disney. ⁠Get LIVE feedback on your Animation from the pros. Learn more at https://animschool.edu/
Adding Vibration to Animation

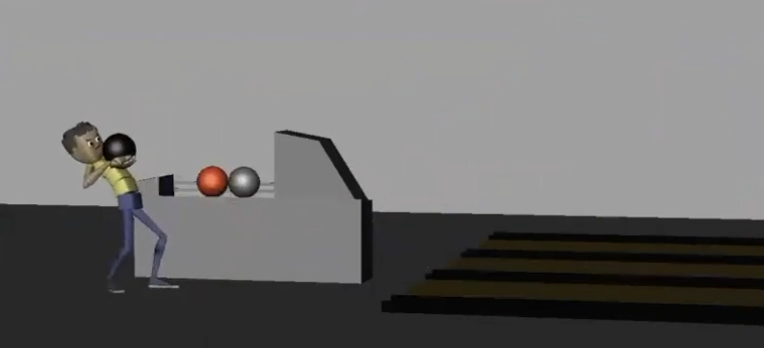
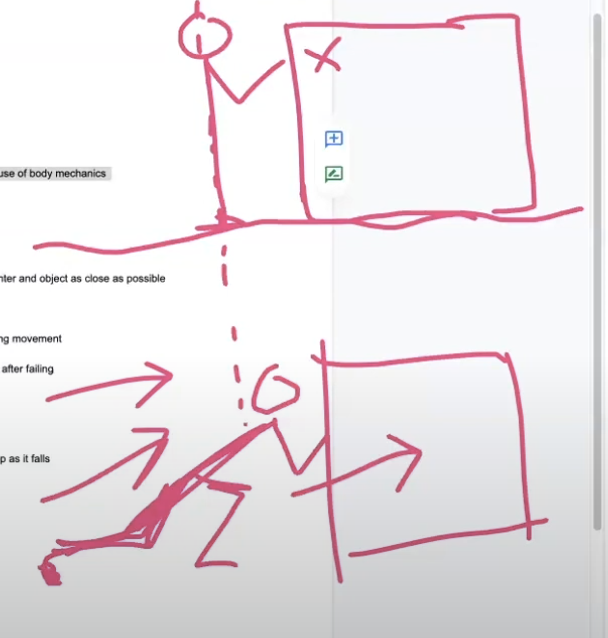
Animation is a powerful medium for storytelling and visual expression, and adding subtle details can make a significant difference in how your work is perceived. One such detail is the incorporation of vibration effects, which can bring life, energy, and realism to animated elements. Whether you’re animating a character, a piece of machinery, or any other dynamic object, introducing vibration can add depth and impact to your animations. In this video (linked below), AnimSchool instructor Louaye Moulayess explains how to add vibrations in your animation shots to better sell the struggle, force, and energy a character exerts in order to lift a heavy object.


Louaye begins by identifying the point of maximum vibration – in this case, where the character is struggling the most in order to lift the box. From there, he identifies two more points: where the start of the vibration is, and where it ends, ensuring that the beginning and ending points are at zero so as to not affect past/future poses. 

Louaye demonstrates various possibilities for the shape of a vibration curve, citing that “there are no rules.”

He then adds a key to every single frame between the start and end of the vibration, and quickly shifts each key in alternating directions to create a buildup to the apex and gradual fallout.

Add keys on each frame between the start and end, and ensure you only have the desired channel(s) keyed.

Adjust each key to create a gradual climb and fall in vibration amplitude and intensity.

Before concerning himself with the polish and exact values of each key, Louaye plays through the animation to get a feel of how the vibration looks, and then begins to slowly adjust. Louaye recommends to use check your animation using playblasts in order to see the subtle movements of the vibration. 

Louaye finishes off the animation by demonstrating how to copy and paste the vibration to another control using animation layers, citing to be careful about what controls are selected and knowing specifically what is transferring. In this case, he copied the vibration of the head’s gimbal rotation control onto a knee pole vector translation control, ensuring that he tests the animation and makes necessary corrections, such as scaling down the amplitude of the animation curve.

Incorporating vibration into your animations can significantly enhance their dynamism and realism. Whether you choose to manually animate each frame or use automated techniques, the goal is to create a believable and engaging effect that complements your animation. By mastering vibration techniques, you can add an extra layer of detail that elevates your work and captivates your audience.


Watch the full clip from an AnimSchool lecture here: 

At AnimSchool, we teach students who want to make 3D characters move and act. Our instructors are professionals at film and game animation studios like Dreamworks, Pixar, Sony Pictures, Blizzard & Disney. ⁠Get LIVE feedback on your Animation from the pros. Learn more at https://animschool.edu/
Cleaning Up Curves: Splining 101

Understanding the basics of splining your animation is key to crafting a smooth performance. AnimSchool instructor Ricky Renna explains how to spline a shot for beginner animators by demonstrating his method, in which the first step is cleaning up curves in the Graph Editor.


Before splining, Ricky recommends to ensure that your animation is stepped with keys on at least every three or four frames. Depending on the action, you may be able to get away with keying every five frames; however, the more keys you have, the more accurate your blocked animation will be to the final result. 

When you are ready to spline, select all of your keys and controllers and switch them to auto tangents. Ricky explains that he prefers to start cleaning up with the “biggest” controllers, such as the body and gimbal controls. He also mentions that he will split up the animation into sections and fully spline them one section at a time, rather than splining one controller through the entire animation, then moving on to the next. One section may range from 30-40 frames; however, depending on the animation, it may make more sense to split it up according to when one action ends and another begins, resulting in varying lengths.

Before cleaning up the curves – note the overall shape of the curve

In the Graph Editor, the key is to look for smooth curves. Ricky explains that he simply addresses one channel curve at a time before moving onto the next: Translate X, Translate Y, Translate Z…

After cleaning up the curve – note the reduced keys and smooth shape

As you delete and rearrange keys, consider how the changed keys affect the shape of the curve: is it making it more jagged? If so, try adding some keys back in to make a smoother and cleaner action. Keep in mind that one of the most important aspects is whether or not your animation reads well: does adding in an extra key actually affect the feeling and believability of the overall animation? Don’t overcomplicate things! Simplify the curve, and ensure that the intended action still reads in the easiest way possible.


Watch the full clip from an AnimSchool lecture here: 

At AnimSchool, we teach students who want to make 3D characters move and act. Our instructors are professionals at film and game animation studios like Dreamworks, Pixar, Sony Pictures, Blizzard & Disney. ⁠Get LIVE feedback on your Animation from the pros. Learn more at https://animschool.edu/
Acting Through Anticipation

In animation, anticipation is what will sell your character’s action and intention. Animschool Instructor, Gwilym Morris steps through the importance of anticipation in animation. Anticipation doesn’t just add drama and believability to an action, but, by anticipating an action or a thought, you are preparing the audience for what is about to come. Successful anticipation can drive a character forward in space but also a plot forward in energy. By taking a few extra frames to build believable and interesting animation through anticipation, your piece will feel faster, better-paced, and more interesting.

 Animators use anticipation to prepare the audience for an upcoming event. For instance, when a character is about to move forward, they will move backwards first to help build up the momentum of the forward propulsion. By the same token, this prepares the audience for the motion of the character. A “surprise gag” is when the anticipation pose is left out altogether to create a feeling of surprise in the audience when the movement takes place.

Anticipation, in addition to preparing the audience, adds texture and movement to the animation by helping it become more believable. Consider a runner getting ready to spring into action and leap into the air; before the main action, they will stoop down and “compress” in order to prepare to spring up and move against the forces of nature and have a greater buildup of momentum.

Anticipation can also be used to direct the audience’s attention somewhere. If a character is reacting to something happening off-screen, the audience may see this as a cue to prepare themselves to watch and wait for the main action. Depending on the nature of the reacting character, the audience can infer and anticipate what sort of action is about to occur. However, using anticipation in this way can also be a tool to mislead the audience. The audience may perceive something as a heavy object due to the character reacting a certain way, when it is actually very light.

Watch the full clip from an AnimSchool lecture here: 

At AnimSchool, we teach students who want to make 3D characters move and act. Our instructors are professionals at film and game animation studios like Dreamworks, Pixar, Sony Pictures, Blizzard & Disney. ⁠Get LIVE feedback on your Animation from the pros. 
Learn more at https://animschool.edu/

What is Rigging?

AnimSchool instructor Daria Jerjomina has rigged characters all over the industry. In this short lecture, she not only walks through what it means to rig a character, but also discusses how it differs in each part of the industry.

Most are familiar with two stages within the 3D pipeline: modeling and animating; rigging occurs between these two steps. Rigging consists of adding a skeletal structure to the model which allows the model to respond fluidly to the animator’s directions. Without rigging, 3D animation as we know it would not exist.

Daria begins by providing a general definition of rigging: a process of setting up a character, providing an animator with a control over its movement. It falls between rigging and animation within the pipeline.

  • Parts of a pipeline (not all pipelines are the exact same, but most will follow this general order):
    • Visual development (concept art, storyboarding, color script, etc.)
    • Modeling
    • Rigging
    • Animation
    • Texturing
    • Lighting

Riggers will work closely with both the modeling and animation departments. Animators may request specific features and functionality on the rig, and riggers may need to work with modelers to get the model best suited for adding in those features. 


Rigging in Different Productions

CG Feature Animation

  • Tries to simulate the work of a 2D artist
  • Rigging needs to give animators the ability to change the model/give the same type of control that they would have if they were to draw the character on paper
  • Oftentimes that means pushing the model with features like squash and stretch
  • Give animators the ability to “cheat” certain poses and movements

Visual Effects

  • Unlike feature animation, in VFX riggers want to achieve a realistic representation of how the character moves
  • Important to study the anatomy of the character, even if it is a fictional character; the muscle structure and skin deformation needs to resemble that of the animals we have in the real world

Games

  • Keep in mind that the highest concern in video games is performance – riggers must be conservative and cautious of how complex the rig can be
    • As hardware improves, rigs can become increasingly complex with less constraints for things like number of joints. However, rendering in real time still carries limitations!
  • One of the examples of performance optimization is the level of detail (LOD) that changes depending on how far the character is from the player
    • Characters cannot be rendered at the highest resolution all the time, so the model/rig/animation is going to be switched when the player moves closer or farther from an NPC

Other Mediums

  • Animations can be exported from 3D applications to a variety of mediums
  • For stop motion: models are created in Maya, 3D printed, and then replaced on a physical and tangible model
    • Some challenges include the intersection of parts and the thickness of the mesh
  • For robotics: animation is created in maya and then exported as code for the physical robot to perform

Analyzing Existing Rigs

It can be extremely useful to closely examine rigs built by other people or companies. It can help in finding features that both work and do not work, see how intuitive the rig is, and look into how it’s built. Try to open up rigs to see how they work; pose them to get an idea of how an animator might use the rig.


Watch the full clip from an AnimSchool lecture here: 

At AnimSchool, we teach students who want to make 3D characters move and act. Our instructors are professionals at film and game animation studios like Dreamworks, Pixar, Sony Pictures, Blizzard & Disney. ⁠Get LIVE feedback on your Animation from the pros. 
Learn more at https://animschool.edu/
Page 2 of 4