Tag: 3D animation Page 2 of 4

Breathing Life Into Your Animation

A key component of bringing animated characters to life is believable breathing. In this demo by AnimSchool instructor and professional animator Neave Lifschits breaks down the process of creating a breathing animation, step-by-step, and focuses on making it look natural by adjusting for character design limitations and fine-tuning various parts for realism.

Step 1: Start with the Basics – Breathing Movement

To create a believable breathing animation, begin by animating the chest rising and falling. For a character standing still, exaggerate the chest’s motion to show heavy breathing. Set keyframes to create a smooth cycle, with the inhale being slower and the exhale faster. Adjust timing for realism by fine-tuning the easing on both actions.

Step 2: Refining Tangents

Use weighted tangents to smooth the transition between keyframes. Modify the “ease in” and “ease out” of the chest’s movement, making the breathing feel fluid. Adjust the timing for the inhale and exhale to balance out the rhythm.

Step 3: Translation & Rotation

Offset translation (moving the chest outward) and rotation (slight torso twisting) to create a natural flow. You can experiment with having either rotation or translation lead, but slight offsets in timing between these actions will add realism.

Step 4: Animating the Upper Body

Shoulders move in relation to the chest. Offset their rotation slightly, making them follow the chest’s expansion and contraction. The shoulders should react after the chest’s movement, not at the same time, for more realistic timing.

Step 5: Arm Movement

Have the arms “drag behind” the chest, reacting more slowly to breathing. Keyframe subtle arm movement so that the arms follow the chest’s rise and fall, but with a slight delay to avoid making them feel stiff or over-exaggerated.

Step 6: Head and Neck Movement

Keep head and neck movement subtle to avoid distraction. Use world space translation for the head and slight rotations for the neck, ensuring they follow the torso without overreacting. This keeps the breathing grounded and stable.

Step 7: Final Adjustments

Smooth the breathing loop by adjusting the first and last keyframes to ensure they match. Scale down any exaggerated movements for a more natural feel. Test the animation, making sure everything flows seamlessly.

Creating realistic breathing in 3D animation is about understanding how the body responds to inhalation and exhalation, and then adjusting the timing, translation, and rotation of different body parts accordingly. By starting with the chest’s basic movement and then refining the translation, rotation, and timing of the shoulders, arms, neck, and head, you can create a breathing animation that feels natural and immersive. The key is to experiment with different timing offsets and to make subtle adjustments for each part of the body, ensuring they work in harmony.


Watch the full clip from an AnimSchool lecture here: 

At AnimSchool, we teach students who want to make 3D characters move and act. Our instructors are professionals at film and game animation studios like Dreamworks, Pixar, Sony Pictures, Blizzard & Disney. ⁠Get LIVE feedback on your Animation from the pros. Learn more at https://animschool.edu/

Student Spotlight: Leticia Lozano

AnimSchool student Leticia Lozano offers insight into how she created an animated shot using audio from the 2023 Netflix film, We Have a Ghost. Her shot was featured in the 2024 AnimSchool Student Showcase.

Leticia explains that she received a recommendation to jump into splined animation right away in order to help see the timing of the slower and more subtle actions, such as in the face and shoulders. While she did complete a blocking pass of her animation, most of the smaller movements are much better seen after a splining pass.

Leticia mentions that she focused greatly on the facial animation, which proved to be a bit difficult as she was trying to keep the entire animation alive with breathing, eye darts, and other supporting actions for her scene. With so many subtle movements and incredible facial performance, Leticia’s scene was a success and ended up as the cover of the 2024 AnimSchool Student Showcase.

Watch her featured clip below:

Watch the full AnimSchool Student Showcase Livestream here:


At AnimSchool, we teach students who want to make 3D characters move and act. Our instructors are professionals at film and game animation studios like Dreamworks, Pixar, Sony Pictures, Blizzard & Disney. ⁠Get LIVE feedback on your Animation from the pros. Learn more at https://animschool.edu/
Student Spotlight: Maria Fateeva

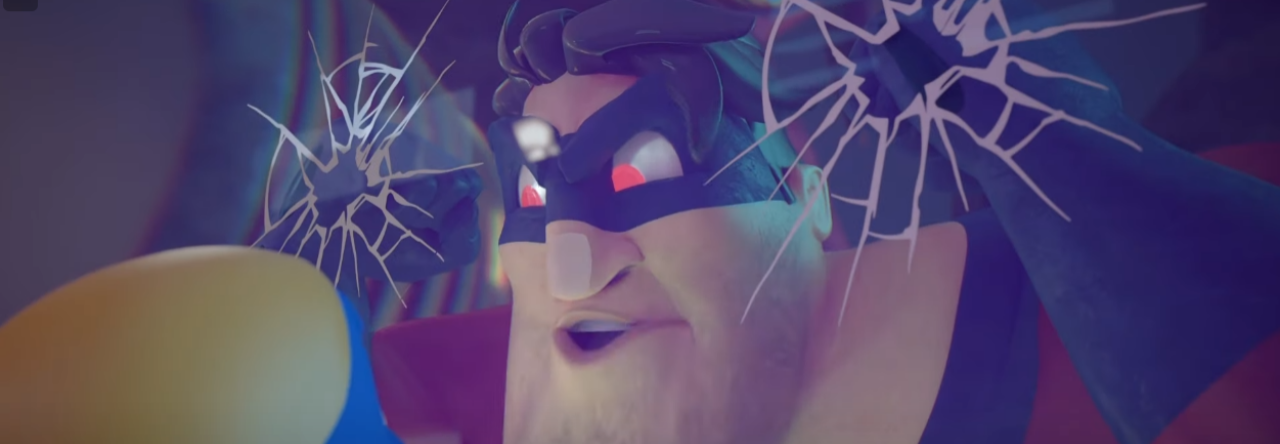
AnimSchool student Maria Fateeva shares her experience creating an animation using audio from Bo Burnham’s song, “Unpaid Intern,” and offers some insight to her animation process. Her shot was featured in the 2024 AnimSchool Student Showcase.

Maria explains that, looking back, she did not end up utilizing her reference footage as much as she would have liked, which resulted in some difficulties capturing the proper body mechanics and the character flow during the animation process. However, she was still able to pull various key poses and ideas from her reference in order to make a visually entertaining and dynamic shot.

Maria also mentions that the biggest challenge she ran into was animating the main character clutching various cups and mugs, especially when he drops one and quickly grabs it again. At the suggestion of her instructor, Alek Kolev, she snuck in an additional cup near the end in order to really emphasize the large amount the character was holding.

Watch her featured clip below:

Watch the full AnimSchool Student Showcase Livestream here:


At AnimSchool, we teach students who want to make 3D characters move and act. Our instructors are professionals at film and game animation studios like Dreamworks, Pixar, Sony Pictures, Blizzard & Disney. ⁠Get LIVE feedback on your Animation from the pros. Learn more at https://animschool.edu/
Cinematic Camera Setup for Game Animation

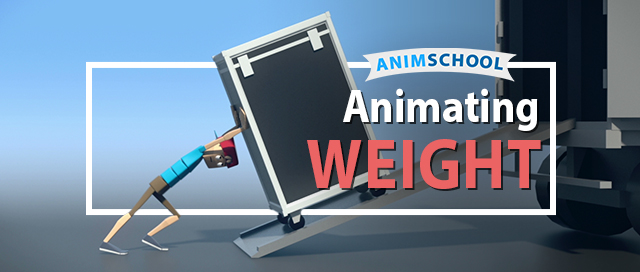
Setting up a cinematic camera for game animation is a key skill. In this video, AnimSchool instructor and pro game animator John Paul “JP” Rhinemiller explains how to set up a camera for a moving character in a cinematic scene. He also demonstrates an exercise that covers a fundamental step in mastering camera setups.

JP explains that, generally, cinematic camera movement involves one main “key” move in either translation or rotation. In the early stages, it is crucial to ensure that the camera’s main movement feels good and works well in the scene. From there, more layers and complexity can be added.

Camera Setup

JP begins by demonstrating how to create a “slide” cinematic camera. He mentions that starting with the render settings is a good idea to ensure that the aspect ratio is correct and helps you understand the framing of your characters as you animate the camera. The settings he chooses are:

  • Presets: HD_720
  • Width: 1280
  • Height: 720
  • Resolution: 72 pixels/inch

He also adjusts the attributes of the camera to change the gate mask opacity in order to control what can be seen offscreen.

Animating a Slide Shot

To begin animating, JP first sets his first and last key frames for the desired camera and then addresses the curves. He notes that, by default, the camera curves will be set to auto tangent with slow out and slow in. Depending on the shot and what the next cut is, that may not be what you want; in this case, you would need to change those curves further.

For JP’s shot, he explains that he wants it to appear as though the camera is catching up to the character. To achieve this, he adds a few more frames at the beginning to first match the pace of the character’s movement and then have the character appear to pull ahead, making it seem like the character is ramping up in speed. He then further adjusts the position of the keys to get a smoother movement.

JP explains some fundamentals of a typical “slide” shot to keep in mind:

  • Ensure that the character is always in frame
  • The character appears to be motivating the camera to move, or slide
  • The character should not get too far into the left/right third of the frame, where it seems like they are “pushing” the camera (unless there is motivation to do so)
  • As the character slows down to a stop, the camera can keep moving for a few frames after
  • The start and end frames should not be on the first/last keys on the shot – there should be continuous motion that goes beyond the shot, especially in a cut with action

Watch the full clip from an AnimSchool lecture here: 

At AnimSchool, we teach students who want to make 3D characters move and act. Our instructors are professionals at film and game animation studios like Dreamworks, Pixar, Sony Pictures, Blizzard & Disney. ⁠Get LIVE feedback on your Animation from the pros. Learn more at https://animschool.edu/
Student Spotlight: Jonathan Gibney

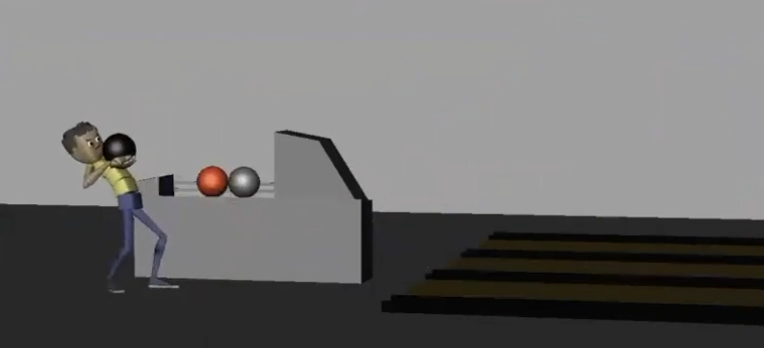
AnimSchool student Jonathan Gibney discusses his experience and walks through the process of animating his shot featured in the 2024 AnimSchool Student Showcase. Using audio of Willem Dafoe’s monologue from The Lighthouse (2019), Jonathan explains how he crafted a villainous pirate performance.

Jonathan explains that, while he filmed a reference video for his animated shot, much of what he actually used is not on video. Rather, if he needs to, he will simply stand up from his desk and act out the shot in order to understand first hand how certain body parts move in the scene.

For Jonathan, the biggest challenge within the shot was grappling with the moving camera, as it affected animation arcs and screen space. In as early as his blocking phase, he had the camera movement planned out to allow for more freedom with the character.

To create an antagonistic character with villainous qualities, Jonathan and his instructor bounced various ideas off one another and adjusted the animation. Jonathan mentions that, in the beginning, the villain was simply going to cut the rope early on, immediately dropping the other character into the ocean. However, this was later changed to have the villain hold on to the rope after cutting it and deliberately releasing it later to maintain tension, play with shape language, and reflect how the choice—and life of the other character—is in his hands.

Watch his featured clip below:

Watch the full AnimSchool Student Showcase Livestream here:


At AnimSchool, we teach students who want to make 3D characters move and act. Our instructors are professionals at film and game animation studios like Dreamworks, Pixar, Sony Pictures, Blizzard & Disney. ⁠Get LIVE feedback on your Animation from the pros. Learn more at https://animschool.edu/
Student Spotlight: Daniela Lobo Dias

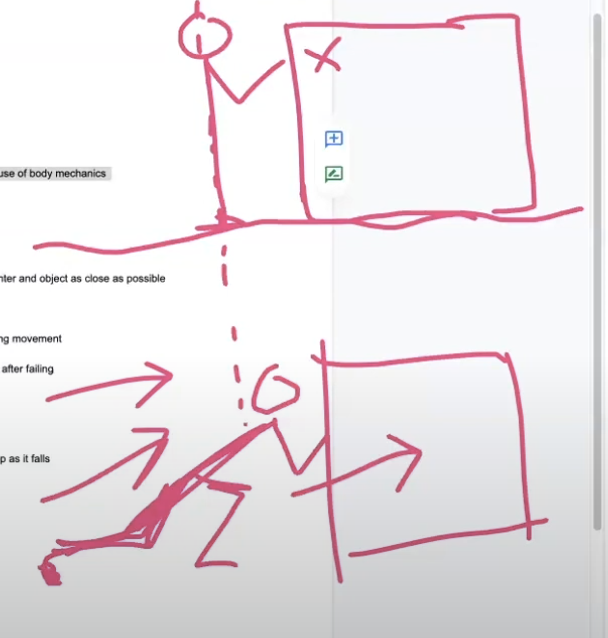
AnimSchool student Daniela Lobo Dias shares her perspective and offers behind-the-scenes insight on animating one of her shots shown in the 2024 AnimSchool Student Showcase. Featuring audio from a clip of a professional ice cream taste tester, Daniela discusses how she transforms the character into a charming sommelier with a taste for blood.

Daniela mentions that she particularly enjoys the workflow of starting in stepped animation, then later filling in the gaps and transitioning to splined. This allowed her to focus on the main poses and their silhouettes before slowly adding in-betweens as the animation became more polished.

She also explains how she thought outside of the box to achieve the look of swirling liquid in a glass without particle simulation by creating blend shapes and animating geometry.

“This was very much one of those labor of love shots where I was just really having fun with it the entire time. Despite being very hard on myself, at the end of the day I still really enjoyed the shot.” – AnimSchool student Daniela Lobo Dias

Watch her featured clip below:

Watch the full AnimSchool Student Showcase Livestream here:


At AnimSchool, we teach students who want to make 3D characters move and act. Our instructors are professionals at film and game animation studios like Dreamworks, Pixar, Sony Pictures, Blizzard & Disney. ⁠Get LIVE feedback on your Animation from the pros. Learn more at https://animschool.edu/
Student Spotlight: Carl Nyasore

In this clip from the AnimSchool 2024 Showcase Livestream, Carl Nyasore talks about his process behind what he describes as one of his “best shots at AnimSchool.” Pulling inspiration from Disney movies like Encanto, studying shots frame by frame, and utilizing AnimSchool’s network of instructors currently working in the industry all played a critical role in helping his shot shine.

Carl explains that working on his shot taught him to always look for something new to learn. Being open to exploring new styles, practicing, and talking to others about your craft is how growth is achieved.

For his shot featured in the 2024 AnimSchool Showcase, Carl mentions that he thoroughly examined Disney’s Encanto and took his shot to General Reviews to aid in refining his smooth transitions, polishing flourishing actions, and making other small changes to make a big impact.

“Before this class, I didn’t know how to do things like head accents and leading action, so I learned a lot from just studying animated films. That’s why it turned out to be one of my best shots at AnimSchool.” – AnimSchool student Carl Nyasore

Watch his featured clip below:

Watch the full AnimSchool Student Showcase Livestream here:


At AnimSchool, we teach students who want to make 3D characters move and act. Our instructors are professionals at film and game animation studios like Dreamworks, Pixar, Sony Pictures, Blizzard & Disney. ⁠Get LIVE feedback on your Animation from the pros. Learn more at https://animschool.edu/
Student Spotlight: Noemi Rajczyba

In this clip, AnimSchool student Noemi Rajczyba used dialogue from the 2006 feature film The Break-Up to create what she called a “funny, joyful, singing” moment that shows her character singing in a shower along to “Owner of a Lonely Heart” by 1970s progressive rock band Yes.

Noemi discusses her experience working on the shot for her facial performance class, coming up with entertaining dance moves to reimagine the scene.

Noemi’s animation was recently featured in the 2024 Student Showcase: “The opportunity to be featured in this showcase alongside my peers is a huge honor. I can’t help but think it’ll lead to even bigger things in my animation career.” – AnimSchool student Noemi Rajczyba

Watch her featured clip below:

Watch the full AnimSchool Student Showcase Livestream here:


At AnimSchool, we teach students who want to make 3D characters move and act. Our instructors are professionals at film and game animation studios like Dreamworks, Pixar, Sony Pictures, Blizzard & Disney. ⁠Get LIVE feedback on your Animation from the pros. Learn more at https://animschool.edu/
Student Spotlight: Igor Madeira

In this clip, AnimSchool student Igor Madeira shares his experience creating an animation using trending audio from the “Possessed by an Owl” meme, and offers some insight to his animation process from reference to final animation.

Igor explains that he was inspired by other people using the trending audio to reimagine the scene, and decided to utilize it as well for his own assignment. He mentions that he does not like to limit himself to just shooting one reference video; instead, he records himself multiple times, pushing the poses differently in each, and finds something new and worth referencing in each iteration.

Igor’s shot was featured in the 2024 AnimSchool Student Showcase, linked below.

Watch Igor Madeira’s full showcase clip here:

Watch the full AnimSchool Student Showcase Livestream here:


At AnimSchool, we teach students who want to make 3D characters move and act. Our instructors are professionals at film and game animation studios like Dreamworks, Pixar, Sony Pictures, Blizzard & Disney. ⁠Get LIVE feedback on your Animation from the pros. Learn more at https://animschool.edu/
Common Maya Mishaps

Whether you’re a modeler, a lighter, a rigger, or an animator, the one software we all share is Maya. Maya is an incredibly powerful tool that can help you as an artist achieve amazing, incredible, and unimaginable things, but with great power comes great… troubleshooting. We’ve all been there: we open Maya and something unexpected occurs. Most of the time a quick Google search will lead you back in the right direction, but sometimes the problem is just so odd and confusing that you are at a complete loss as to what to do next. In this short lecture, AnimSchool Instructor Luis Labrador highlights just a few of the most common Maya mishaps he has seen students struggle with over his career. No matter your specialty or how far in your career you are, these tips could save you time and energy that you can now spend on making your next masterpiece.


Clipping Plane

When an object is extremely small and the user attempts to zoom in, the object may appear to cut open or clip through the perspective camera. The reverse can also happen when objects are extremely large. To remedy this, open the camera’s attributes and adjust the Near Clip Plane (default is 0.1) and the Far Clip Plane (default is 10000) by multiples of 10. In Luis’s example, he sets the Near Clip Plane to 0.001, which allows him to zoom in closer to the small object without the clipping occurring. When zooming out, you may need to increase both the Near Clip Plane to prevent shading artifacts, and increase the Far Clip Plane to prevent “losing” the object as it clips from behind.

Exporting/Importing as OBJ

Sometimes, you may find that something in your file has changed unexpectedly, resulting in various issues across your project. The best way to “bleach” and clean up your project, as recommended by Luis Labrador, is to export as an OBJ file and reimport it into a fresh Maya file. To do so, first ensure that OBJ exports are enabled in the Plug-in Manager by checking the “Loaded” and “Auto load” boxes. Then, the OBJ option should appear in the drop-down list of export file types. When exporting as OBJ, two file types will be exported: OBJ and MTL. The MTL file is a reference file that can typically be ignored.

OBJ files work well for “resetting” your project because, in 3D, it is the most basic file type, and only represents coordinates of points in space.

Maya ASCII vs Maya Binary File Types

When saving out a Maya file, you may come across two main file types: Maya ASCII (.ma) and Maya Binary (.mb). Maya ASCII files are generally “heavier,” containing data that allows the file to be opened in test editors that have the ability to change the version of Maya being used. Maya Binary files are much lighter and more efficient in comparison, as they store the data as 1s and 0s. Luis explains that neither are technically “better” to use – it’s up to personal preference.


Watch the full clip from an AnimSchool lecture here: 

At AnimSchool, we teach students who want to make 3D characters move and act. Our instructors are professionals at film and game animation studios like Dreamworks, Pixar, Sony Pictures, Blizzard & Disney. ⁠Get LIVE feedback on your Animation from the pros. Learn more at https://animschool.edu/
Page 2 of 4