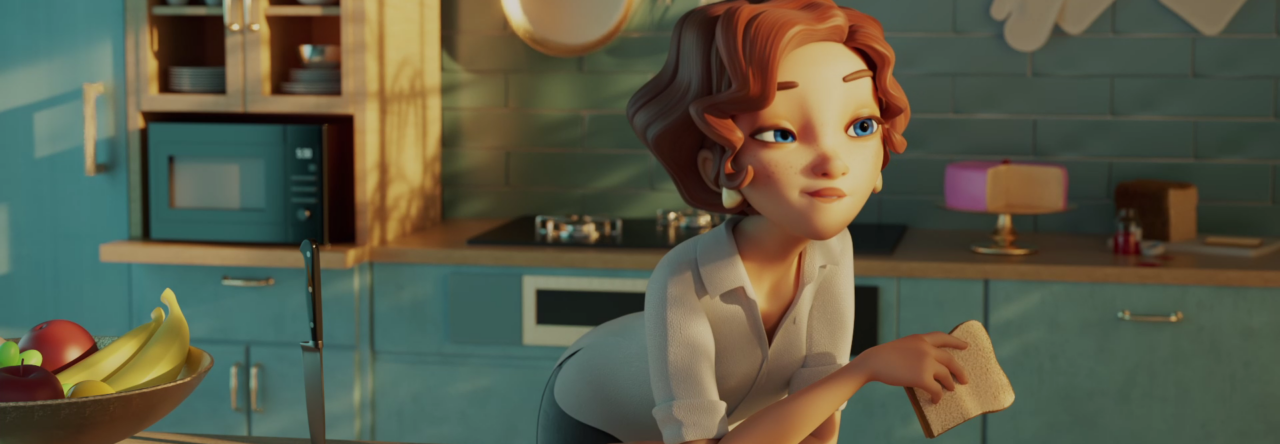
Introduction to Animation Layers – Tony Mecca


One helpful animation workflow method that many students don’t learn about until they take more advanced courses in animation is the use of Animation Layers. Animation layers are extremely useful for making non-destructive changes to parts of your shot while maintaining the animation that is working well. Animation layers are used mainly in the spline phase when you’d like to (or are directed to) make adjustments to certain portions of your animation, or you want to try out different poses and motions. They can save you a lot of time and effort when you’re making changes, and help make you a more efficient animator overall. In this clip from a Body Mechanics class, which is our third introductory course in 3D character animation, instructor Tony Mecca does a great job of explaining the fundamentals of how Animation Layers work by relating them to layers in Photoshop, and showing an example in Maya.


The following are covered in this video:
  • How animation layers work
  • How to set them up
  • How to tweak your animation with keys in the animation layer
  • How to adjust how much the animation layer affects the base animation
  • How to merge the new animation with your base animation


For more information about AnimSchool and our online animation programs, visit us at www.animschool.com

Blocking Lecture 2- Layered method


In this lecture, Animschool instructor, Hans Dastrup explains the “Layered” method of blocking. He provides the pros and cons of the method and situations where this blocking method can be used efficiently.

For more information about AnimSchool and its animation program, visit www.animschool.com

Blocking Lecture 1- Pose to Pose

In this lecture, Animschool instructor, Hans Dastrup explains the “Pose to Pose” method of blocking. He provides the pros and cons of the method and situations where this blocking method can be used efficiently.


For more information about Animschool and its animation program: visit www.animschool.com

Open House/Q&A at AnimSchool! Come See What it’s Like

Are you thinking about learning 3D animation or characters modeling?
If you are considering applying to be a student at AnimSchool: come to our free public open house this Friday 6pm Pacific, 9pm Eastern time.
Come and get a sneak peek of the new student pages, all the resources and what it’s like to be a student here at the school.
There will be a short presentation of our school and site and we will take your questions live.
Bonus! We will have several current AnimSchool students and instructors there to answer your questions as well.

To register for this live event and get more info, click here.

This event is expected to fill up, so register now to attend live, or receive the recording link afterwards. 

To find out when this is in your timezone, change your timezone here: http://www.animschool.com/TimeZoneSelection.aspx

If you set it correctly, go here to see the event:
http://www.animschool.com/AcademicCalendar.aspx
You can have your webcam/mic ready OR if you don’t have one, you can still listen and chat with us.
AnimSchool: makers of the famous Malcolm rig and AnimSchool Picker used by tens of thousands around the world! We are known for our high quality, expressive rigs and student achievement.

Q&A Session – Manuel Bover & Jarrod Showers

In AnimSchool’s Q&A Session, instructors Manuel Bover and Jarrod Showers answer questions from our students about the industry.


 Come join us at www.animschool.com

New AnimSchool Game Character: Riker

We are pleased to present AnimSchool’s newest game character, Riker!
Students in our upper game animation classes can learn using Riker.

Riker is made using an all new rig initiative – we’ve taken the extreme facial expressiveness AnimSchool is known for and brought it to the game rig world! Riker has a wide range of expressions not usually seen in games.

Riker was designed by artist Wesley Tippetts and modeled by Paul Bellozas and Dave Gallagher. Texturing by Paul Bellozas.

Come join our gaming animation classes to learn skills with AnimSchool rigs!

Facial Anatomy- Wesley Mandell

In this lecture, AnimSchool instructor Wesley Mandell explains how important it is to understand facial anatomy in order to animate well.

For more information about animation, join us at www.animschool.com

Stepped or Spline?


Stepped and spline refer to the way your keyframes are interpolated in an animation. Stepped means that there is no change in values between two keys.  With spline, the computer automatically adds in-betweens values between two keyframes.

Most 3D animation is splined in the end, making smooth motion, but there are two main ways of starting out when animating. So stepped and spline also refer to two different workflows.

With Stepped, you focus on key poses and only work on those keys. When you hit play, the software plays it like a series of drawings.


Pros

The biggest benefits of working in stepped mode is that you can really focus on the key poses for your shot. Since the software doesn’t interpolate between any of the keyframes, stepped mode allows you to keep your shot very clean in a way that you can tell the story of your animation with a small amount of keyframes. 
In other words, stepped mode helps you establish the important beats of your animation and allows you to get a basic idea of the timing while focusing on the key ideas of the shot.
Your graph editor is more manageable, and big changes are easier.

Cons

The biggest drawback of stepped mode is that it can be hard to envision how your timing is going to turn out. Animators fill in more and more poses as they go, but there is a point when you have to leave the stepped world behind and convert the curves from stepped to spline. That’s a simple click, but seeing your hard animation work that way is nearly always a disappointment.


If you are an animator, you’ve probably seen how an animation loses its snappiness when going from stepped to spline. This is because your brain had been filling in the gaps but now the computer interpolates between each keyframe. The simple version you were used to looking at wasn’t a very complete representation of the movement. It’s the time when you get a big surprise seeing it with fluid motion – and it’s never a pleasant one!


Spline:
Another method of starting out is skipping the stepped keyframes
entirely and having smooth movement from the very beginning, where you
focus on the overall movement of the body and don’t worry about the
poses yet.

You start by moving the rig’s root control or COG (center of gravity) to find the movement of the scene in a fluid way. Then you layer in the spine and head’s motion, and the limbs.

Pros

Spline gives you the possibility to work more straight ahead and feel how your animation is going to look already in the early stages of blocking. You skip the painful process of getting used to looking at simplified stepped movement, only to hit the hard reality of the ugly “first spline” phase later.
If the movement doesn’t feel right, it is easy to shift individual keyframes around until you get what you are looking for.

Cons

It’s easy to get distracted by the interpolation of the keyframes and not focus on posing when using splined curves to block out a shot. It may also be hard to work in a clean way – the keyframes aren’t neatly organized on individual frames – they are scattered all over.

Since you’re not spending time on making beautiful poses up front, the posing can suffer and feel like an afterthought.

Students can have a difficult time learning with a spline method, since they get used to seeing bad motion and aren’t able to see how to improve it, and instructors aren’t able to see which timing decisions were made consciously and which are just the raw computer interpolation. At least with stepped blocking, an instructor knows exactly what the student’s posing and timing decisions are and can give specific ways to fix it.

Spline workflow is often associated with faster productions since the motion is worked out earlier, and it avoids that two-step process. But it is also associated with lower production values because of that.

However experienced animators can achieve excellent results with a spline workflow as well since they know how to overcome these issues. Now spline workflow is used at all ranges of quality, from the cheapest animation to the very best animation.

Although one method might be better than the other depending on the shot being animated, choosing stepped or spline comes down to personal preference. It is important to try both of them out and determine what’s better for your type of workflow.


Happy animating!

Acting choices: Is it a cliche?


“Never bluff emotions. This lady (the camera) would know.”- Michael Caine


There are two ways animators define clichéd acting choices.
1: These are the acting choices that we have seen repeatedly in similar shots so we would prefer to see something else.
2: These are the “go to” acting choices that pop into our heads when we think of acting for animation. For example snapping fingers and smiling to show that the character has an idea or is having a “A-Ha” moment. Or a snarky, knowing smile with one eyebrow down and the other raised.

Most of us animators grew up watching animation. Animated TV shows, Disney, Ghibli movies have introduced us to the magic of animation and motivated us enough to become storytellers ourselves. These shows that we grew up watching constitute a big part of our visual library. Intentionally or not, whenever we think about animation ideas, we tend to go to that library to pick out poses, gestures and actions. Even when we act for our animation references, we often try to emulate that level of broad, exaggerated acting choices. We act and animate as we think it should be and go for acting choices that depict our perception rather than the personality of that character. Every character we animate risks becoming just a copy of our personality or something too close to it.

Now, there is nothing wrong with having a visual library that is built on the work of such amazing movies and television shows: it is actually a great thing. However, it would be a shame to not take that knowledge and build on it. Instead of going back and re-using same poses, same acting choices and same actions, it is better to reinvent them, based on your character. As our AnimSchool instructor, Garrett Shikuma put it, “When you can’t re-invent the wheel… put your own spin on it.
This spin can come from the personality of the character that you are animating. It can come from the situation that the character is in or it can come from the design or limitations of their body.

So how to avoid clichéd acting choices?

In order to avoid the obvious clichéd choices, consider these:

1. Acting based on personality and subtext: Instead of thinking about the action, think about the thought process and the personality of the character. Is the character an extrovert or an introvert? When he gets an idea, does he act broadly, jumping up and down and using the space available to him or he is an introvert who just shows that he has gotten an idea by having his eyes widen. How good are his people skills? Questions like these really help one to narrow down the personality of a character.
Once you are sure about the personality it is time to think about the subtext.
The subtext is the unspoken thoughts. It is the content underneath the dialogue and reveals the true motives that drive the character to act in a certain way. Finding the subtext and coupling that with the personality of the character would make your acting choices authentic to the character.

2. Watch live action movies and study the 

acting choices: Pick a movie that has a good critical acclaim and study it. are the choices that they could have made but instead chose something else. This will help you bypass the obvious choices and come up with more creative acting choices.
Why are the actors doing what they are doing? Or you could consider it from another angle: What

3. Bring your life experiences to your work: Let your own culture and experiences influence your acting choices. But try to make sure that your choices will be decipherable by others. Your work should be original and interesting but also universally understandable. Otherwise, the audience won’t be able to connect to it and your storytelling may suffer.

4. If cliché has to be used, then do it well: Clichés are good in the sense that they get the point across clearly. Everyone has seen them; everyone understands them. Sometimes the best choice turns out to be a clichéd action. If that happens, then do it well. Make sure it serves its purpose well and adds something to the overall performance. These acting choices, just because they are used repeatedly are not necessarily bad choices – we just want to avoid too much sameness. If every girl character starts tucking her hair behind her ear every time she gets confused, we are going to get tired of it. So you may want to pair that action with other elements that we haven’t seen.

For more animation tips and tricks, visit our online 3D animation school, www.animschool.com and for more awesome animated shots like these, watch our student showcase of 2016 here

4 Free Maya Plugins For A Better Workflow Part II

1. aTools

Created by animator Alan Camilo, aTools not only enables you to easily select sections of a rig quickly but also stores lots of handy tools in one convenient place. It makes your work flow faster and it’s very easy to install; just drag and drop it into your Maya viewport!


Click here to download aTools!

2. Studio Library

This plugin allows you to save out your character poses and also export your animation. Creating a good character pose can take a lot of time, but being able to save those poses and find them again in a hurry can save a great deal of time and work. Apart from saving poses, Studio Library also lets you mirror them and organise them into folders of your choice!


Click here to download Studio Library!

3. Pose2Shelf

This plugin lets you save and label poses and current selections to your shelf by just pushing one button! Pose2Shelf comes in handy not only when you have to set a lot of keys on your shot but also when you are transferring a lot of animation onto characters!

Click here to download Pose2Shelf!

4. AnimSchool Picker

The AnimSchool Picker is a plugin that provides a GUI for selecting rig controls or geometry on 3D characters more quickly.

It is tightly integrated into Maya and Softimage, highlighting when you make a selection in Maya, as well as picking from the buttons.

Users can zoom and pan using standard Maya/Softimage navigation hotkeys, make single or multiple object buttons and make script/command buttons.

The AnimSchool Picker also gives you the possibility to move buttons or groups of buttons with the control key, nudge buttons precisely with the arrow keys and arrange and distribute buttons horizontally or vertically.

Click here to download the AnimSchool Picker!

Page 11 of 40