Month: August 2025

Blocking Plus Workflow: Breakdowns

In animation, moving from blocking to spline isn’t just about flipping a switch. It’s a shift in mindset and detail. While a shot may look “done” in blocking plus, the real depth of motion often only starts to emerge when you stop and assess if you truly have all of the information you need. In this clip from a live AnimSchool lecture, instructor Jean-Luc Delhougne shows his workflow for getting your blocking animation to the next level.

The point between blocking and splining is where many animators pause and reassess. The character might be hitting the right key poses, but the transitions, timing, and energy might still feel off, like the movement starts or stops abruptly. In order to remedy this, pay attention to the shape of the moving hold—that subtle buildup of energy before a big motion—so the viewer feels the intention behind every movement.
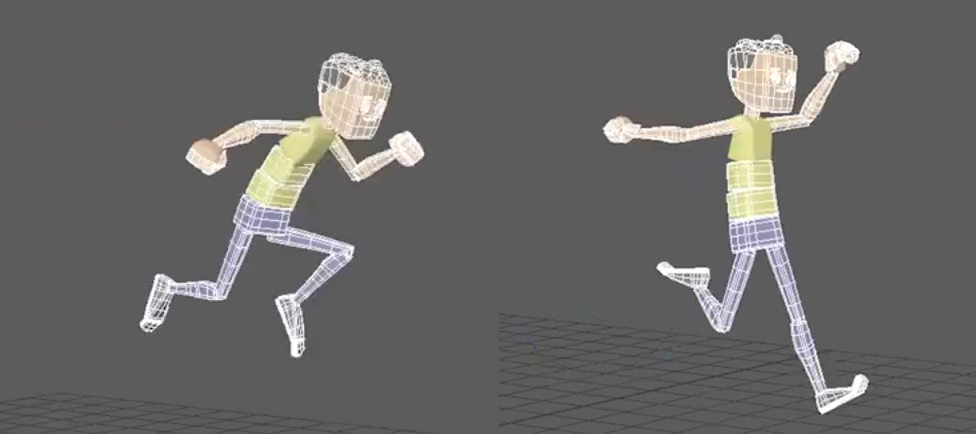
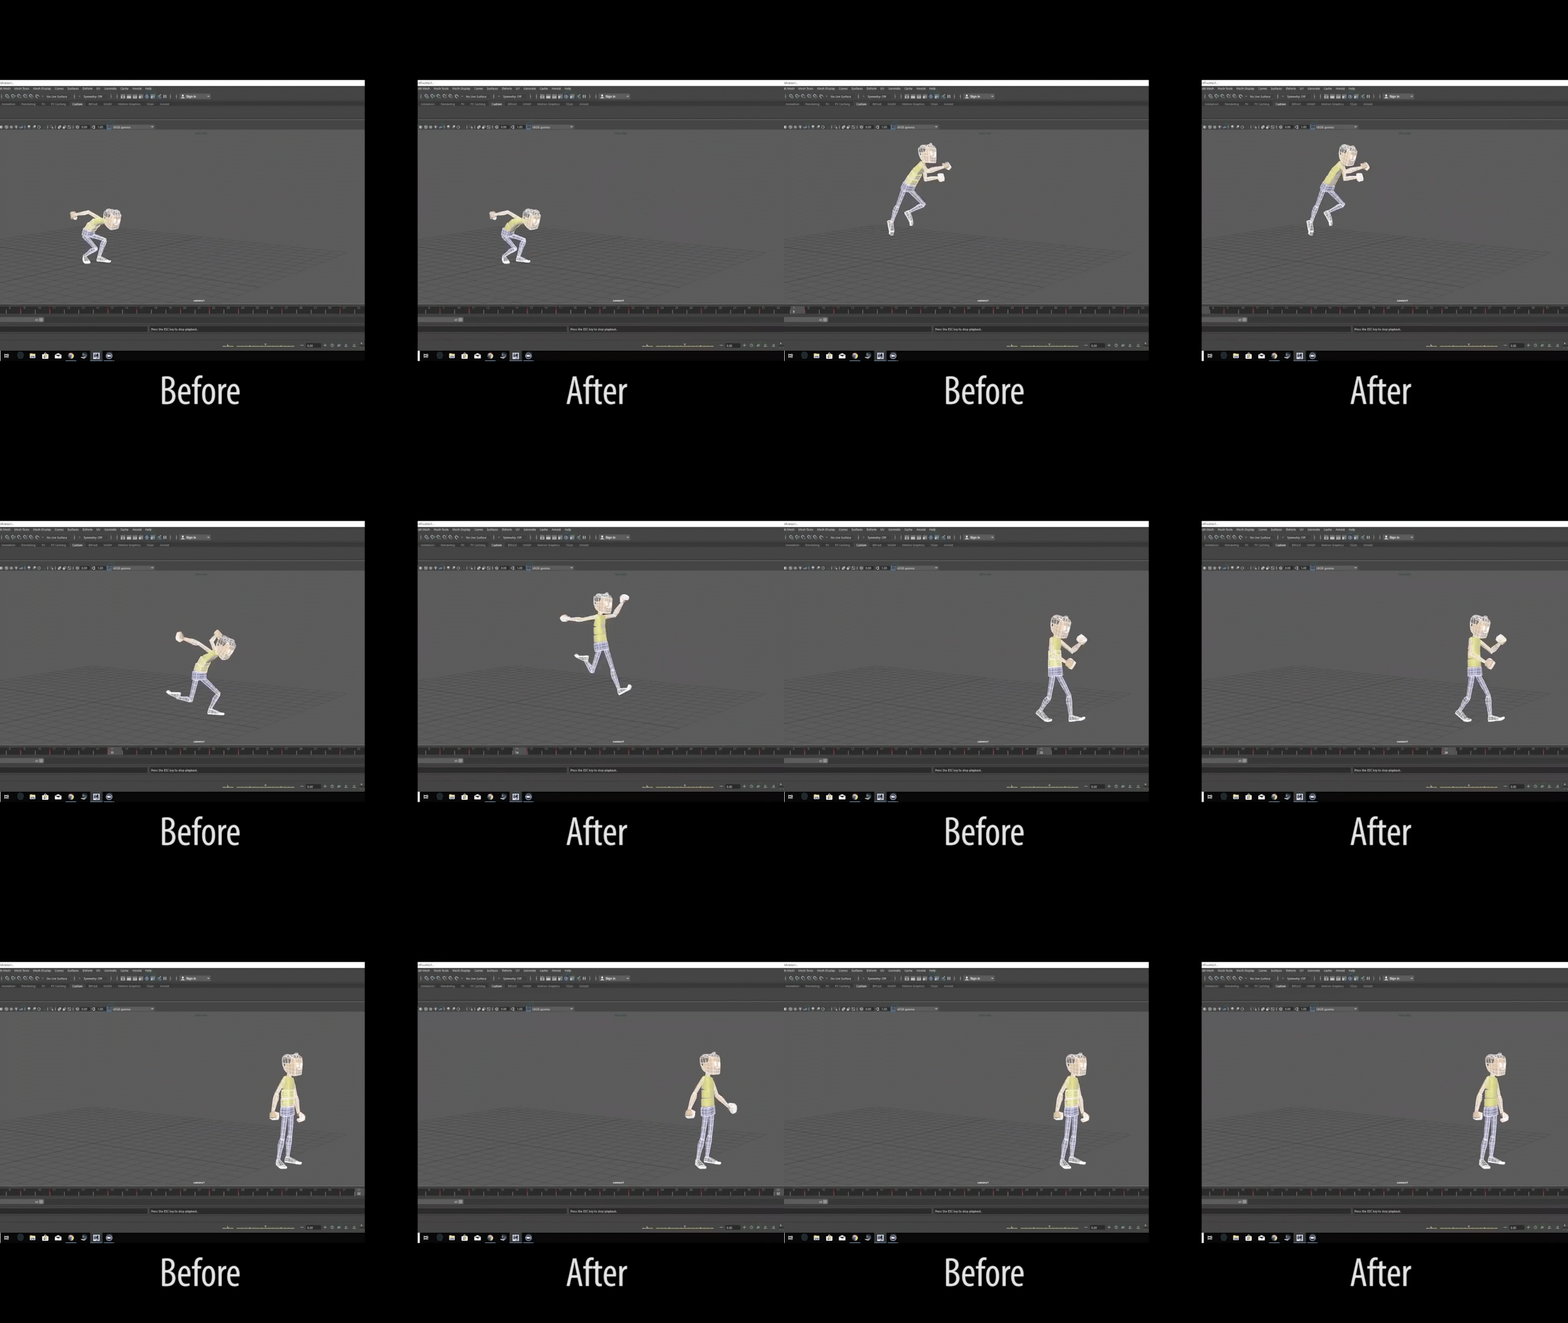
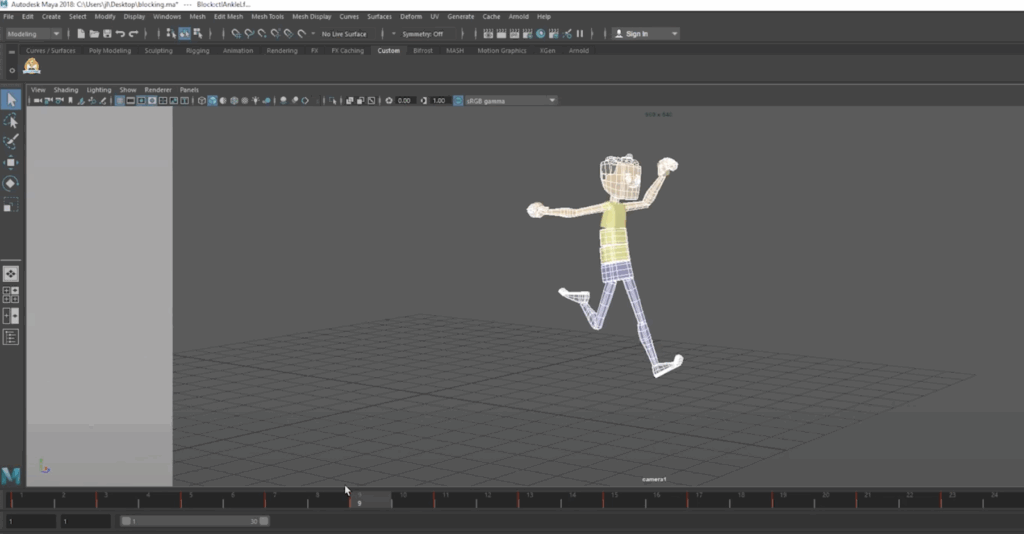
Before adding breakdowns: the transition between one pose to the next feels extreme

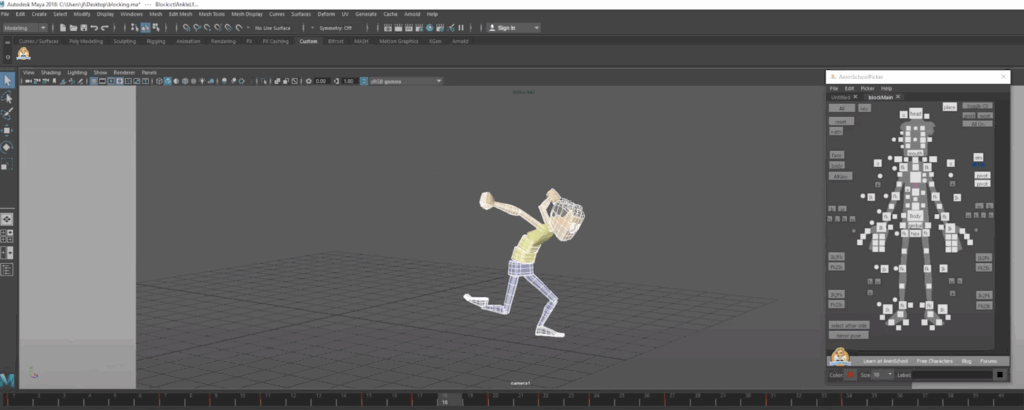
Making small changes, such as nudging the hips down and forward, and adding slight opposition in the spine and head, you begin to create that feeling of anticipation. Even subtle details like an arm shifting forward or the head lifting slightly can inject life into a still pose. It’s not about big moves—it’s about involving the whole body in the motion, giving the character a sense of internal momentum. As the motion develops, timing becomes a key focus. A transition between two strong poses might only need three frames, but those frames have to be very selective. As you set keys and adjust arcs, think about how the different body parts move together. Everything contributes to a feeling of weight and energy.

Every time a change is made, don’t forget to go back to check the relationship between poses. This level of care ensures continuity and clarity in motion. Tiny adjustments can dramatically improve the flow and believability of a shot, eventually bringing it all together. At this point, you might finally feel like you have enough information to transition into spline.
Before adding breakdowns
After adding breakdowns

This process might seem slow or overly meticulous, but that’s the magic of animation. By the time the shot hits spline, the hard decisions have already been made, and the shot is already working.


Watch the full clip from an AnimSchool lecture here: 

At AnimSchool, we teach students who want to make 3D characters move and act. Our instructors are professionals at film and game animation studios like Dreamworks, Pixar, Sony Pictures, Blizzard & Disney. ⁠Get LIVE feedback on your Animation from the pros. Learn more at https://animschool.edu/

Blocking Plus Workflow: Arcs

Once an animation starts to feel right, it’s easy to move on. However, that’s actually the perfect time to dig in and refine. During blocking and splining, arcs might be roughed in or implied, but in the polish phase, they need to be made intentional. If something feels off in your shot—even if you can’t articulate why—chances are it has to do with a broken or inconsistent arc. In this clip from a live AnimSchool lecture, instructor Jean-Luc Delhougne demonstrates how to use arcs to take your blocking to the next level.

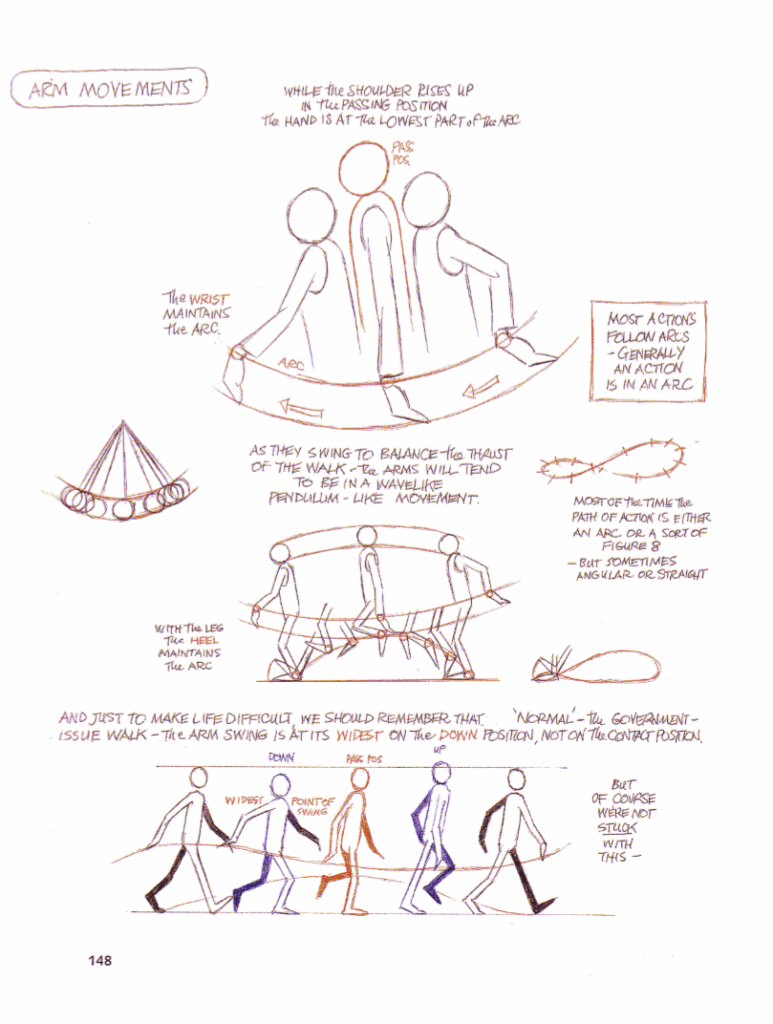
From the Animator’s Survival Kit

A good place to start is with the head and spine. These parts often reveal arc issues because they tend to move with subtle complexity. If the head suddenly changes direction over a few frames or shifts too quickly between poses, it can break the flow and feel visually jarring. The key is to step through the animation frame by frame and examine the head’s motion across time. Often, the fix involves selecting the head, neck, and spine controls together and nudging them to form a more continuous arc. You’re not adding frames—you’re adjusting spacing and orientation to reinforce the shape of the motion. The result is a smoother, more intentional line of action through the upper body. The head no longer pops or feels disconnected from the rest of the movement.

Add visual markers to help track the arc

Overlap also plays a role in arcs. If everything moves at once—especially in vertical actions—the motion can feel stiff. For example, if the head rises with the body too quickly during an upward movement, the arc may technically be there, but the lack of overlap makes it feel forced. Slowing the head’s rotation slightly or delaying its path just a bit can help reintroduce the feeling of follow-through and drag, which not only improves timing but also enhances the arc visually.

Sometimes an arc exists but lacks clarity due to poor spacing. One frame might be too far off the path, causing a visual pop. The solution isn’t always to add more keyframes but to redistribute what’s already there. This is where simple tools like moving controls by single pixels (using something like Alt + arrow keys) can be invaluable. These tiny shifts can help smooth out a curve without affecting the depth or creating messy curves in the graph editor. It’s a low-impact way to bring spacing and silhouette under control when things feel close but not quite there.

This is the essence of polishing animation arcs: noticing the small things that don’t quite sit right, identifying whether it’s a path, a spacing issue, or a lack of overlap, and making small, thoughtful adjustments. The arcs guide the eye, control rhythm, and anchor poses in space. During polish, refining arcs should be as important as refining timing or easing. Don’t wait until something looks broken to address them; the best results come from being proactive and observant. If something feels off, it’s often a broken arc waiting to be cleaned up.


Watch the full clip from an AnimSchool lecture here: 

At AnimSchool, we teach students who want to make 3D characters move and act. Our instructors are professionals at film and game animation studios like Dreamworks, Pixar, Sony Pictures, Blizzard & Disney. ⁠Get LIVE feedback on your Animation from the pros. Learn more at https://animschool.edu/
Blocking Plus Workflow: Timing

In animation, one of the first major steps in developing a believable performance is blocking—laying down the key poses that define how a character moves and reacts. Refining this workflow, especially in the blocking stage, can be crucial in laying the proper foundation for a smooth animation. In this clip from a live AnimSchool lecture, instructor Jean-Luc Delhougne discusses his workflow for blocking, with emphasis on timing.

During blocking, the goal is to understand the character’s physicality and intent. Whether it’s a jump, a step, or a weight shift, it’s important to capture the essential actions and emotional beats through clear, well-designed poses, with focus on the spacing, or the relationship between the poses. These poses form the skeleton of the animation. At this point, the animation might not necessarily feel right when played, but don’t worry—timing comes later.

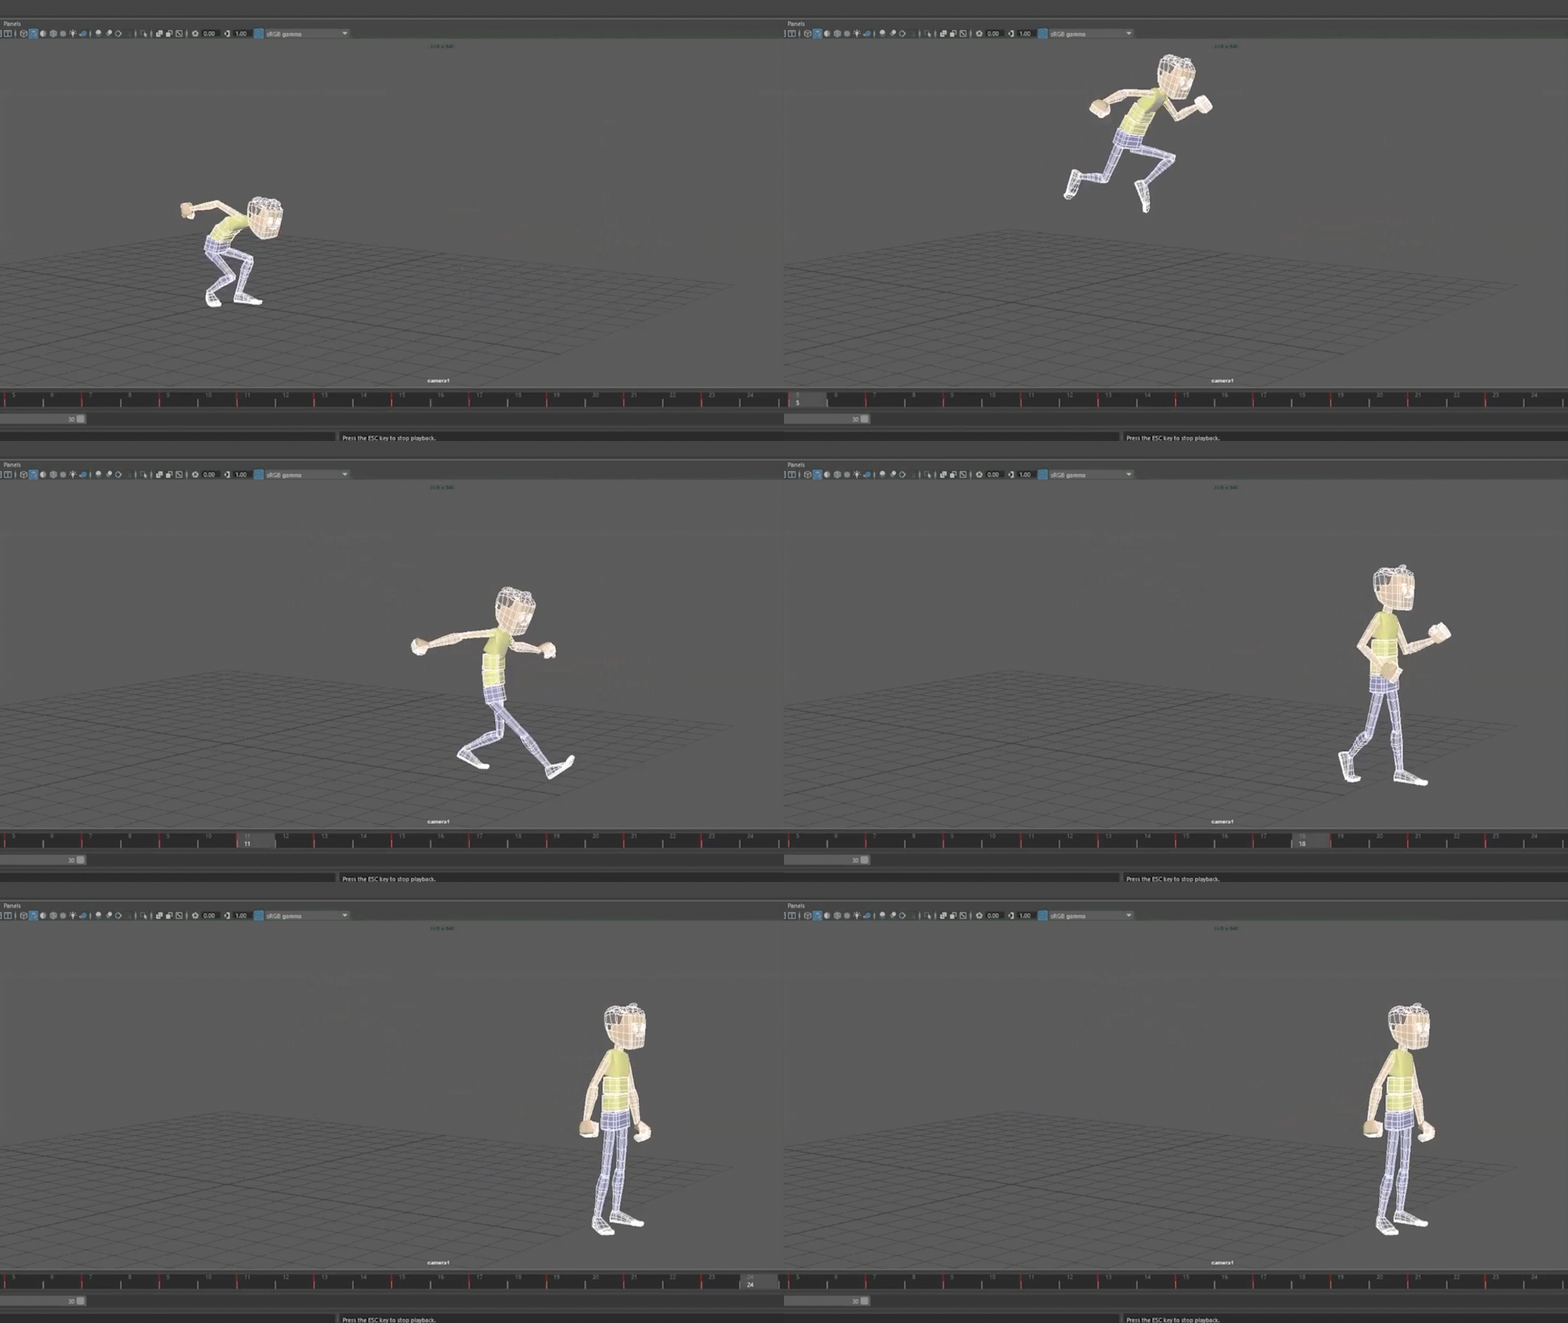
Note that all of the keyframes are currently on twos. Jean-Luc explains that, in the blocking stage, he ignores the timing and instead focuses on the spacing (the relationship between poses) in order to clearly understand what the character is doing.

Once the poses are working, the next step is to introduce timing, which transforms the static poses into a convincing and dynamic performance. Good timing isn’t just about counting frames; it’s about feeling how the character moves. For example, anticipation before a jump needs to be strong and readable—often holding for more frames than the jump itself—so the audience can register the build-up of energy. Similarly, the peak of a jump might benefit from a bit of hang time to convey weight, before quickly snapping back down into the landing.

Timing is rarely perfect on the first try. Animators often go through rounds of experimentation, pushing keyframes forward or backward, adjusting spacing, or adding breakdowns to smooth transitions. A common pitfall is trying to stop motion too quickly—after a jump, for instance, it can be tempting to have the character land and immediately hold. But real motion doesn’t stop on a dime. Adding extra steps, weight shifts, or slight bounces after a landing helps absorb momentum and makes the action feel grounded.

As the timing gets refined, an important detail to look for is variation. Evenly spaced keyframes tend to create robotic, lifeless motion. A well-timed animation should have a mix of fast and slow moments—sharp transitions, longer holds, staggered steps. This contrast gives the performance rhythm and energy. Looking at the timeline and seeing irregular gaps between keyframes can be a good visual sign that the timing has a natural, organic flow.

Ultimately, strong animation comes from the balance of thoughtful posing and refined timing. Blocking lays the structural foundation, while timing injects life and rhythm.

Before timing adjustments
After timing adjustments

Watch the full clip from an AnimSchool lecture here: 

At AnimSchool, we teach students who want to make 3D characters move and act. Our instructors are professionals at film and game animation studios like Dreamworks, Pixar, Sony Pictures, Blizzard & Disney. ⁠Get LIVE feedback on your Animation from the pros. Learn more at https://animschool.edu/