Month: June 2025

Avoiding Spline Depression

Spline and polish—two essential stages in the animation process—can often feel like a frustrating uphill battle, especially for newer animators, which can result in “spline depression.” Yet, as with any skill, with time and practice, the process becomes more intuitive and manageable. Still, that dreaded “ugly phase” never completely goes away—it just becomes easier to push through. In this clip from a live AnimSchool lecture, instructor Martin Scotto offers some important step-by-step tips in taking an animation from blocking to spline.
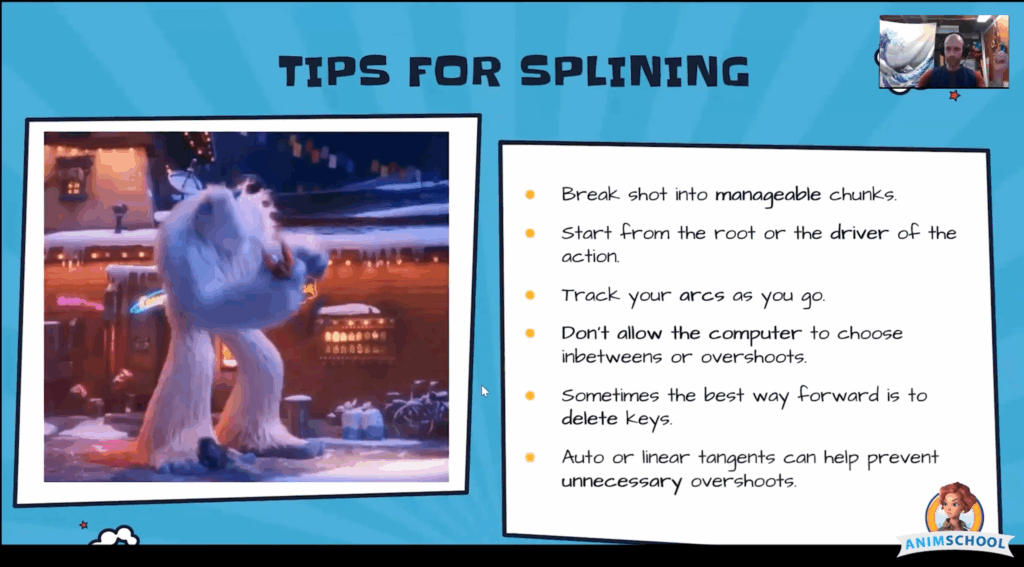
One of the most effective strategies to navigate this stage is to break the shot into manageable chunks. Whether it’s by frame range or body parts, working piece by piece helps avoid feeling overwhelmed. For example, you might start from the root of the motion and begin by polishing the body and center of gravity, then move on to the legs, spine, arms, and so on. Trying to spline everything at once often leads to chaotic results and progress that feels scattered, or, even worse, feeling like you are undoing work.

Track the arcs. If something feels off, it can often be traced back to the arcs. Try to draw out what is happening, whether on the screen or on a separate piece of paper or whiteboard, to help visualize the flow of motion. Furthermore, don’t solely rely on the computer to do the work for you—the default spline and auto tangent settings don’t take into account timing, weight, or intent. It’s only the first step in connecting the dots.

Don’t be afraid to delete keys. Simplifying the animation can make it easier to create a clean arc and polish up the motion. Analyze the curve and reduce it to just the essential poses; this will offer better control and cleaner results. If needed, don’t hesitate to rework a section by starting over from the blocking. Clean up and lock in the key poses, delete the clutter, and spline from a clean slate so that you are not working with a messy timeline.

Finally, be intentional with your tangents. Auto tangents can introduce overshoots that ruin otherwise solid motion. Use linear tangents when you want a clean hold, or adjust handles manually to sculpt the curve just right. You may even find that adding a few more keys in the right places creates better control than trying to wrestle with just two.


Watch the full clip from an AnimSchool lecture here: 

At AnimSchool, we teach students who want to make 3D characters move and act. Our instructors are professionals at film and game animation studios like Dreamworks, Pixar, Sony Pictures, Blizzard & Disney. ⁠Get LIVE feedback on your Animation from the pros. Learn more at https://animschool.edu/

Posing Hands for Animation

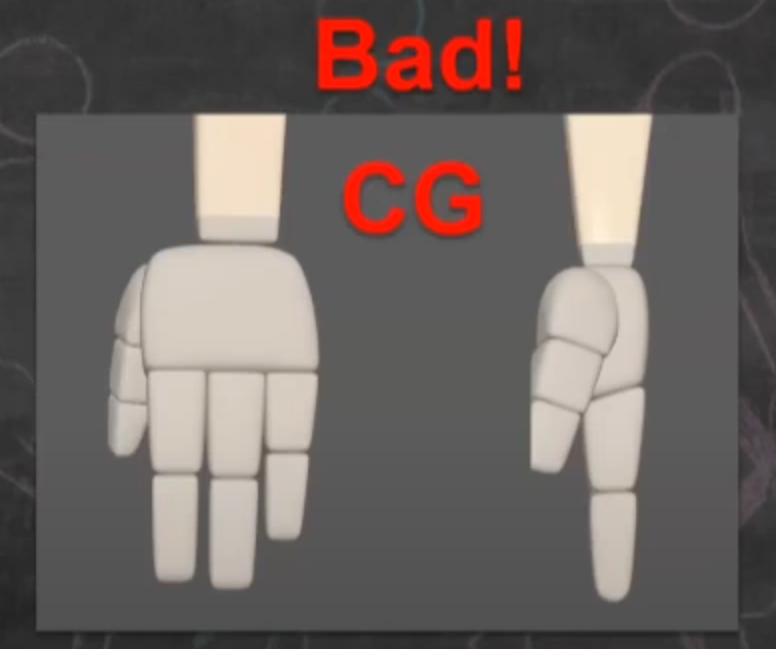
When it comes to character animation, hands are often overlooked — yet they’re one of the most expressive parts of the body. Done wrong, they can instantly signal stiff, lifeless “bad CG.” Done right, they add nuance, emotion, and realism. In this clip from a live AnimSchool lecture, instructor Kelly Vawter explains how to make appealing and organic hand poses for animation using contrast and grouping.

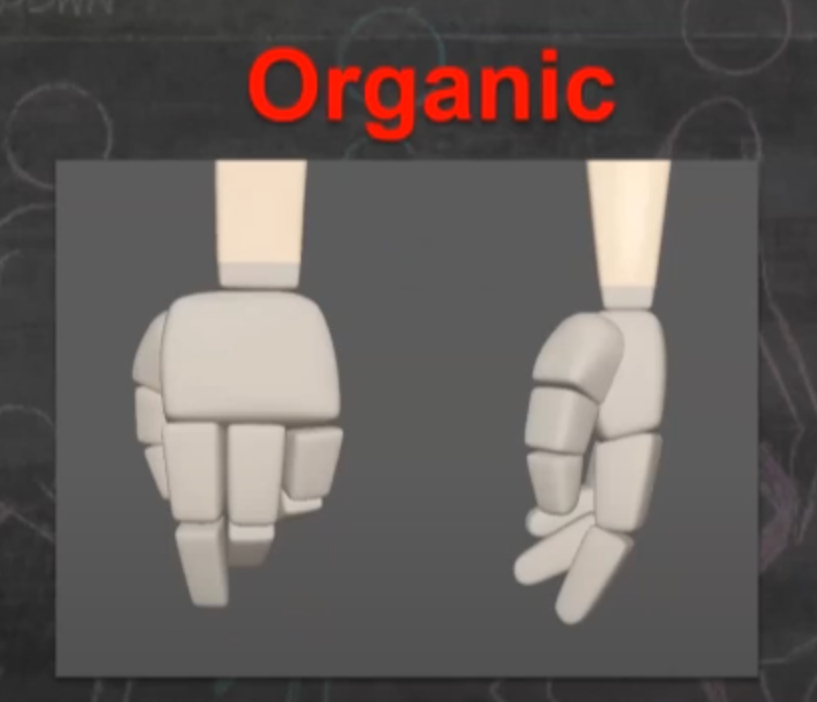
Many animators will start with straight fingers and straight wrists, causing their characters to immediately fall flat. Real hands aren’t naturally straight. Even when relaxed, they have curves, tension, and slight groupings. Muscles, tendons, and anatomy ensure there’s always subtle movement and form. It actually takes effort to fully straighten all of the fingers. Take caution to ensure that the default pose does not have stiff and evenly spaced fingers.

A relaxed hand is not the same as a limp hand. It means natural tension — curved fingers, a slight bend in the wrist, and arcs in the knuckles. Compare a rigid, flat pose with one where fingers gently curl inward, wrists turn slightly, and knuckles form a subtle arc. A good hand pose feels like everything’s pressing slightly toward the palm — a central point of tension. That central compression brings cohesion and energy.

Finger grouping is a simple but powerful technique. Instead of spacing all fingers evenly (which reads as artificial), cluster them into small, natural groups. Think of how your hand looks at rest — you might have your middle, ring, and pinky fingers close together while your index finger slightly floats. Look at classical art or traditional animation — grouping fingers adds rhythm and gesture to a pose. It also gives your character’s hands a unique personality.

Posing isn’t just about fingers. A perfectly straight wrist breaks the illusion of life. Add subtle bends or twists. Let the wrist complement the fingers’ flow. Think of the hand as a whole — a system of connected lines and curves. Flow matters.

Look to traditional 2D animation films for expressive hand posing.
The smallest finger closes first and opens last.

A hand pose should never feel generic. It should feel like a moment — relaxed, expressive, full of intention. Whether the character is gesturing, resting, or reacting, hands help sell the performance.

So, when blocking out a scene, take some time to study real hands and take note of the curve of the fingers, angle of the wrist, groups, and overall flow. Aim for an organic, natural feel.


Watch the full clip from an AnimSchool lecture here: 

At AnimSchool, we teach students who want to make 3D characters move and act. Our instructors are professionals at film and game animation studios like Dreamworks, Pixar, Sony Pictures, Blizzard & Disney. ⁠Get LIVE feedback on your Animation from the pros. Learn more at https://animschool.edu/
What Makes Good Reference

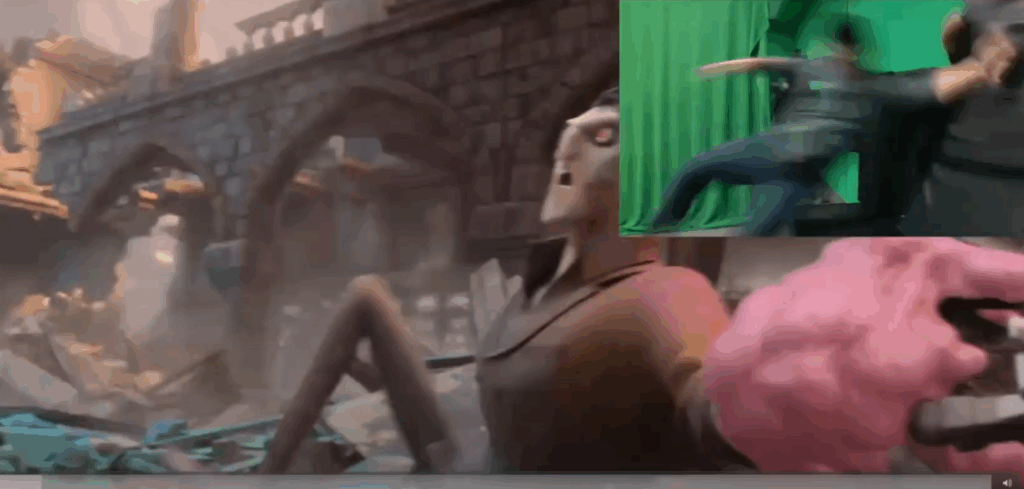
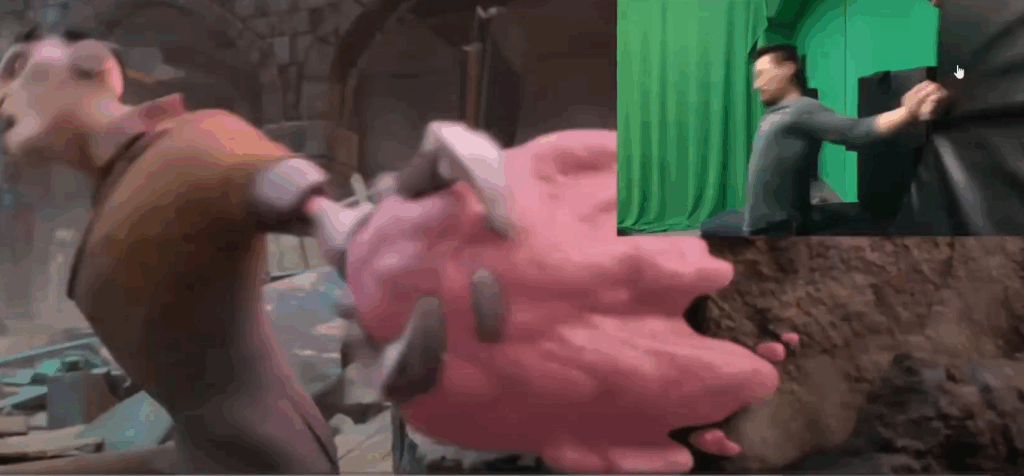
Whether you’re a painter or an animator, reference is essential to any artist’s creative process. In this clip from a live AnimSchool lecture, instructor Timothy Suarez explains how to film good video reference that will make animating easier. He covers the importance of proper staging, collaborating with others, and how to film when you don’t have the same props as your character. Though reference may seem like it’s taking away from your time animating in Maya, Suarez reminds us that reference is the basis of the animation so it’s important to put the time in and get it right.

Using video reference doesn’t mean copying or rotoscoping. Instead, it’s about building a solid foundation to caricature and push performance. Having real physicality and genuine acting beats to work from gives your animation weight, timing, and believability.

What Makes a Good Video Reference

  1. Cover All Acting Beats
    Reference should include every key moment — emotional shifts, physical actions, and most importantly, moments of thought. Characters don’t always move; sometimes they pause, hesitate, or react internally, and these subtle beats bring performances to life.
  2. Match the Camera Angle
    Shoot your reference from a camera angle that’s as close as possible to the animation camera setup. This helps with staging and ensures that movement translates properly in the final animation.
  3. Act It Out
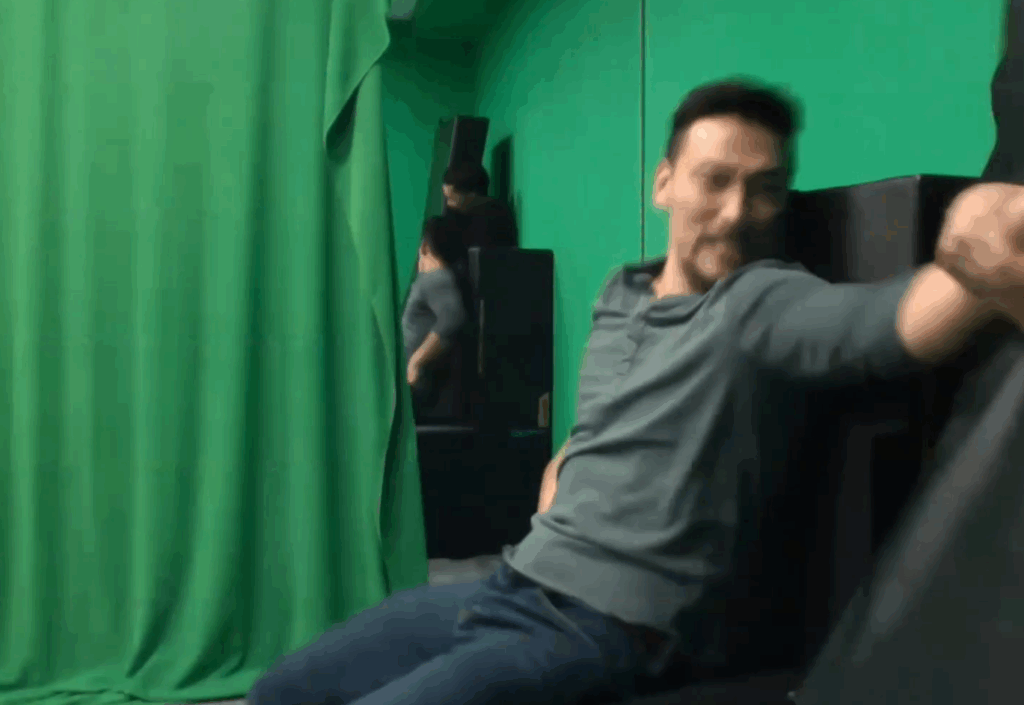
    Whether the character is lifting a heavy object or reacting to sticky goo on a wall, don’t fake it. Use props with real weight, or collaborate with someone who can physically perform the motion. Your body needs to experience the mechanics for the animation to feel right.
  4. Consider a Sketch Pass
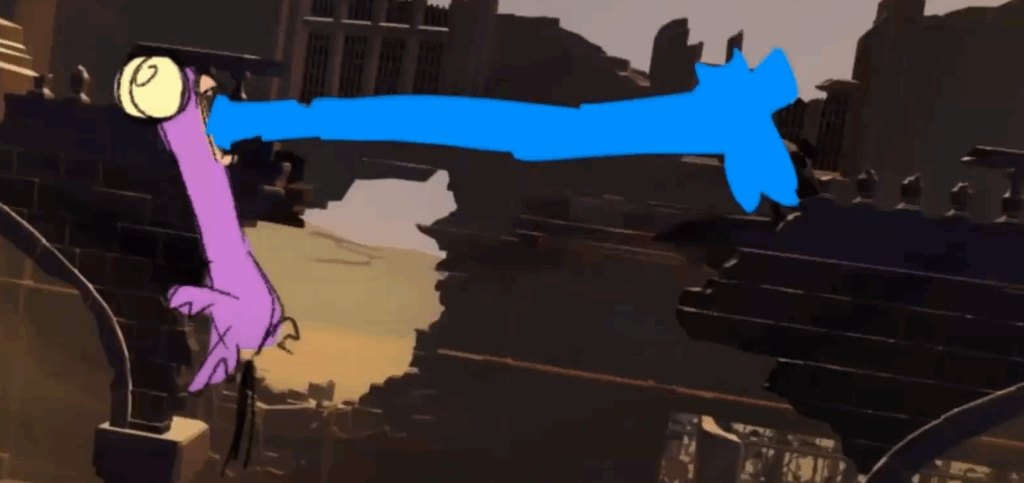
    For shots that are too fantastical for live-action reference — like a bird shooting ice from its beak — rough sketches can help block out timing and layout.
  5. Shoot Multiple Takes and Edit
    Don’t settle on the first take. Record several and review them, then edit the best parts together or pick the strongest single performance to guide your work.
Example of a sketch pass
Don’t fake the physicality, and don’t be afraid to direct the actors!

Ultimately, good reference starts with good planning. Research the shot, understand the physics and emotion behind the action and characters, and don’t be afraid to look a little ridiculous in the process. The best performances come when animators let go of self-consciousness and fully commit to creating a great shot.


Watch the full clip from an AnimSchool lecture here: 

At AnimSchool, we teach students who want to make 3D characters move and act. Our instructors are professionals at film and game animation studios like Dreamworks, Pixar, Sony Pictures, Blizzard & Disney. ⁠Get LIVE feedback on your Animation from the pros. Learn more at https://animschool.edu/