Month: April 2025

Understanding Constraints in Maya

Knowing how to use Maya constraints is important for both riggers and animators. Navigating the world of constraints and parenting can be confusing, but mastering them opens doors to a more flexible and nuanced approach to control. In this clip from a live AnimSchool lecture, instructor Daria Jerjomina demonstrates how the different kinds of constraints work, and how to utilize constraint weights.

Constraints allow an object to follow another’s position, rotation, or scale without the strict dependency of parenting. By applying constraints, you can fine-tune how one object behaves in relation to another. This method offers greater flexibility, especially in complex rigs, by allowing animators to maintain offsets, blend movements, and create more dynamic interactions.
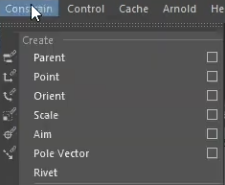
Types of Constraints

  1. Parent Constraint: This is the most commonly used constraint. It links both the translation and rotation of an object to another—essentially mimicking the behavior of parenting but without directly linking the two objects. A major advantage here is that scale is not affected by a parent constraint. This makes it ideal when you need to control the position and rotation of one object without altering its size.
  2. Point Constraint: The point constraint focuses only on translation. This means one object will follow the position of another but will not inherit its rotation. It’s a useful tool when you need one object to follow another in space, but with independent orientation.
  3. Orient Constraint: The orient constraint only affects an object’s rotation. It makes one object rotate in the same way as another, without influencing its position. This is particularly useful when you need an object to face a specific direction or match another object’s rotation.
  4. Aim Constraint: The aim constraint affects the direction that an object faces or points, which is especially useful in creating eye rigs. Adding an aim constraint will allow the eyes to always face the controller, which gives animators easy control over facial animations.
  5. Pole Vector Constraint: Used more in IK (Inverse Kinematics) rigs, pole vectors allow for more precise control over joints and limbs, offering a different and potentially more intuitive way to pose characters depending on the situation.

Constraints can also be used in tandem with one another. For instance, combining point and orient constraints will allow it to follow the translation and rotation of multiple objects independently, which can create more complex behaviors.
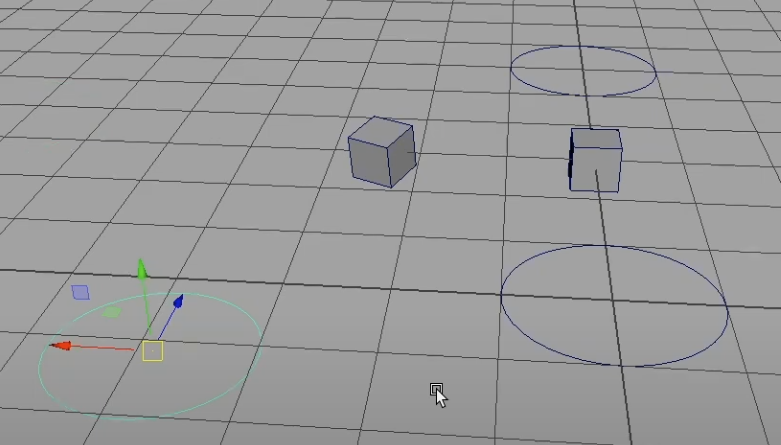
Benefits of Constraints

  1. Maintaining Offsets: The ability to maintain an offset between objects is a powerful feature of constraints. For example, when a parent constraint is applied with the “maintain offset” option enabled, the constrained object won’t snap to the parent’s position—it will retain its relative position in space.
  2. Adjustable Weights: Constraints come with adjustable weight attributes, meaning you can control how much influence one object has on another. Setting the weight to zero will completely remove the effect of the constraint, while a weight of one will fully enforce it. This is useful for creating dynamic rigs where an object might follow another at certain times and not at others.
  3. Multiple Constraints: You can also apply multiple constraints to a single object. For example, you can apply both a point and orient constraint to an object, allowing it to follow another in both position and rotation independently. This can be expanded further by blending the influence of multiple objects, as seen when applying a parent constraint to an object, or directly parenting it via the hierarchy, and controlling its position between two different objects.
  4. Separation of Controllers and Mesh: By constraining objects rather than parenting them, animators can separate controllers and mesh components into distinct groups. This ensures a more organized rig and hierarchical structure, where controllers and mesh elements can be toggled on or off as needed.
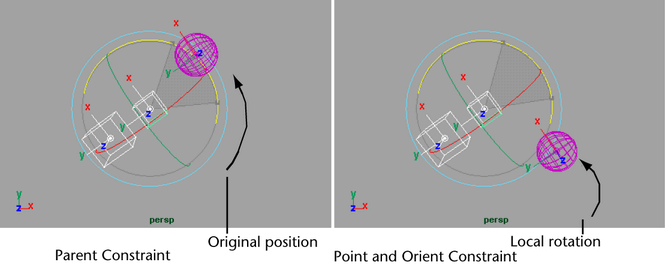
Constraints are an essential tool for animators and riggers, providing flexibility and control that parenting alone cannot achieve. By understanding the different types of constraints—such as parent, point, orient, and aim constraints—you can create more dynamic rigs with cleaner hierarchies. Constraints not only improve the organization of your project but also enable more nuanced animation controls, which is crucial for creating sophisticated, interactive animations.


Watch the full clip from an AnimSchool lecture here: 

At AnimSchool, we teach students who want to make 3D characters move and act. Our instructors are professionals at film and game animation studios like Dreamworks, Pixar, Sony Pictures, Blizzard & Disney. ⁠Get LIVE feedback on your Animation from the pros. Learn more at https://animschool.edu/

Setting Up Hot Keys in Autodesk Maya

Every animator wants to have a quick, clean, and organized workflow system that helps them animate more efficiently. Hotkeys in Maya can help achieve that and save valuable time. In this clip from a live AnimSchool lecture, instructor Justin Barrett explains how to set up these hotkeys, and how to manage the hotkeys in order to animate quickly and efficiently.

The Default and Duplicate Hotkey Sets

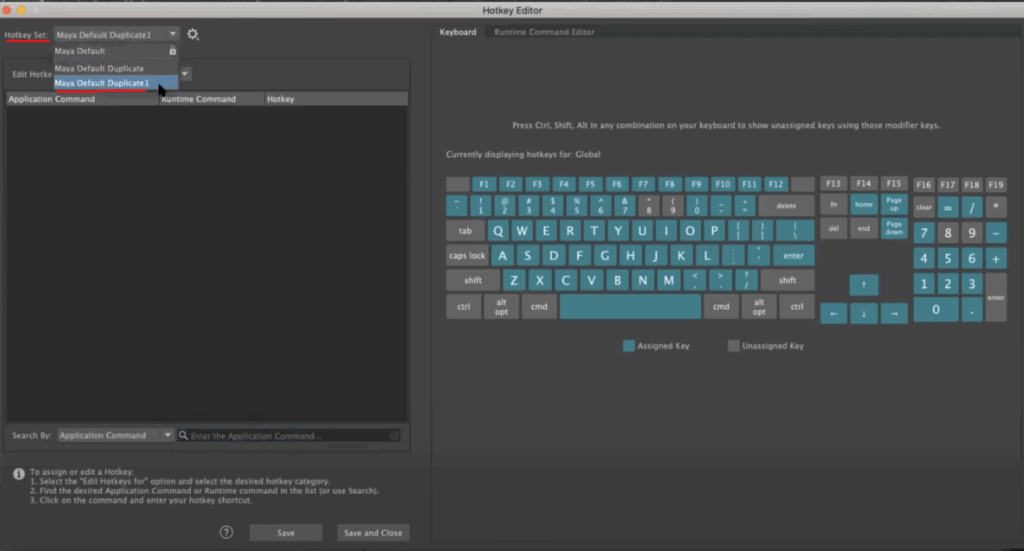
When you first open the Hotkey Editor in Maya, you’ll notice a default hotkey set, labeled “Maya Default.” This set cannot be deleted, so you can always revert to it. However, as you interact with the interface, Maya automatically creates duplicate sets to avoid accidental changes to the default set. These duplicates copy all the hotkeys, allowing you to make changes without altering the core configuration. Be cautious—if you switch back to the default set or jump between duplicate sets, you may end up with conflicting changes across multiple sets. You cannot merge sets, so, to keep things organized, it’s best to stick with one duplicate set and make all your adjustments there.

Categories and Runtime Commands

The Hotkey Editor organizes available commands into categories, such as “Menu Items,” “Editors,” or “Custom Scripts.” While browsing through these categories, you’ll encounter runtime commands, which are essentially single commands that trigger a sequence of other actions. When linked to hotkeys, you can execute complex actions with just a key press.

Managing Hotkey Assignments

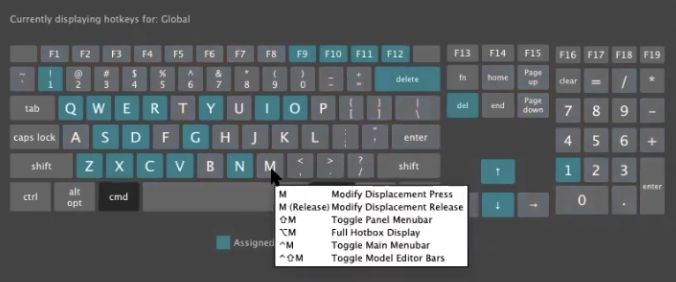
To assign or change a hotkey, simply click in the hotkey space and input your desired shortcut. Maya will warn you if you’re attempting to assign a hotkey that’s already in use. You can override existing assignments, but be aware that doing so will remove the previous function attached to that hotkey.

Maya also displays the available keyboard keys and any current assignments. You can filter these by modifier keys, such as Shift or Command, to help you find an unused combination. Once you’ve made your adjustments, remember to save your changes to ensure they’re applied.

Tips for Efficient Hotkey Management

  1. Stick to One Duplicate Set: Avoid jumping between multiple duplicate sets to prevent confusion and conflicting hotkey assignments.
  2. Use the Search Function: Use the search bar to quickly locate specific hotkeys or commands, ensuring you’re not accidentally overriding important settings.
  3. Test New Hotkeys: Always test your new hotkeys to ensure they work as expected and don’t interfere with existing system-level shortcuts.

Watch the full clip from an AnimSchool lecture here: 

At AnimSchool, we teach students who want to make 3D characters move and act. Our instructors are professionals at film and game animation studios like Dreamworks, Pixar, Sony Pictures, Blizzard & Disney. ⁠Get LIVE feedback on your Animation from the pros. Learn more at https://animschool.edu/
Animating the Eye Mask

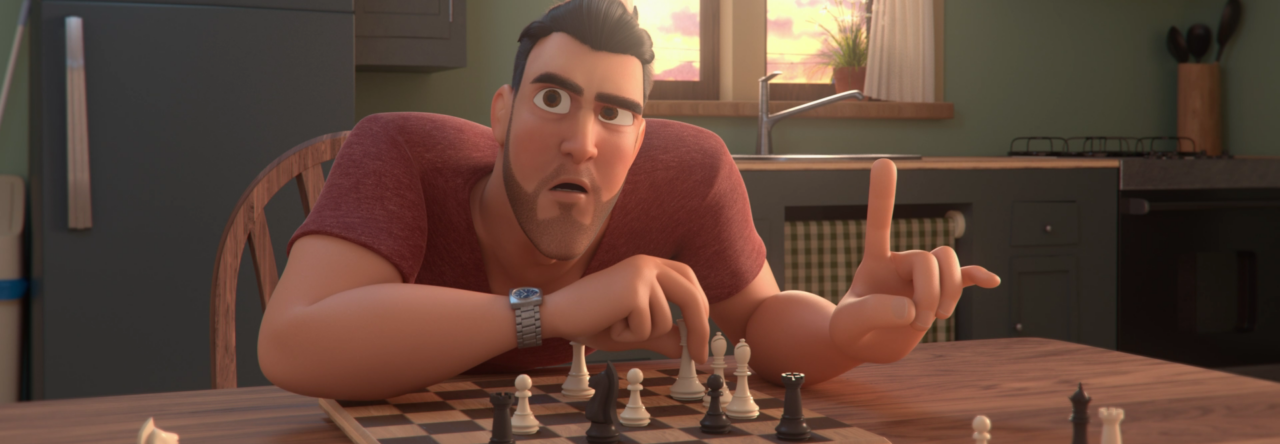
One aspect of facial expressions in animation that is often overlooked is the eyelids. Typically, focus is placed on the more noticeable features, such as the eyebrows. However, the eyelids are just as crucial in conveying the full range of human expressions – they work tandem with the brows to create cohesive and believable facial movements. In this snippet from a live AnimSchool lecture, instructor Scott McWhinnie discusses what the eye mask is and how important it is to understand how it works in order to create unified, appealing eye poses on your characters.

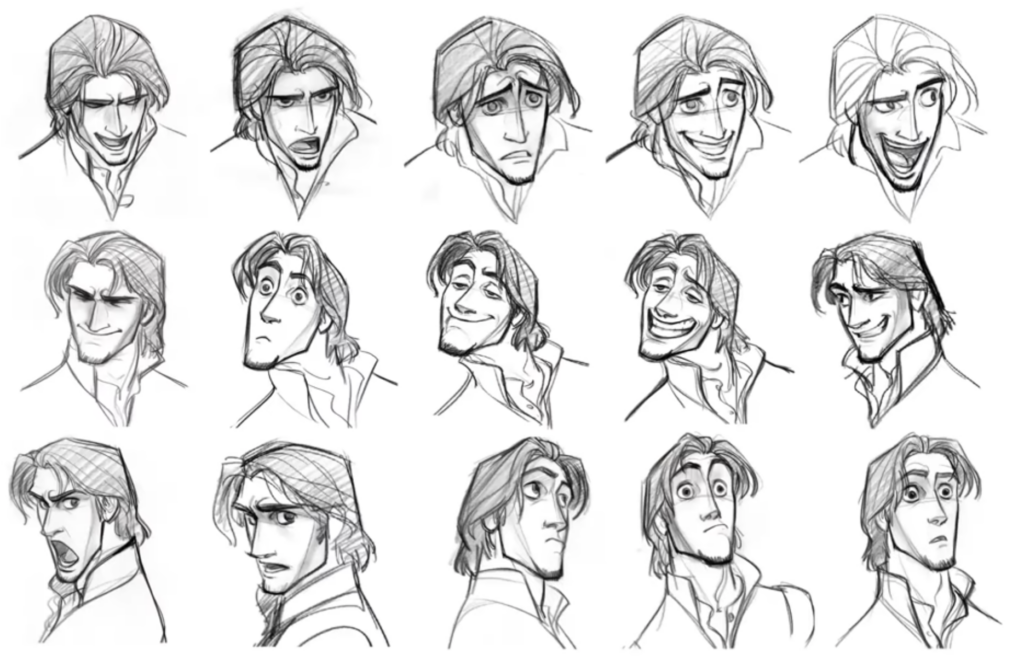
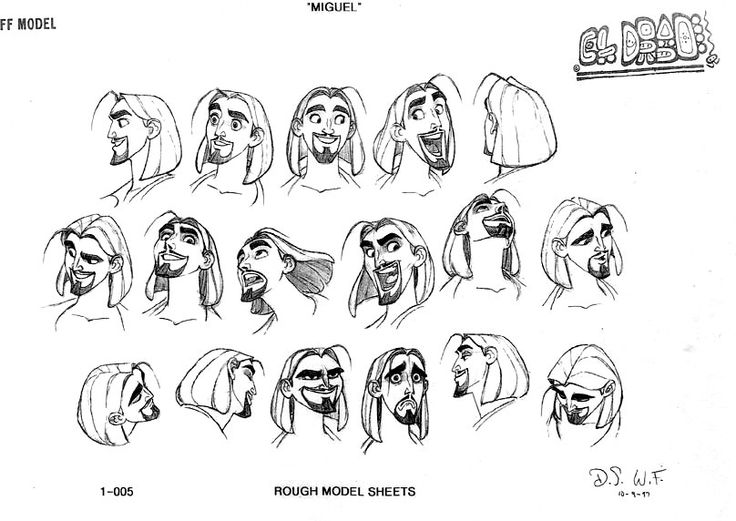
While it’s true that eyebrows do a lot of the heavy lifting when it comes to expressing feelings like surprise, anger, or joy, the eyelids are just as important. The lids support the brows by reinforcing the emotional tone. If the eyebrows are raised in surprise, the eyelids should also reflect that motion—gently lifting or widening in response. If the brows are furrowed in anger, the eyelids will typically compress or narrow in the same direction. In the example below of Flynn Rider’s expression board, note how the eyebrows are the main driver of the emotion, while the shape of the eyelids supplement it by telling the same story.

The key here is unity – the brows and lids should not contradict one another. Working together and supporting each other allows them to convey a clear and homogenous emotion.

The eye mask typically refers to the entire region around the eyes, including the brows, eyelids, and surrounding area. By thinking of these parts as a whole, singular unit, it becomes more easy to ensure the consistency of expressions. When creating an expressions in animation, it’s important to consider how the entire eye mask stretches or squashes. For example, in a surprised or shocked expression, the eyes and eyebrows will both stretch upward. The eyelids will widen, the brows will arch, and the whole eye area will elongate. Conversely, for a more focused or determined expression, the eye mask may compress inward, with the lids narrowing and the brows angling downward.

While symmetry is important for certain expressions, asymmetry can add a lot of depth and nuance to a character’s face. For example, when creating an angry or surprised face, one side of the eye mask may be stretched out, while the other side will be squished to convey more emotional tension. This slight asymmetry can make a character’s expression feel more natural and dynamic, as human faces rarely show perfectly symmetrical emotions. A subtle shift in the direction the character is facing helps reinforce the character’s gaze and emotional direction, guiding the viewer’s perception and keeping the expression grounded.

To create believable expressions, treat the brows and eyelids as part of the same system. By using the eye mask concept, all elements of the face can work together harmoniously to express the same emotion. This leads to more natural, unified expressions.


Watch the full clip from an AnimSchool lecture here: 

At AnimSchool, we teach students who want to make 3D characters move and act. Our instructors are professionals at film and game animation studios like Dreamworks, Pixar, Sony Pictures, Blizzard & Disney. ⁠Get LIVE feedback on your Animation from the pros. Learn more at https://animschool.edu/
Caricaturing the Face: Exaggerated Expressions

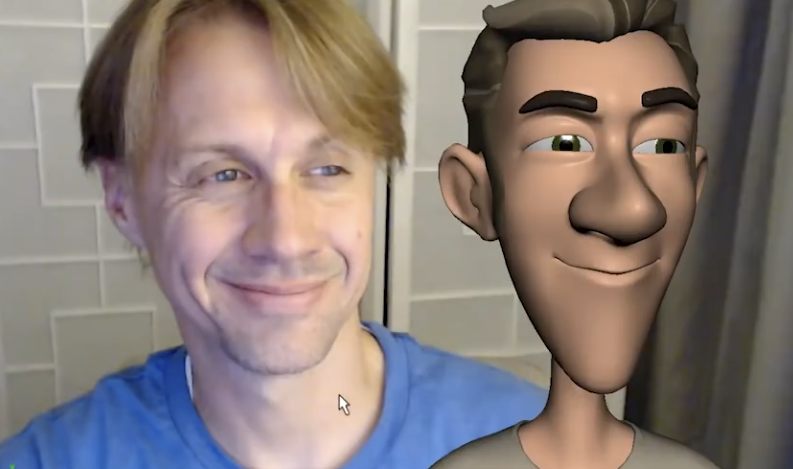
One of the biggest challenges in designing facial expressions for animation lies in deciding how realistic or exaggerated the design should be. Interpreting and adapting real-life references plays an important role, but it’s also essential to understand when to push the boundaries of realism to better convey emotion and expression. In this clip from a live AnimSchool lecture, instructor Hans Dastrup demonstrates using a reference image to create a more stylized and appealing pose for the face.

One key to effective facial animation is understanding the balance between mimicking real-life expressions and adjusting them to suit the character and animation style. Avoid directly copying facial expressions from reference material without considering the unique needs of the character, as replicating a facial expression exactly as it appears in real life does not always translate well in animation. Mimicking expressions can often result in awkward or less appealing designs, especially if the goal is to achieve clarity and emotional impact.

Matching the reference exactly.

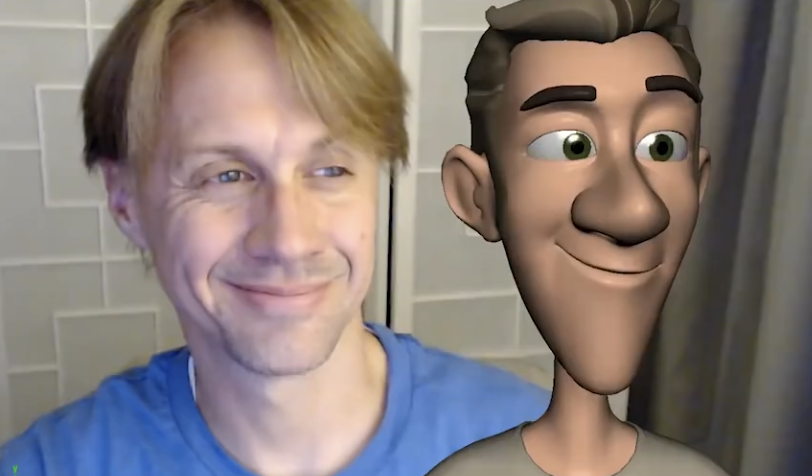
To create a more visually pleasing expression, subtle changes, like simplifying, are often necessary. For instance, in the process of creating a smile, adjusting the mouth shape and adding slight asymmetry can go a long way, as real human faces are inherently asymmetrical and can help maintain a more natural look. A smile in real life might have one side slightly higher than the other, and exaggerating this asymmetry can enhance the character’s expression.

When working with the eyes, it’s important to consider the character’s anatomy. In animation, characters often have larger eyes with exaggerated white areas, which can make them appear more expressive. However, it’s crucial to avoid pushing this too far, as extreme eye shapes can lead to unnatural or unsettling appearances. By adjusting the eye shape slightly, such as making the lower eyelid flatter, a more balanced and appealing look is created without overdoing the exaggeration.

Adjusted eye and mouth shapes to incorporate asymmetry.

Another important consideration is the character’s overall design. For instance, in a happy character, a more graphic and simplified mouth shape may work better than trying to replicate a realistic smile. Pushing the design in this way helps to exaggerate the emotion and adds visual clarity, making it more readable to the audience. The expression doesn’t have to be entirely unrealistic must be entirely unrealistic—it’s about finding the right level of push to enhance the emotion without distorting it beyond recognition.

Pushing the final expression.

While it’s important to consider real-life references, animation often requires tweaking those references to fit the style and emotional needs of the character. By simplifying, adding asymmetry, and adjusting features like the eyes and mouth, animators can create more engaging and believable facial expressions that convey the intended emotion. Ultimately, the goal is to find the balance between realism and stylization to craft a performance that resonates with the audience.


Watch the full clip from an AnimSchool lecture here: 

At AnimSchool, we teach students who want to make 3D characters move and act. Our instructors are professionals at film and game animation studios like Dreamworks, Pixar, Sony Pictures, Blizzard & Disney. ⁠Get LIVE feedback on your Animation from the pros. Learn more at https://animschool.edu/