Month: March 2025

Asymmetry in Hand Poses

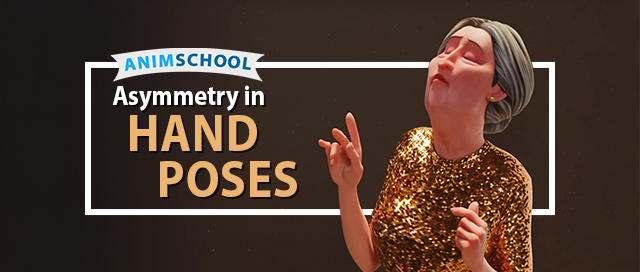
When posing and animating hands, achieving a natural, organic feel is crucial. One key technique to achieve this is incorporating asymmetry, which prevents them from feeling too stiff or mechanical. In this clip from a live AnimSchool lecture, instructor Scott McWhinnie explains the importance of asymmetry in hand posing to boost the organic feel of the overall animation.

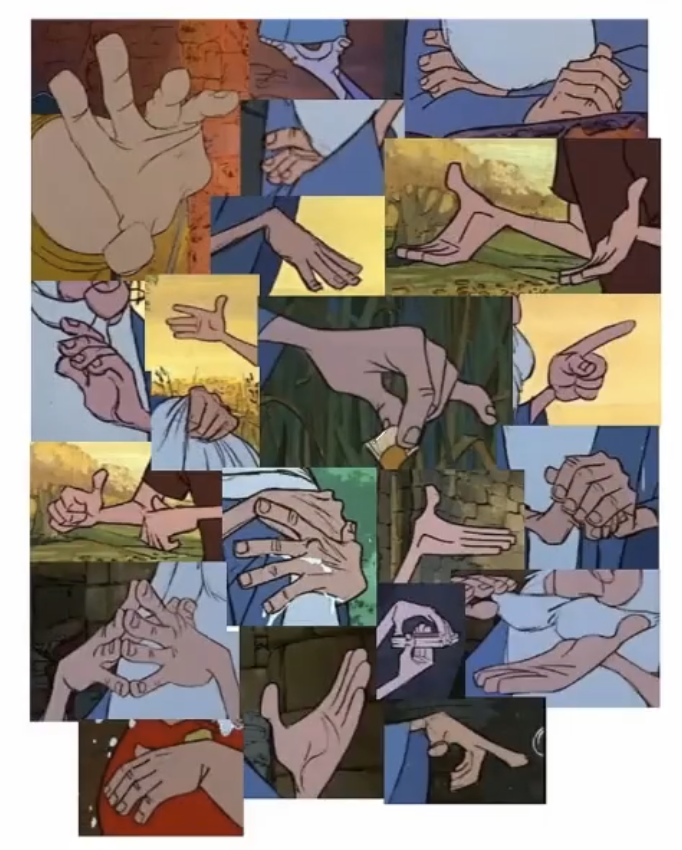
Asymmetry in hand poses can be subtle, but it makes a significant difference. One of the simplest ways to introduce asymmetry is through small changes to the silhouette of the hand. For instance, the pinky finger can stick out slightly, breaking the smooth curve of the hand and creating a more natural look. A slight tilt of the pinky or variation in the angles of the fingers can make a hand feel less uniform and more believable.

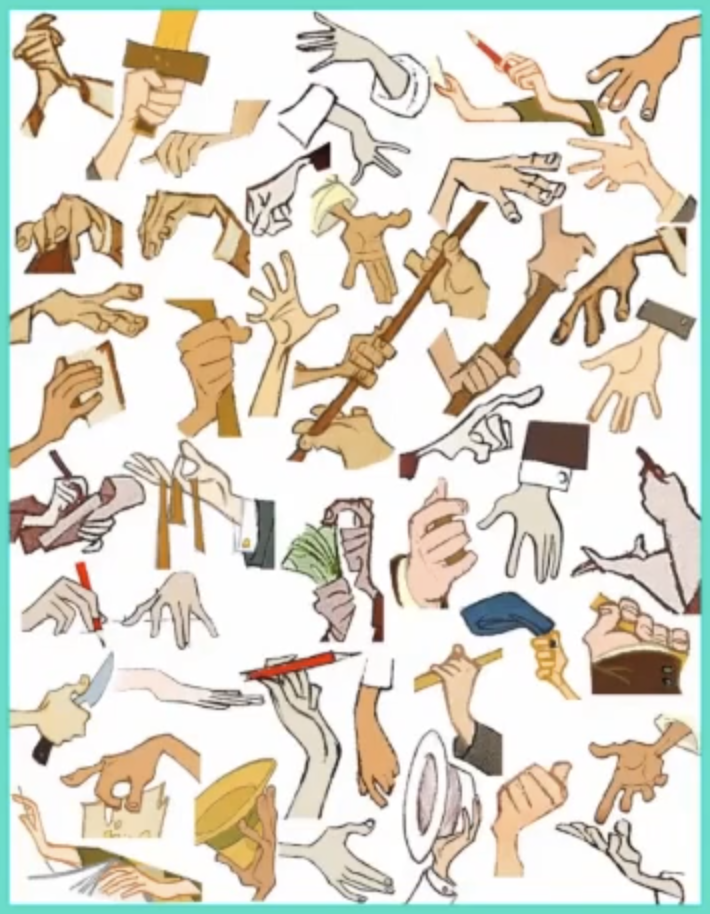
Give special attention to the spaces between the fingers. When fingers are grouped together, such as in a closed fist, ensure the angles between them vary. A slight overlap or variation in finger positioning adds to the organic feel. This is also true when the fingers are spread out—consider grouping the middle fingers or varying the negative space between them.

The thumb is another key area for introducing asymmetry. It can stick out when holding an object, adding a touch of realism to the hand’s shape. Making small adjustments, like slightly twisting or bending one or two fingers, can further break up the symmetry and create a more natural, less rigid look.

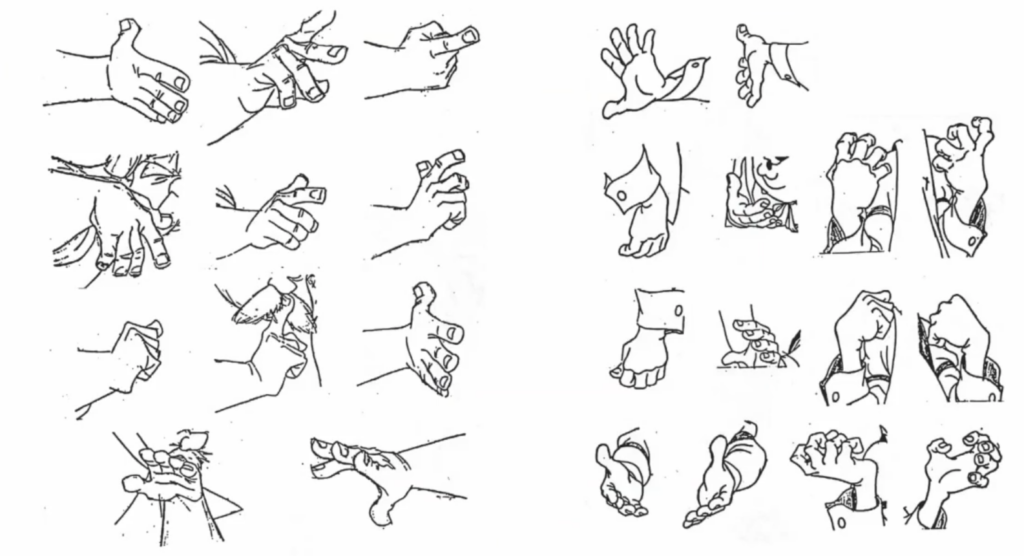
It’s important to remember that these changes don’t have to be extreme – keeping the hands as simple as possible will go a long way. Small, almost imperceptible adjustments can make a hand pose feel more alive and less “computer-generated.” The goal is to add just enough variation to make the hand look real, without overcomplicating the design.

By employing asymmetry—whether through the positioning of the pinky, the angles between fingers, or the slight rotation of the thumb—hand poses can feel more dynamic and true to life. Take a look at how the hands can be tweaked to help break up symmetry and consistency – and make them stand out with natural elegance.


Watch the full clip from an AnimSchool lecture here: 

At AnimSchool, we teach students who want to make 3D characters move and act. Our instructors are professionals at film and game animation studios like Dreamworks, Pixar, Sony Pictures, Blizzard & Disney. ⁠Get LIVE feedback on your Animation from the pros. Learn more at https://animschool.edu/

Animating Eyebrows

Animating eyebrows plays a crucial role in conveying facial emotions and enhancing the overall appeal of animated characters. Though often overlooked, brows are essential in portraying mood and personality. In this clip from a live AnimSchool lecture, instructor Justin Weg explains the importance of eyebrow animation.

When animating eyebrows, think of them as a single unit – try to connect them with a line flowing into one another, while matching the shape/expression of the eyes. This will create a smooth and cohesive look, which is key in creating a natural, expressive character. The brows tend to react to the inner emotional state of the character, so connecting them helps maintain this unity.

Additionally, keep in mind that brows are very dynamic shapes, with the inner sections being more active and expressive than the outer. When the brows go down, the inner brows tend to crunch in. When the brows go up, they will pull out.

One key technique in animating brows is having them lead the head/body movement. When a character is about to speak or make a dramatic gesture, the brows often move ahead of the rest of the face. This can help with timing, allowing the character’s expression to build up before the full action, such as opening the mouth. For example, a character about to speak might raise their brows before they open their mouth, signaling anticipation.

Facial expressions can be either voluntary or involuntary. Involuntary reactions, like surprise or fear, tend to make the brows more symmetrical. Voluntary emotions such as curiosity, suspicion, or contempt tend to create asymmetry in the brow movements. A character questioning something, for example, will raise both brows evenly, while a character expressing doubt or confusion might raise one brow more than the other, creating an asymmetrical look.

When animating brows, arcs are important for creating more natural movement. Instead of linear motion, which feels stiff, adding arcs to the brow movements introduces fluidity to the animation. For instance, when lowering the brows, the outer brow usually leads, and the inner brow follows in a smooth arc. The same principle applies when raising the brows—start with the outer brow, and let the inner brow follow, creating a wave-like effect.

To enhance the realism of the movement, it can be helpful to offset the X and Y positions of the brows. This offsetting technique creates a more dynamic motion, especially when working with diagonal movements. By including slight delays between the movements of the inner and outer brows, you can achieve a more organic feel.

By focusing on the unity, expression, and subtlety of brow movements, animators can bring a new level of depth to their character animation. Refining the movement of the brows is an essential skill for any animator looking to create more relatable and emotionally engaging characters.


Watch the full clip from an AnimSchool lecture here: 

At AnimSchool, we teach students who want to make 3D characters move and act. Our instructors are professionals at film and game animation studios like Dreamworks, Pixar, Sony Pictures, Blizzard & Disney. ⁠Get LIVE feedback on your Animation from the pros. Learn more at https://animschool.edu/

Animating the Head

When animating a character’s head, think of the head like a stage and the face as the actors. The two must work together in order to convey a believable performance the audience can understand and connect with. In this clip from a live lecture, AnimSchool instructor Ricky Renna discusses some tips on how to animate the head in order to allow the audience to follow the character’s facial changes and emotions.

Small adjustments to head positioning can completely alter the mood or message of a shot. A subtle head tilt, for instance, can express a range of emotions. A slight tilt downwards may indicate humility or insecurity, while a slight tilt upward can convey confidence or even superiority. By controlling the head’s direction, animators can manipulate how a character is perceived, whether they’re viewed as an equal, an antagonist, or someone who feels subservient. For instance, in scenes where a character looks straight ahead, the tone might come across as neutral or straightforward. However, when the same line is delivered with the head tilted slightly, it can introduce an entirely new layer of meaning. It’s all about the small changes—animators don’t need to overdo it with exaggerated head movements. A little goes a long way in shaping the audience’s emotional response.

In the above example, though the head is very simplistic and quickly drawn, audiences can quickly recognize the difference in emotion and intention from something so basic as the tilt of the head.

Another critical aspect to pay attention to in animation is head stabilization. Birds, for example, have acute control over their heads, allowing them to stay focused on their prey while in flight. Animators strive to replicate this level of stability to maintain focus on a character’s face. In scenes where the head moves too dramatically, it can pull the viewer’s attention away from the character’s facial expressions or dialogue, making the scene harder to follow.

A prime example of controlled head movement in animation can be seen in the character Colette from Ratatouille. While delivering her lines, Colette’s head remains steady, keeping the audience’s attention on her eyes and the expression she’s conveying. Even as her emotions shift—from apathetic to more animated—her head stays focused, allowing her subtle facial expressions to communicate her changing feelings without overwhelming the viewer with unnecessary movement.

In the world of animation, there’s a technique known as eye trace, where the director ensures that the focus remains on the same point of interest across different shots. This technique helps prevent the audience from losing focus when the scene changes. For instance, when the camera shifts to Remy inside Linguini’s hat, the focus remains on the same point of interest, making the transition seamless and keeping the viewer engaged.

Note that, in the previous shot, Colette’s face is in the red circle; as it cuts to Remy, his face remains in the red circle – this technique is called eye trace.

Ultimately, the key to effective head movement in animation is balance. A steady head allows for clear, expressive communication while preventing distraction. Whether you’re animating a confident antagonist or a shy protagonist, controlling head movement is an essential tool for bringing your characters to life.


Watch the full clip from an AnimSchool lecture here: 

At AnimSchool, we teach students who want to make 3D characters move and act. Our instructors are professionals at film and game animation studios like Dreamworks, Pixar, Sony Pictures, Blizzard & Disney. ⁠Get LIVE feedback on your Animation from the pros. Learn more at https://animschool.edu/

Storytelling in Staging

Staging in animation is the process of breaking down a story into the most simple and basic beats in order to provide a foundation with which to further manipulate the scene into something more unique and entertaining. It is about setting the stage for your character’s actions, ensuring the camera is in the right place, and conveying the story in the simplest, most effective way possible. In this clip from a live AnimSchool lecture, instructor Tyler Phillips breaks down an alien abduction scene from former student Jonah Sidhom.

In Sidhom’s example, the character begins sleeping and wakes up to an alien, reacts, and runs away, ultimately being sucked out into space. This sequence is a clear example of staging that conveys an entire story using only six simple beats. These beats guide the viewer through the character’s emotional and physical journey, from initial confusion to their final fate.

Staging can start with basic visual storytelling elements: simple poses and camera placements. As in the alien scenario, a character might move across the scene, push a button, and face multiple challenges. Each of these actions becomes a beat—an individual piece of the animation that, together, creates the flow of the narrative.

The key to effective staging is to capture not just the actions but the emotions behind those actions. Adding “thinking beats”—moments when the character pauses to react or assess the situation—creates depth and engagement. For example, a character might look at an alien, then pause, registering the danger, and only then react with a frantic escape.

Additionally, creating more granular acting beats can add texture and realism. In one instance, when the character slams against a wall, the small moment of bounce and holding that pose for just a couple of frames enhances the readability of the action. This small pause gives the viewer enough time to process the action before moving to the next step, ensuring the sequence is clear and believable.

One of the most important aspects of animation is variety—using quick, medium, and slow beats. A variety of pacing helps keep the audience engaged and ensures the shot feels dynamic. These contrasting rhythms add richness to the animation, making it feel more alive and less mechanical.

In professional animation, the focus is on bringing characters to life. They must be believable in their thoughts and actions, reacting to their environment. An animator’s job is to think about these moments of reaction and transition, creating a character that feels genuinely alive. Though seemingly small and perhaps even insignificant, intentionally placed acting beats are what ultimately make characters feel real and relatable.


Watch the full clip from an AnimSchool lecture here: 

At AnimSchool, we teach students who want to make 3D characters move and act. Our instructors are professionals at film and game animation studios like Dreamworks, Pixar, Sony Pictures, Blizzard & Disney. ⁠Get LIVE feedback on your Animation from the pros. Learn more at https://animschool.edu/