Today, we’d like to show you a beautiful 3D environment model by Yvonne Zacharias, which was created during her Environmental Modeling class at AnimSchool over the summer. Yvonne was kind enough to talk to us about the process she went through and thoughts while working on this project.
What was it about this particular concept art from The Lorax that made you chose to turn it into a 3D model for your Environmental Modeling class? What part(s) were you most excited to model?
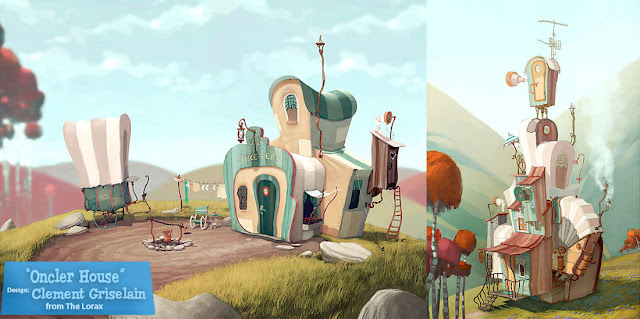
When I first saw Clement Griselain’s design of the Oncler house, I just fell in love with it and I knew, this was the concept I was going to turn into a 3D model for my class. The building is so quirky, so whimsical and has got so much character that if it could talk, it would tell us the most unusual and hilarious stories you’ve ever heard. I also love that you can already tell what kind of eccentric character would live in a building like that, it feels, as if the house is an extension of what the character living in it is like. For me that’s what makes an amazing environment – when I look at it I get hungry to see what’s inside and who’s crazy enough to inhabit a place like that. The perfect mix of cartoony madness and crooked lines with everything being bend slightly and no two objects being the same.
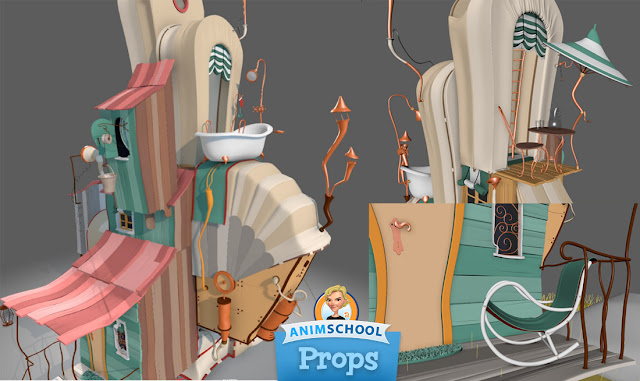
I guess, I was most excited about modeling the writing that was carved into the wood and the outhouse with the heart shape cut out between the wooden slats. But also, all the different little bits and bobs like the bath tub or the crooked steps to the back porch super excited me. I just super wanted to see this fantastic concept coming to life in 3D.
Can you tell us about the process you went through in creating this environment?
A ) I started off looking for more reference pictures and I ended up finding a great concept picture of the front and the back of the house. At the same time, I started collecting reference pictures for different props and parts of the house.
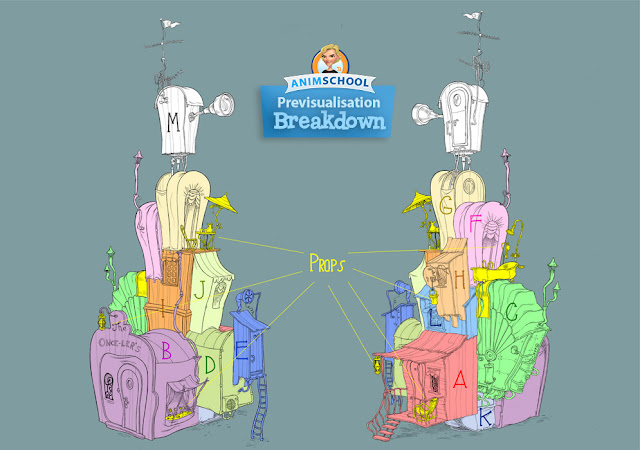
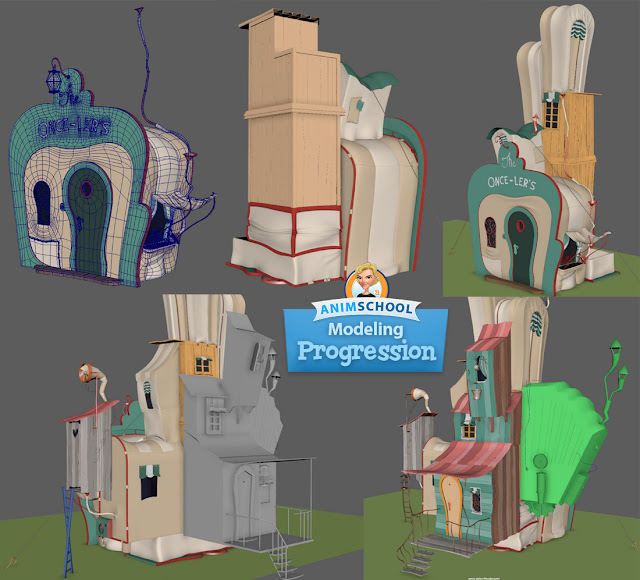
B) I split the entire house up into sections and colour coded each section of the concept drawing in Photoshop. This step helped me a lot as it made me take a very close look at what I am getting myself into. Also, it made the modeling process feel more manageable to me and I was less overwhelmed about how much needed to be done because now, I knew.
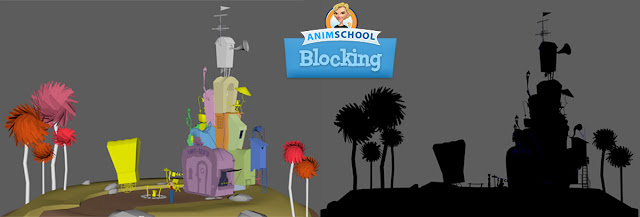
C) The next step was, to go into Maya and block in all the shapes, getting the proportions and positions with the entire environment right and making sure, the silhouette of the previsualisation would look appealing.
D) Pick a section and start turning it into the final geo. I started with section B (the building with the front door) as I was worried about the carved writing at first. I would finish a section or two off for class, get Juan’s feedback, then apply the feedback and tackle the next one or two sections. Like that, I made my way around the entire model.
E) After all the big sections were done, I modeled all the missing props like the bath tub with its accessories, the garden furniture, rocking chairs, the covered wagon, the fireplace and the clothesline with laundry.
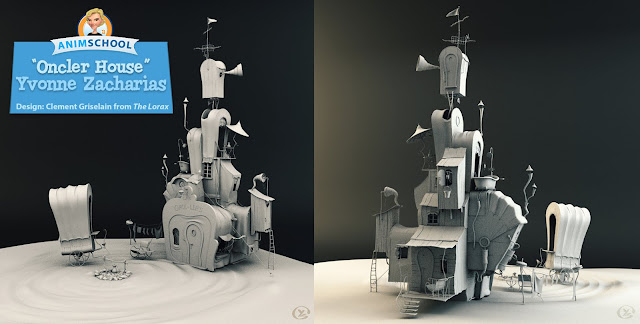
F) UV maps. I waited until I was done modeling when I started on creating UV layouts for each and everything in the scene. I used a mix of Maya’s own mapping tools and Roadkill to create all my UV layouts.
G) Getting the environment ready for presentation meant, cleaning up the scene, making sure, everything had a distinctive name and is grouped wisely, deleting the history on everything and creating a final camera through which the model would look closest to what the concept looked like.
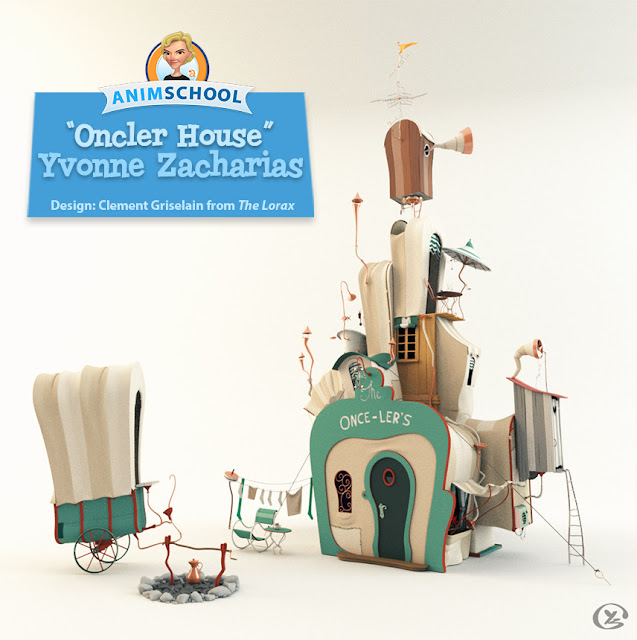
H) Lastly, I created a small lighting setup with the Arnold renderer and rendered a presentation still.
What about the process did you most enjoy?
To be honest, I really enjoyed going through the whole process but I suppose my favourite part of the progress to begin with was the previsualisation because this would be the first time, I would get a real feeling about the concept I’ve chosen and how it would work in 3D. But of course, going ahead and finishing off each and every section as good as I could, was very enjoyable.
What was a particularly challenging aspect that you experienced while working on this project and what did you take away from it?
I did find the drapery particularly challenging as it just wouldn’t want to look like I wanted it to. I realized in the end that less is more and that you are sometimes better off simplifying a crease to make it look appealing.
To learn more about the modeling process, come and join us at one of the best online animation schools: AnimSchool.com

